How To Draw Lotus Step By Step
Unlock your artistic potential now! Learn to draw a lotus, step-by-step, with this essential guide.
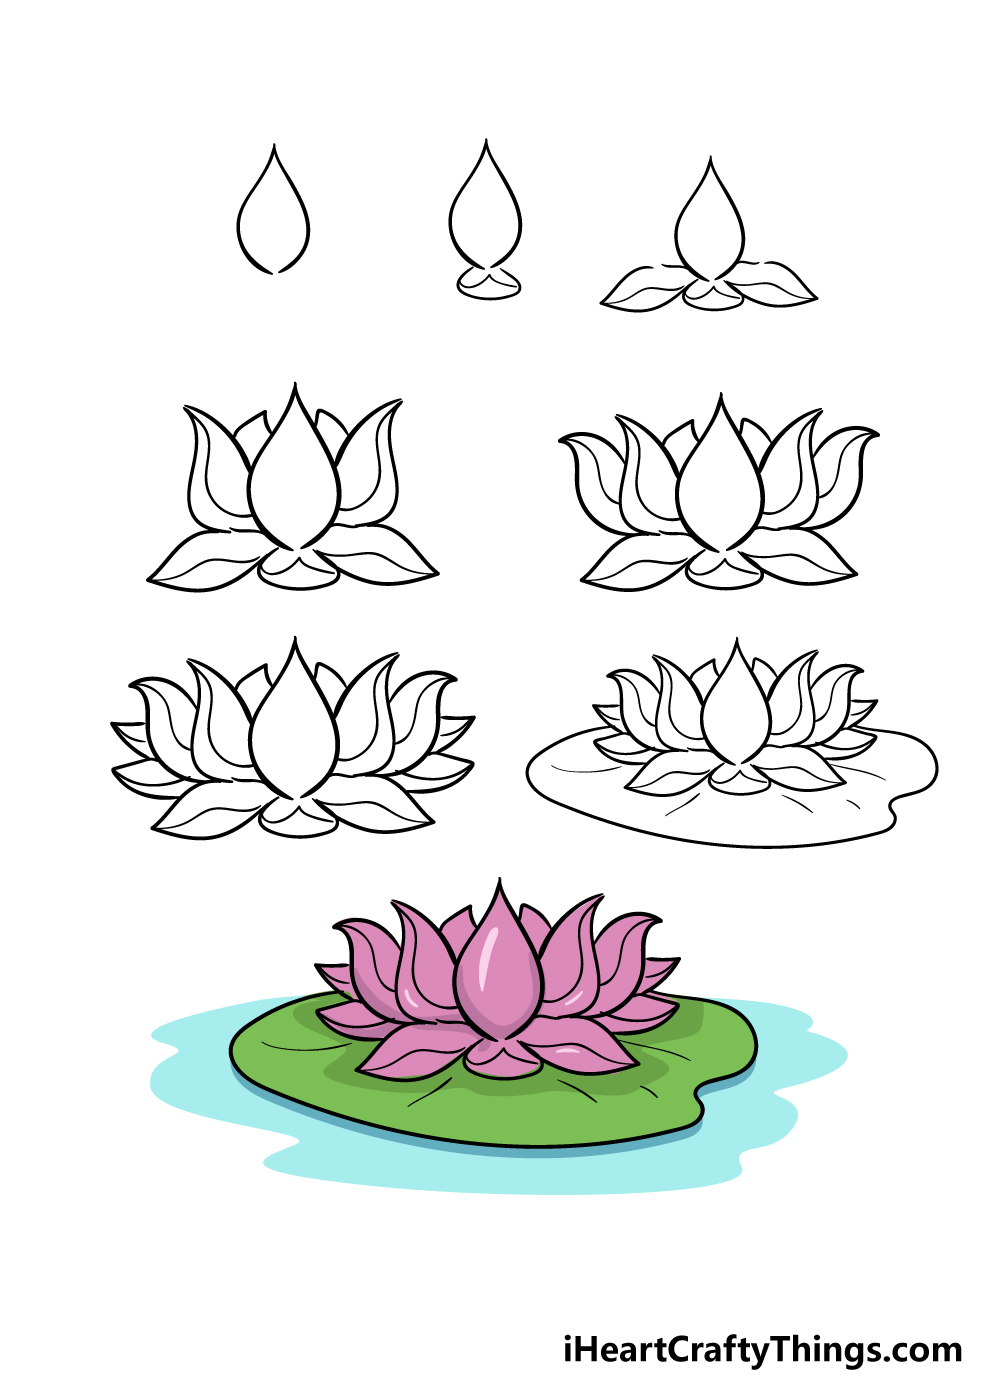
This tutorial provides a simple, structured approach to creating beautiful lotus drawings, regardless of your current skill level.
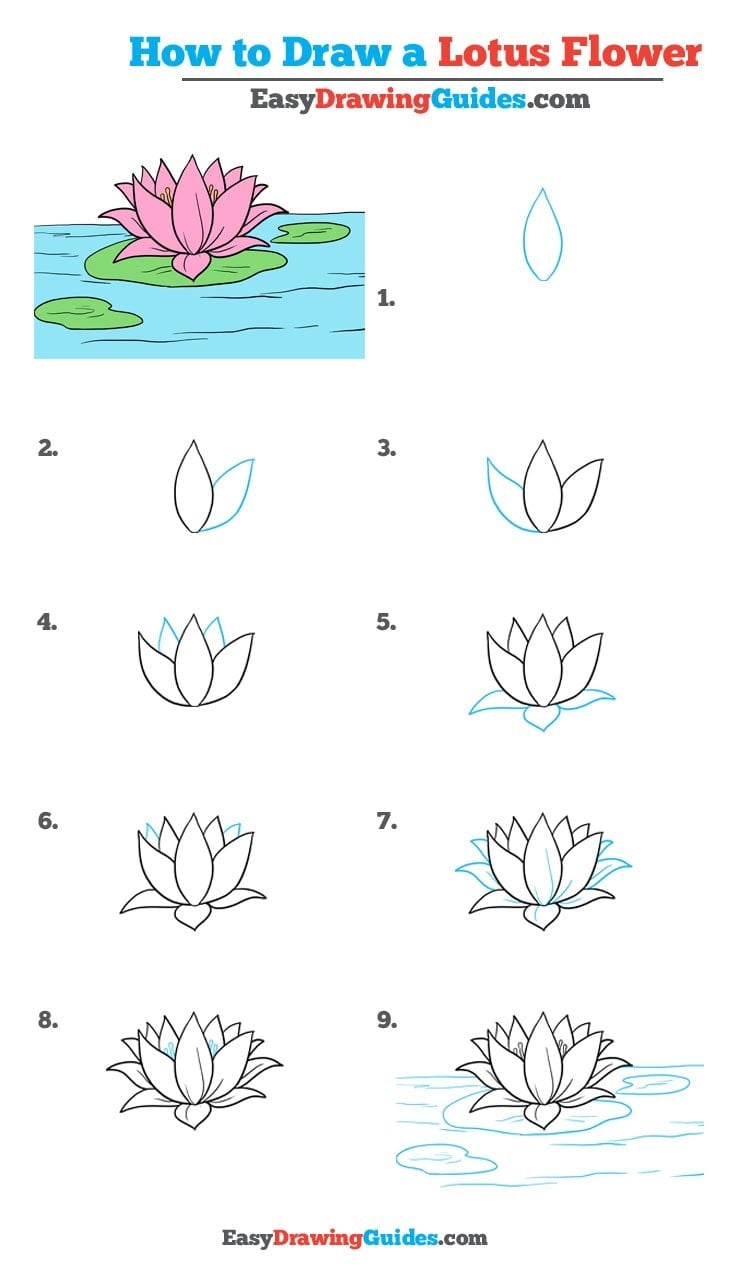
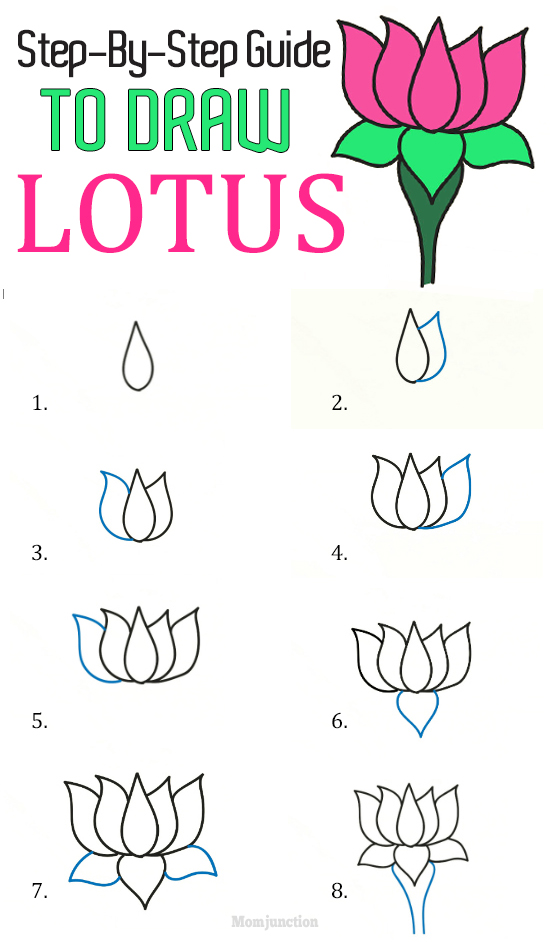
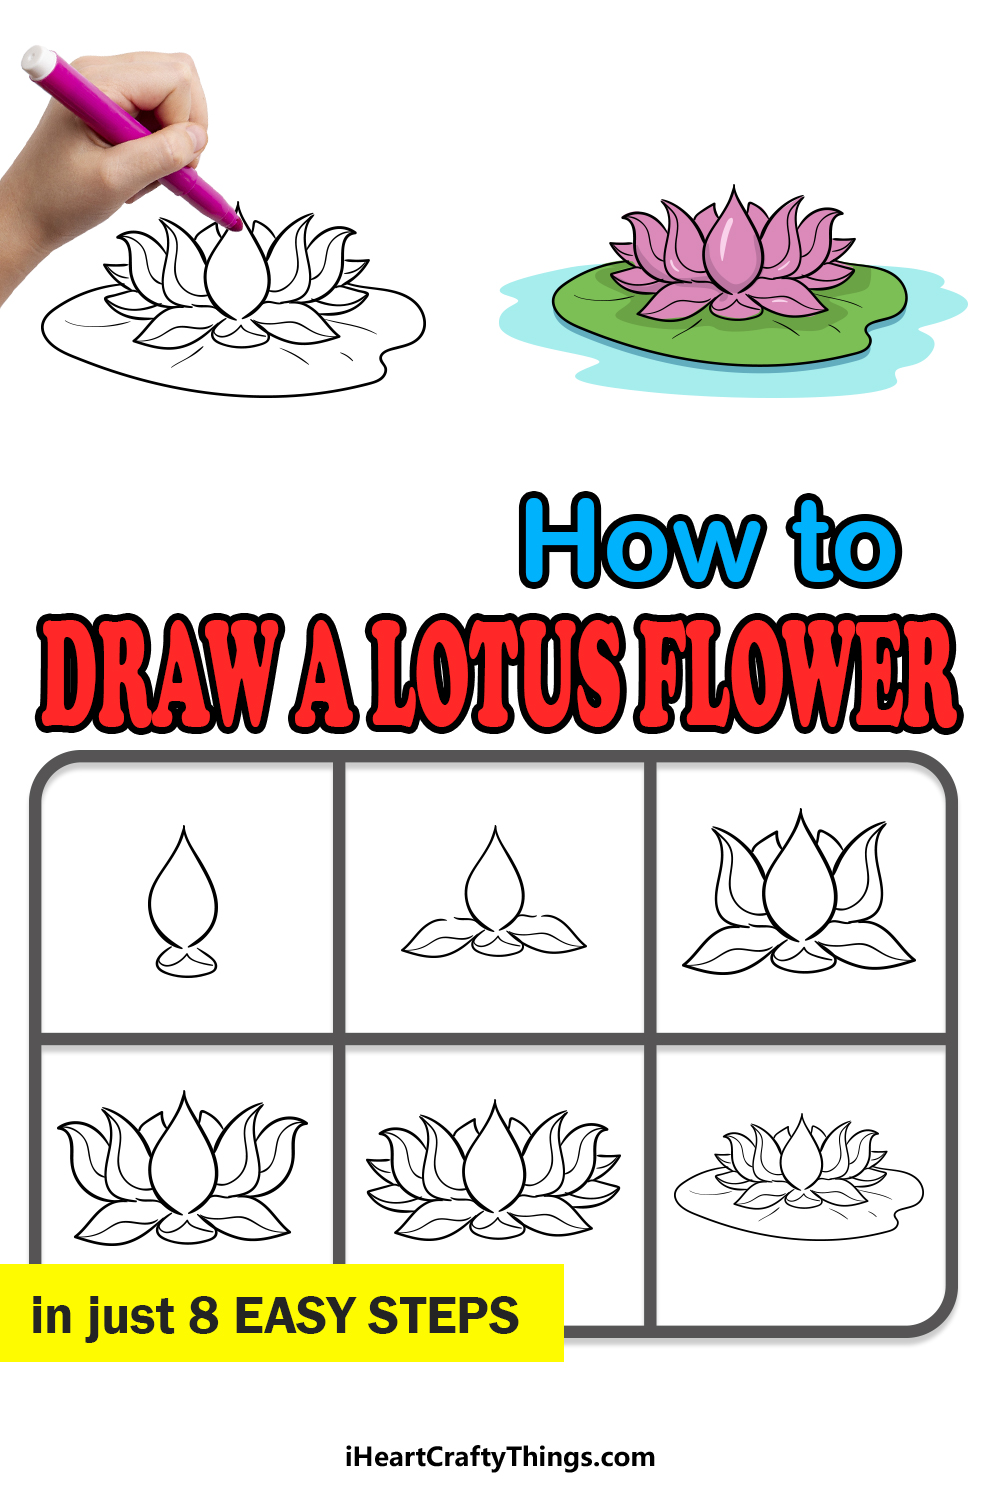
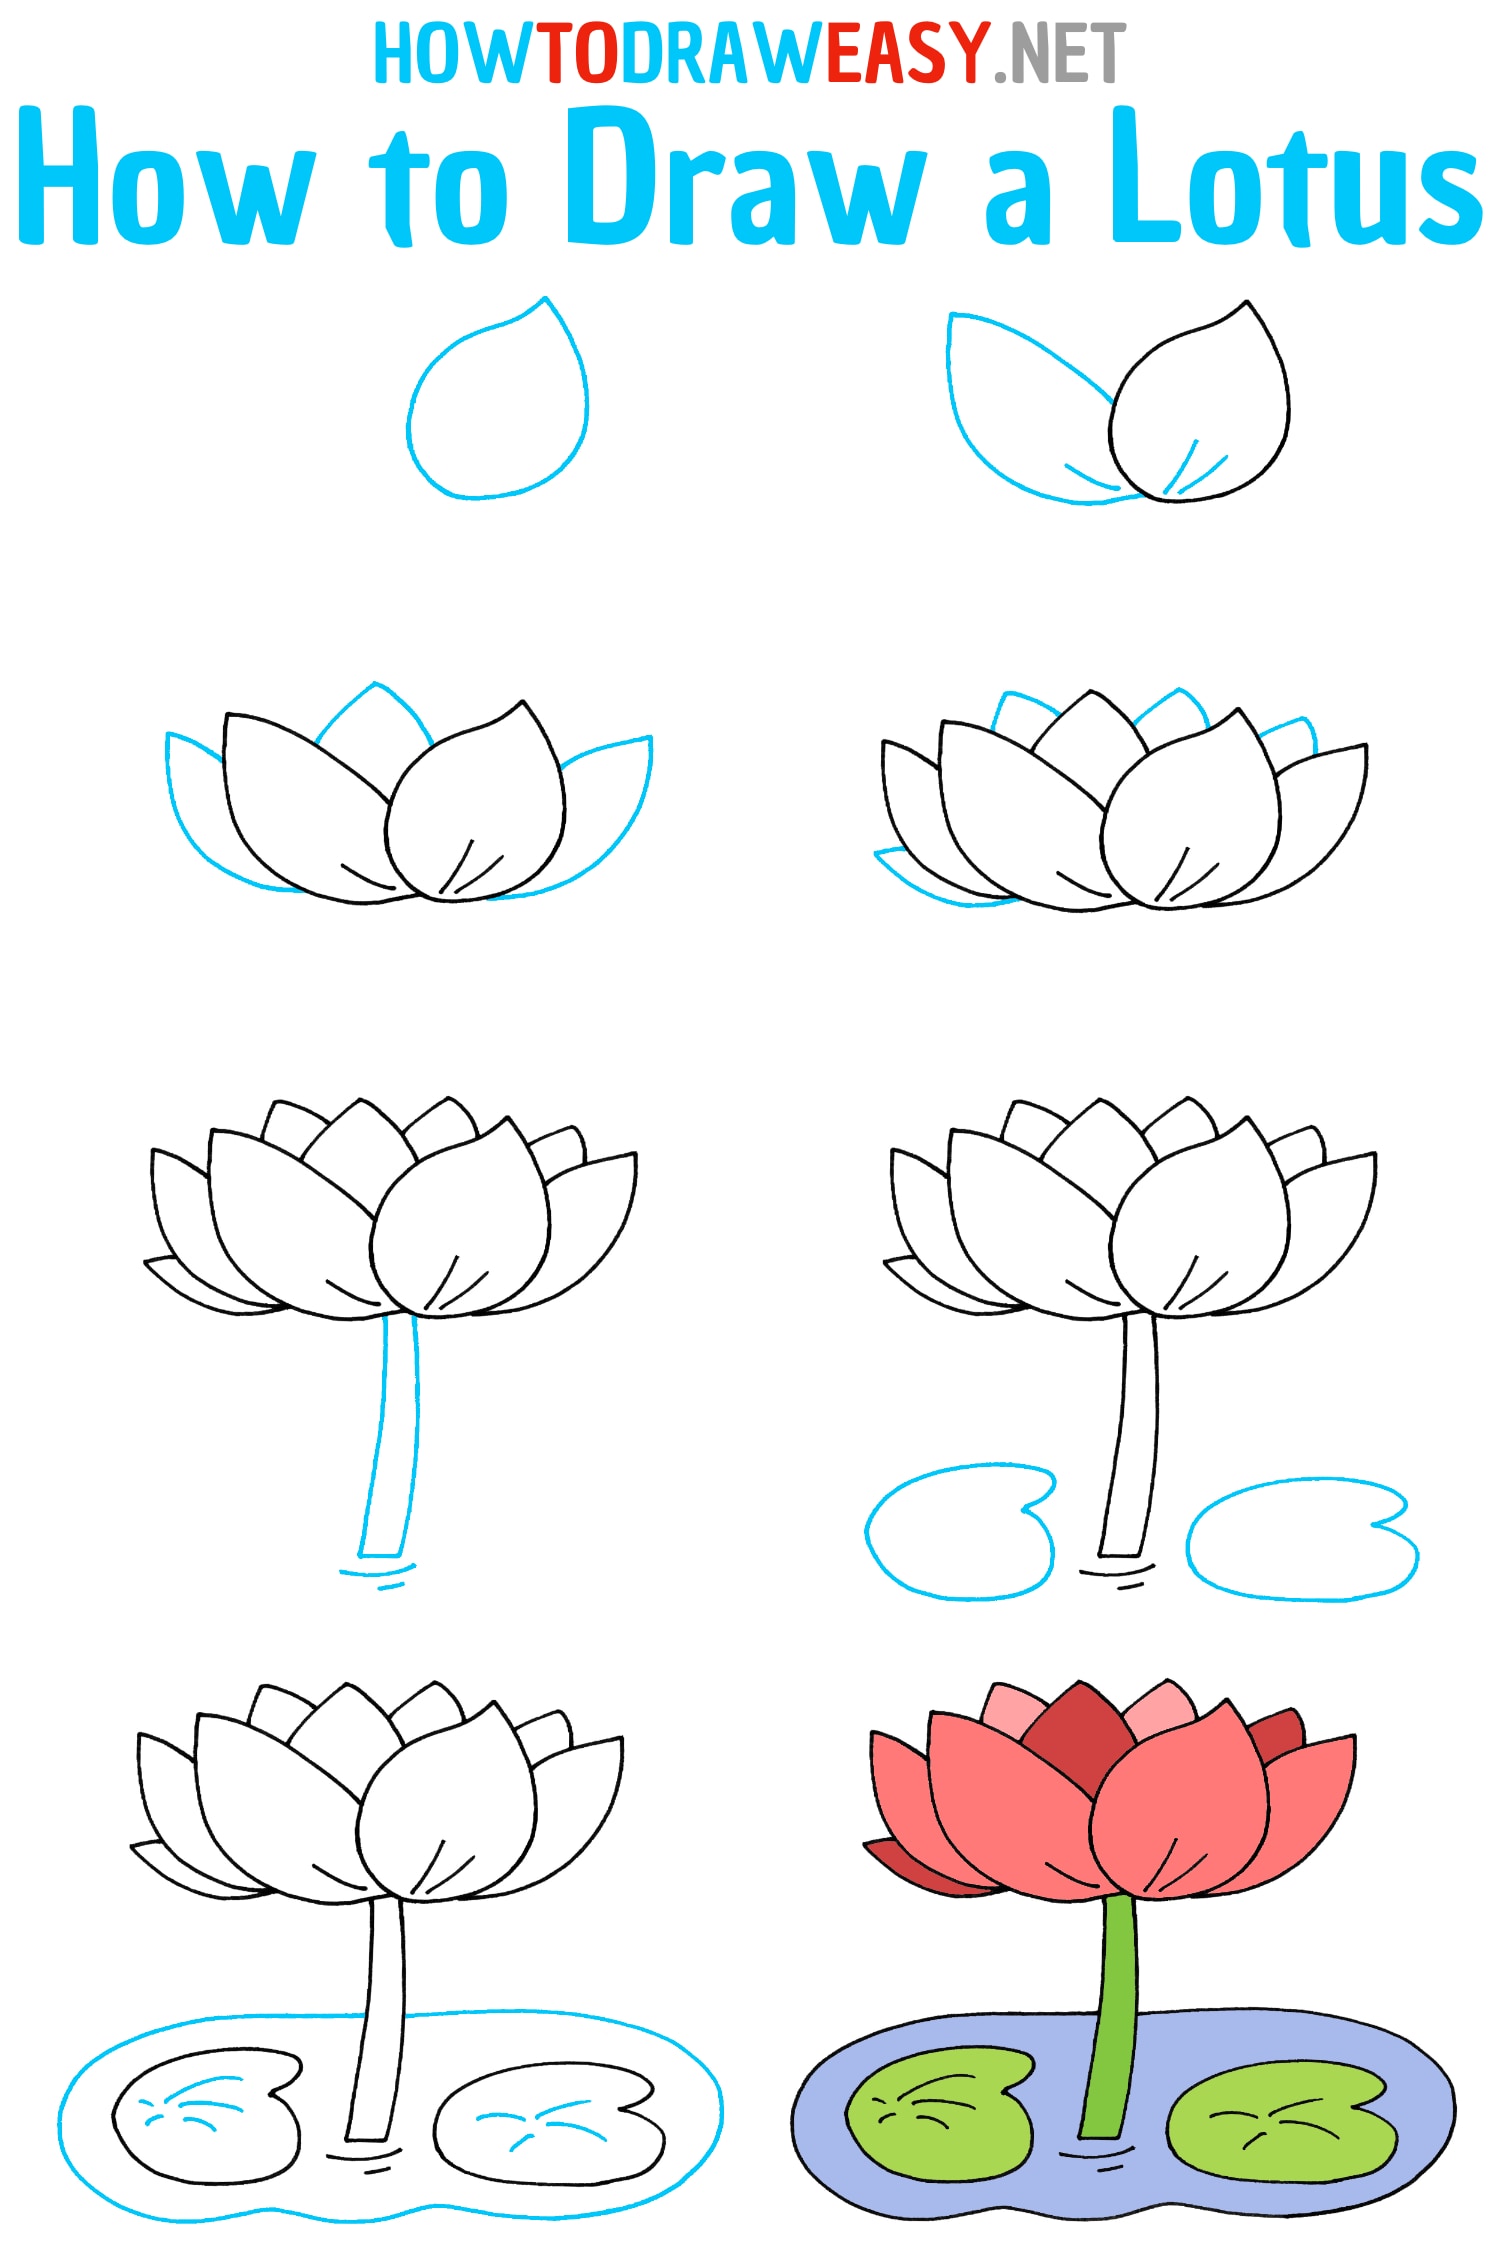
Step 1: The Basic Shape
Begin by sketching a slightly flattened oval. This will form the foundation of your lotus flower.
Keep the lines light and erasable as this is just a guideline. This shape dictates the overall size and form of your drawing.
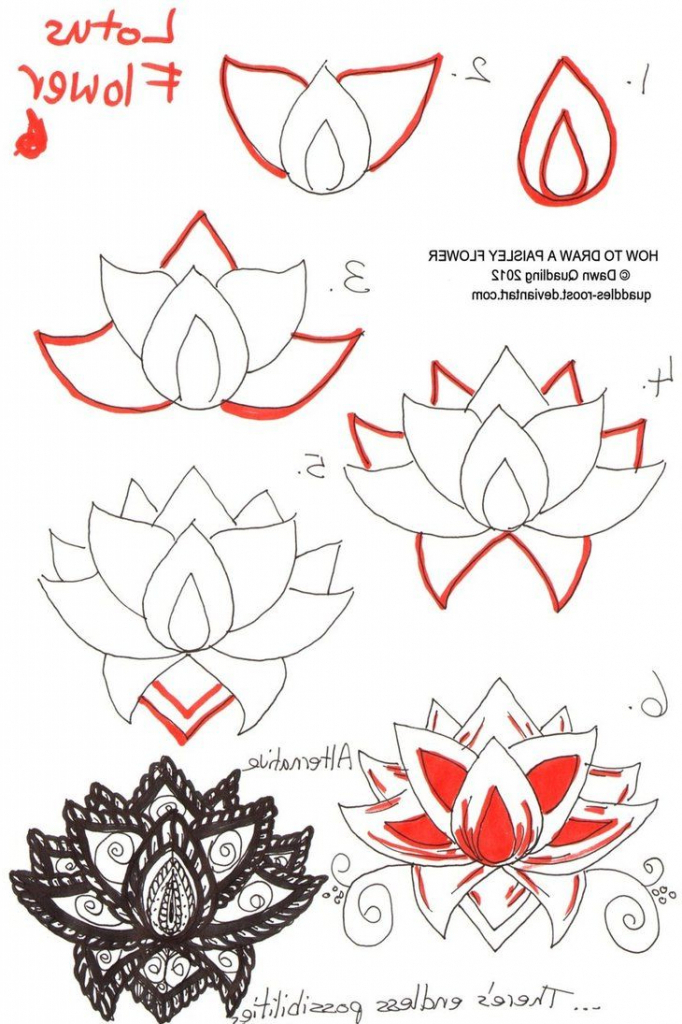
Step 2: Drawing the First Layer of Petals
Inside the oval, draw the first layer of petals. These petals should be small and tightly clustered together.
Imagine them curving inwards towards the center. Each petal should have a slightly pointed tip.
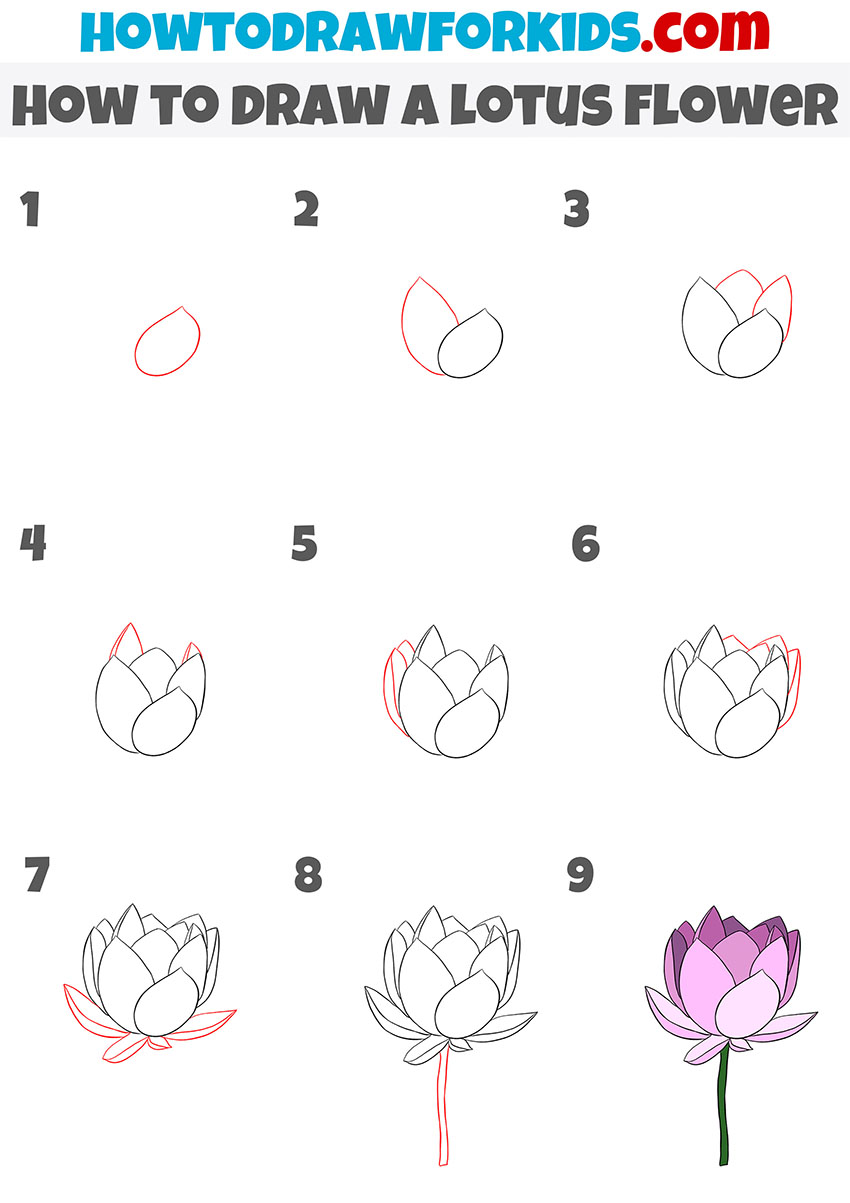
Step 3: Adding the Second Layer of Petals
Now, draw a second layer of petals surrounding the first. These petals will be slightly larger and more open.
Overlap them with the first layer to create depth. Vary their shapes and sizes slightly to achieve a natural look.
Step 4: Creating the Outer Petals
Draw the outermost layer of petals. These will be the largest and most prominent petals of the lotus.
They should curve outwards gracefully, adding elegance to the flower. Pay attention to the spacing between the petals.
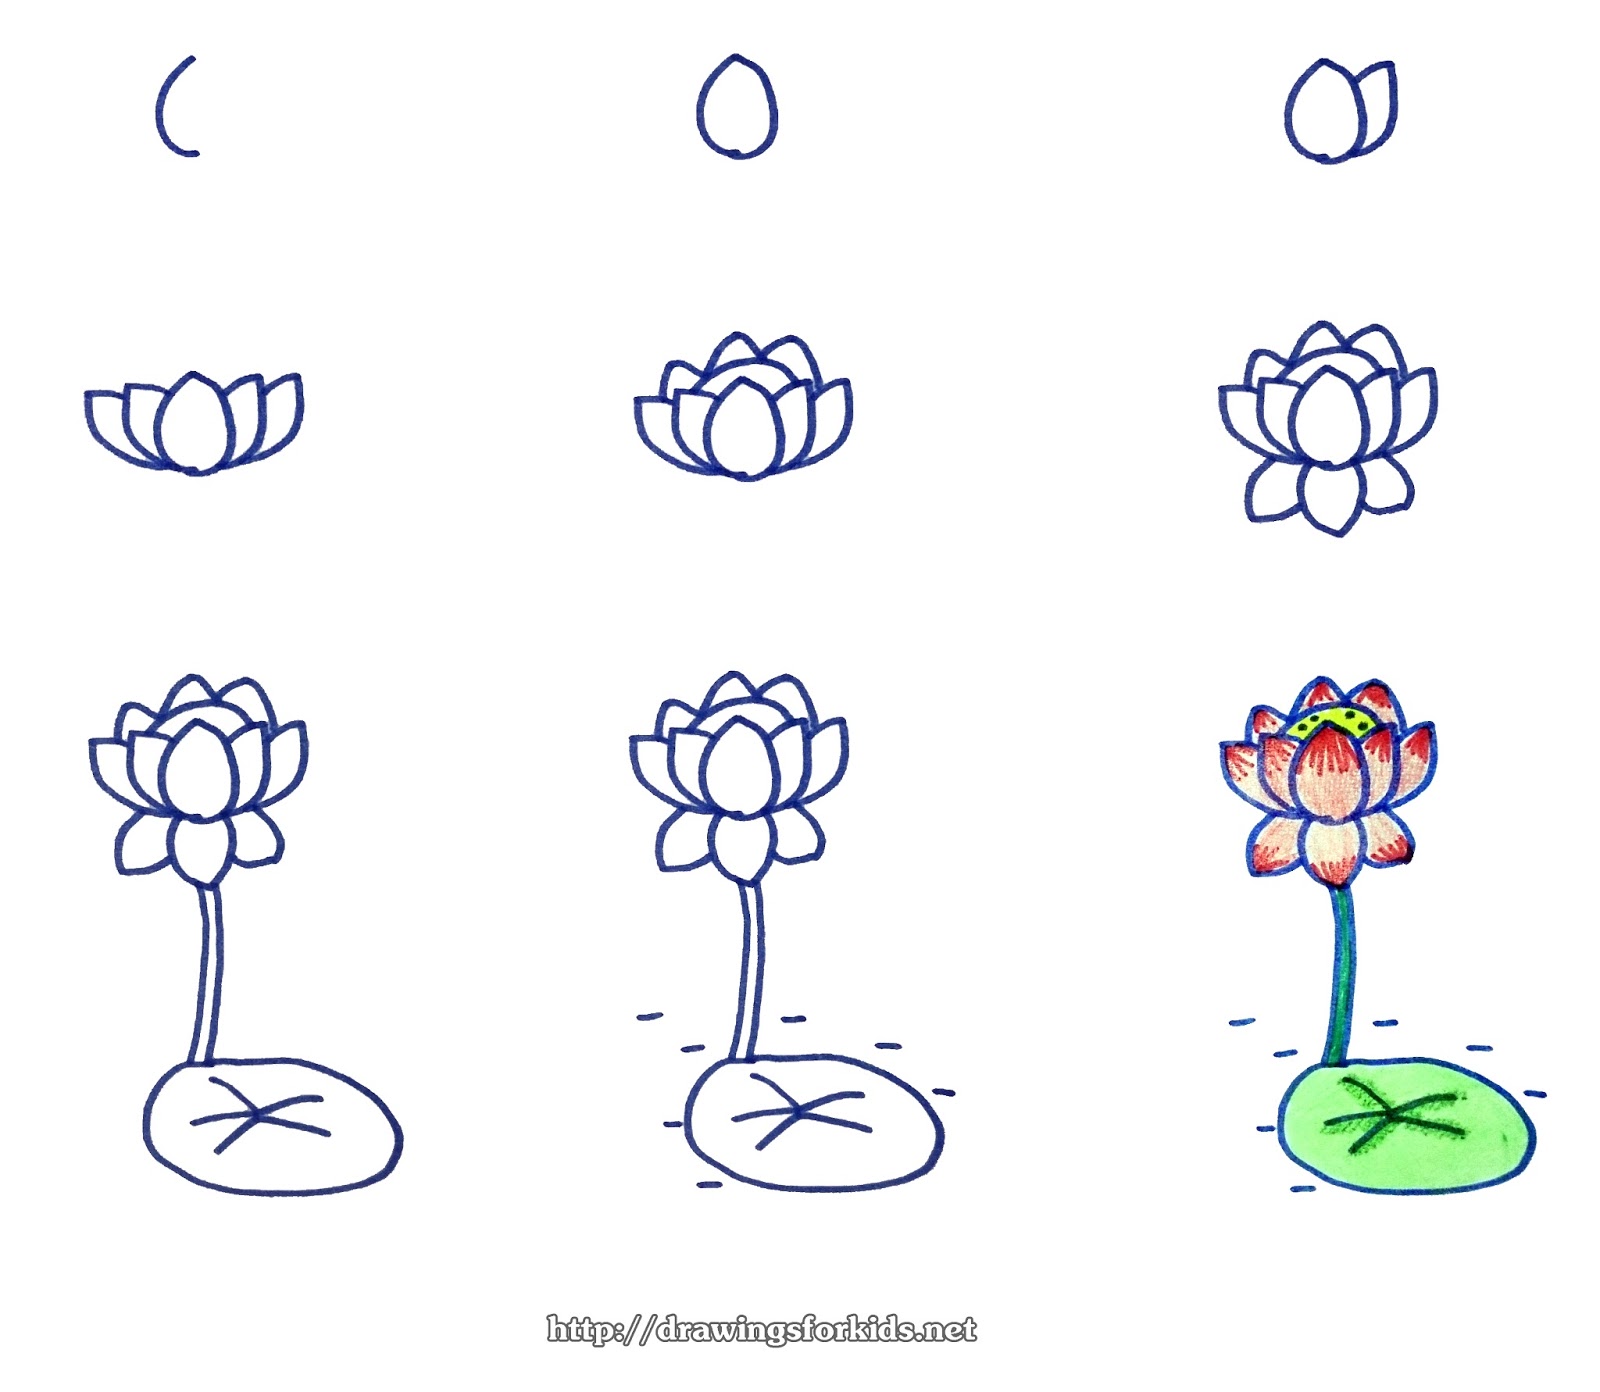
Step 5: Drawing the Stem
Beneath the flower, draw a long, curved stem. The stem provides support and connects the flower to its base.
Make sure the stem appears sturdy and realistic. You can add slight variations in thickness for a natural effect.
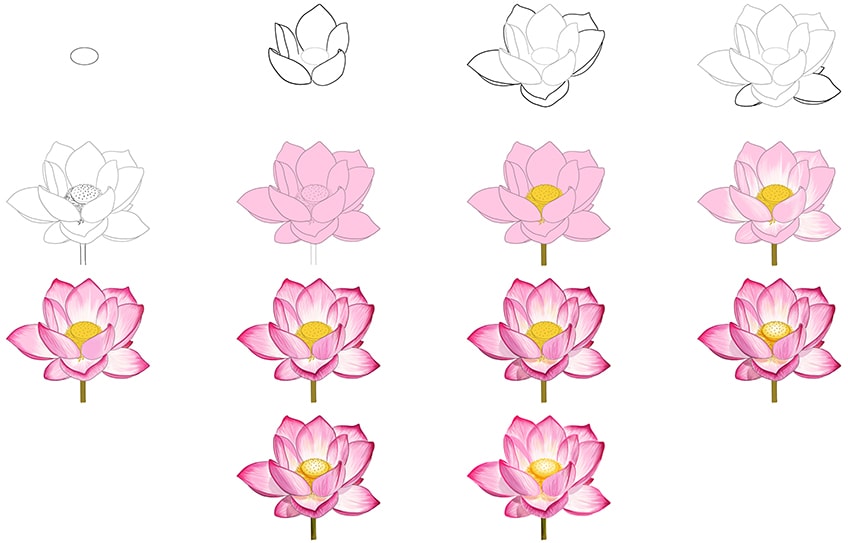
Step 6: Adding Details to the Center
Focus on the center of the lotus flower. Add small, circular details to represent the seed pod.
These details add texture and realism to your drawing. Use light shading to create depth in the center.
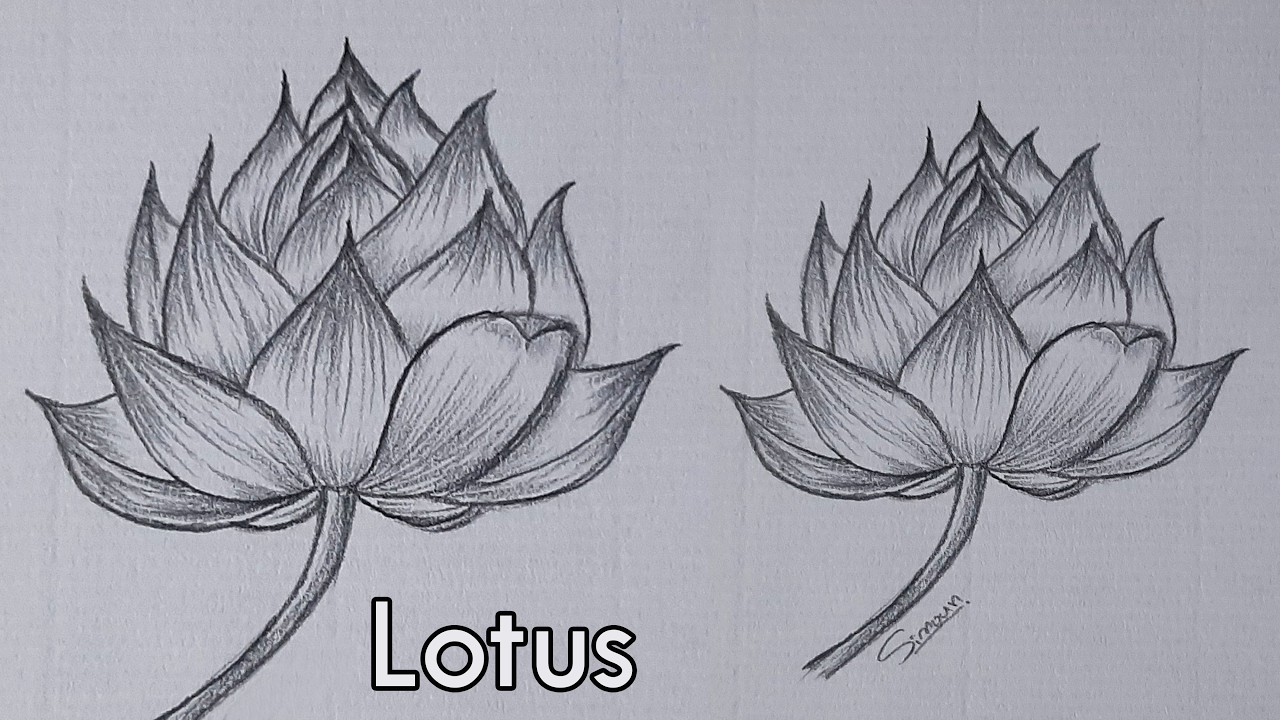
Step 7: Shading and Highlighting
Start adding shading to your drawing. Focus on areas where the petals overlap to create shadows.
Use a light touch to build up the shading gradually. Consider the direction of the light source to determine where the shadows fall.
Step 8: Refining the Lines
Erase any unnecessary guidelines. Refine the outlines of the petals to make them sharper and more defined.
Pay attention to the overall shape and form of the flower. Make any necessary adjustments to improve the composition.
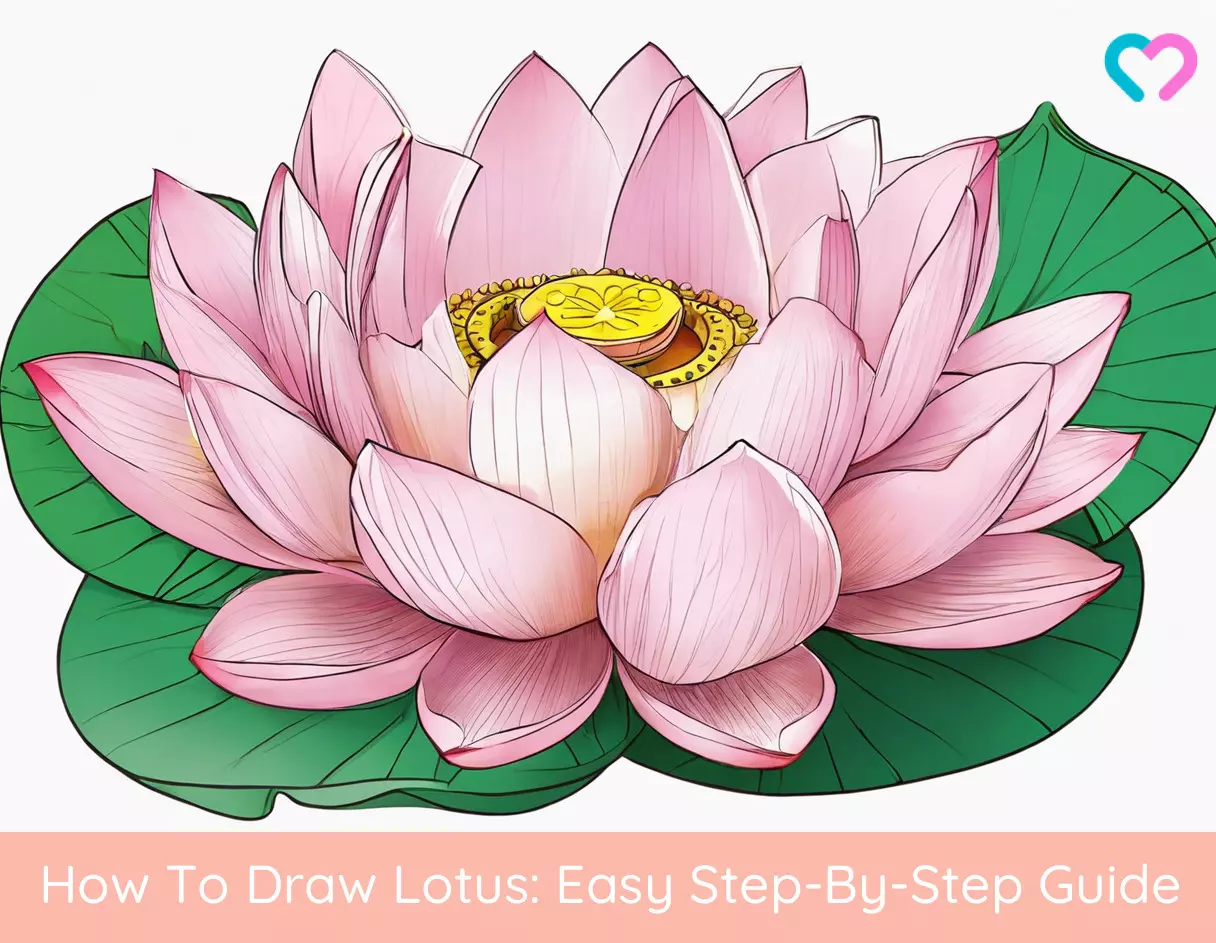
Step 9: Adding Texture
Add subtle lines and textures to the petals. This will make them appear more realistic and three-dimensional.
Use light, delicate strokes to create the texture. Avoid overdoing it, as too much texture can look artificial.
Step 10: Final Touches
Review your drawing and add any final touches. This might include adding more shading, refining the details, or adjusting the overall composition.
Step back and admire your completed lotus drawing! With practice, you'll be able to create even more beautiful and intricate lotus flowers.
Essential Tips for Success
Use a variety of pencil grades for shading. Softer pencils are great for dark shadows, while harder pencils are best for light highlights.
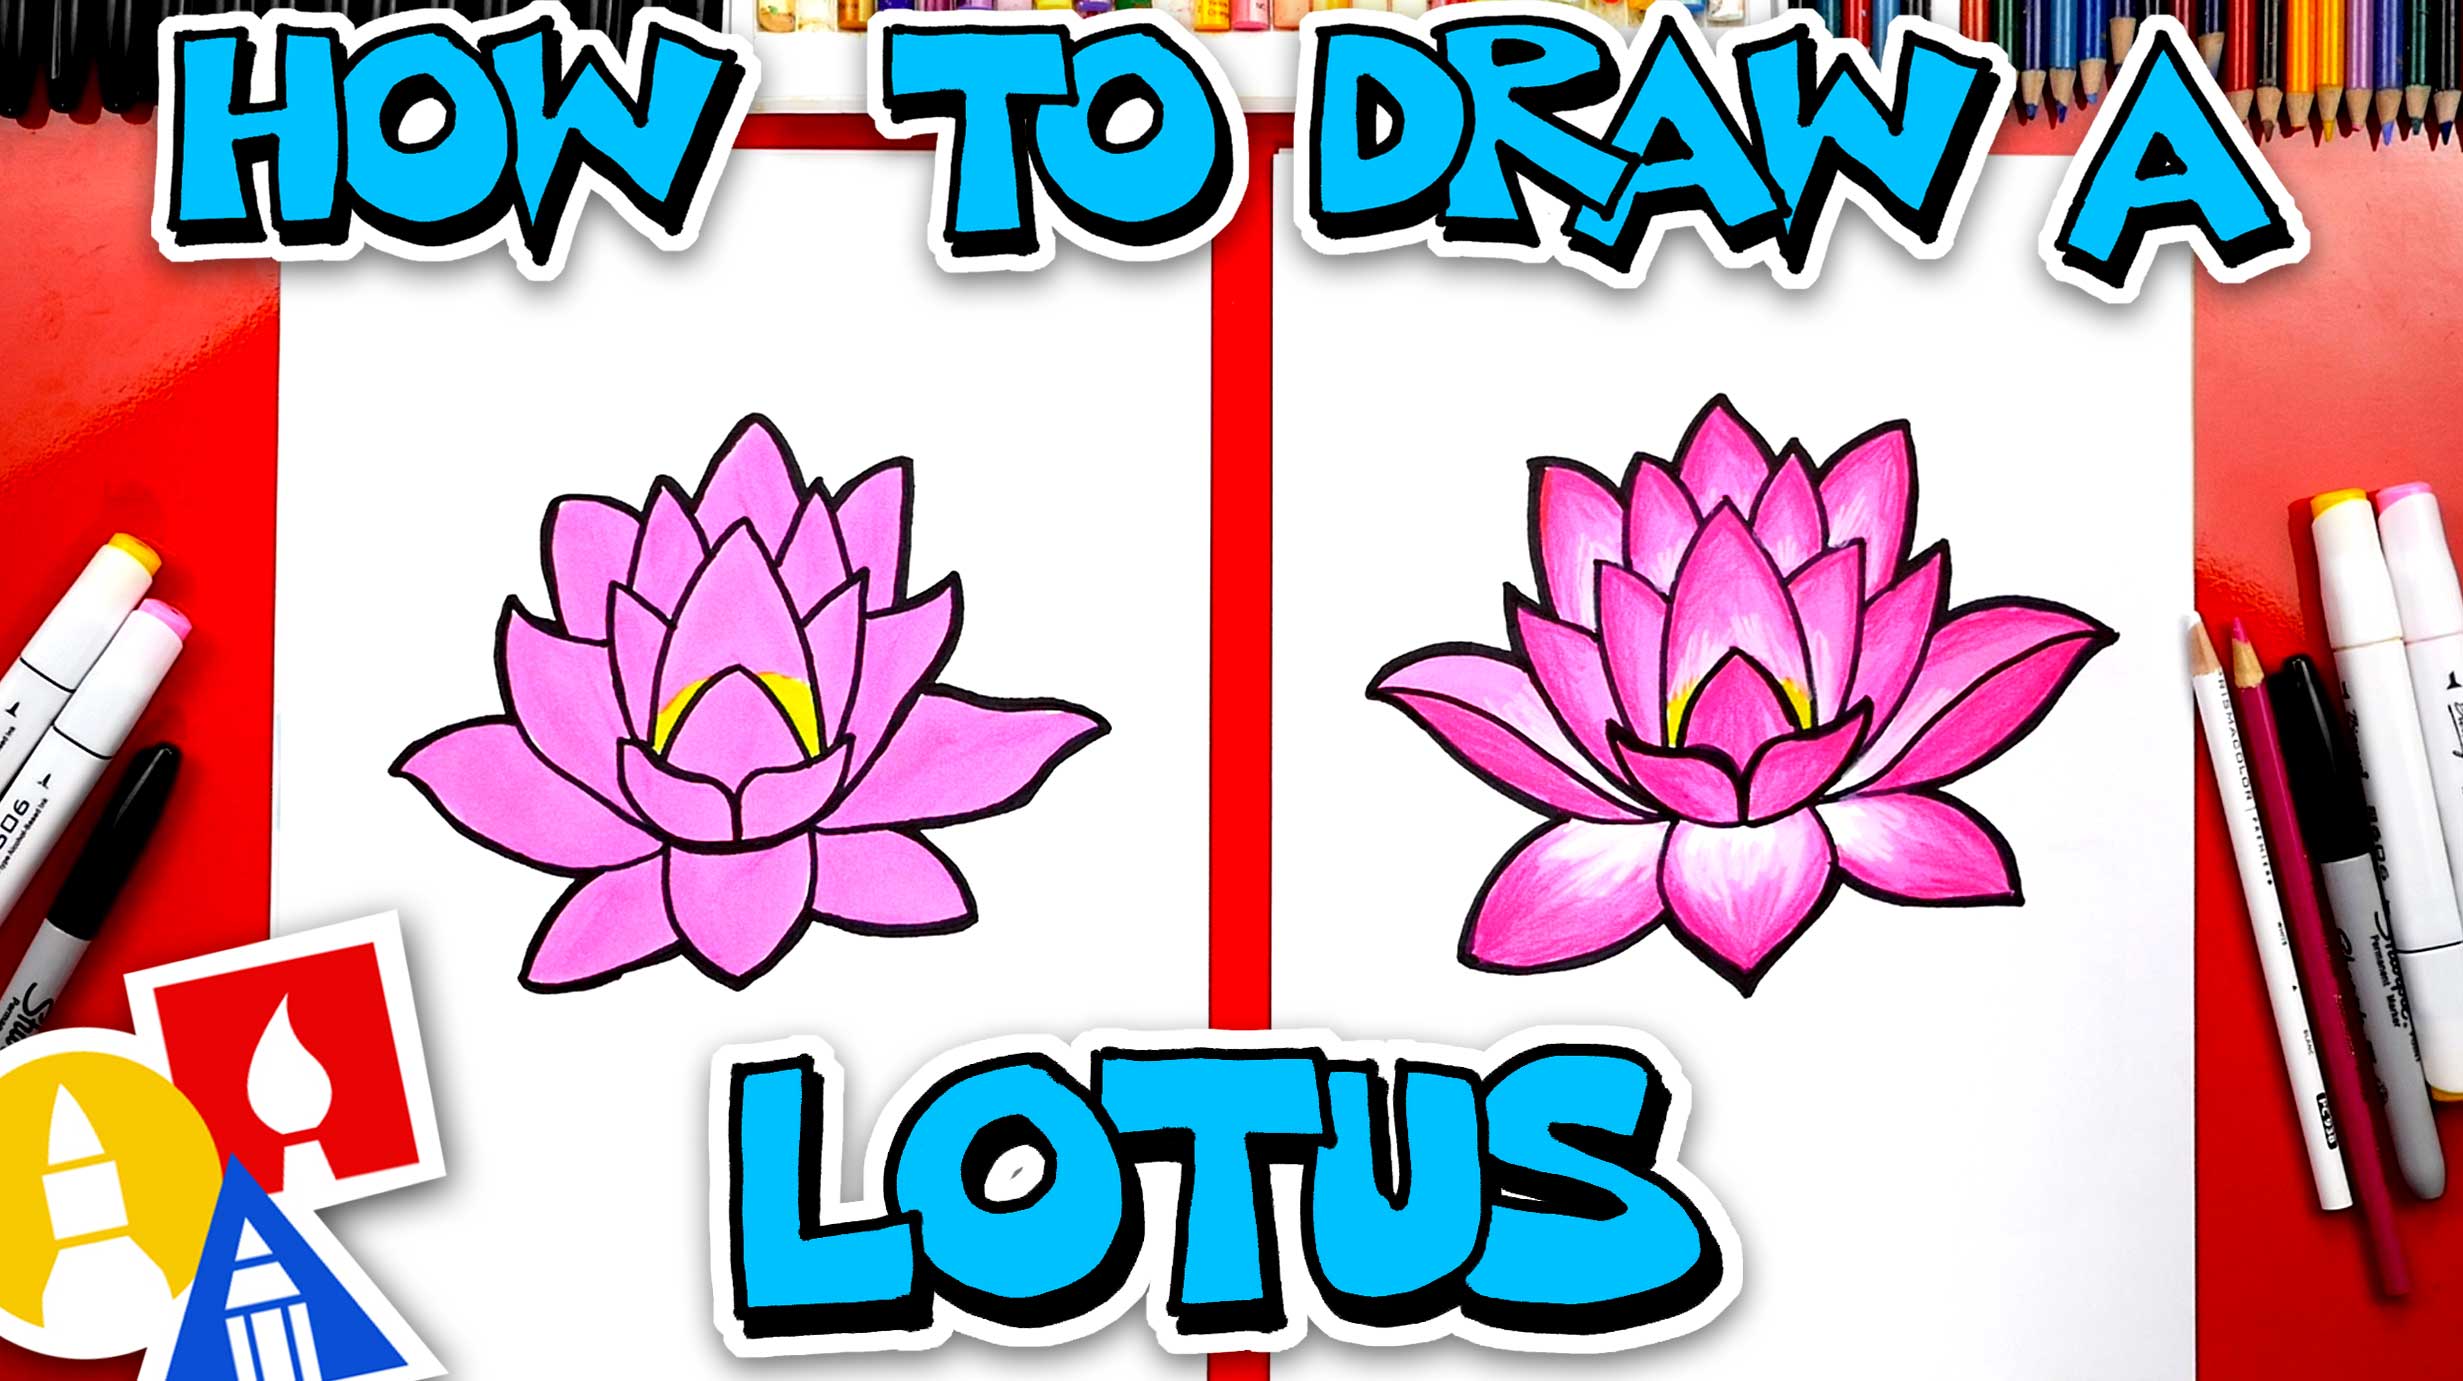
Don't be afraid to experiment with different styles. There are many ways to draw a lotus, so find the style that works best for you.
Practice regularly to improve your skills. The more you draw, the better you will become.
Further Learning
Explore online resources for more drawing tutorials. Numerous websites and videos offer in-depth guidance.
Consider taking a drawing class to learn from an experienced instructor. A class will provide structured learning and personalized feedback.
Continue practicing this step-by-step guide to master drawing lotus flowers and expand your artistic abilities!