How To Fill Battery With Water

Maintaining a car battery often involves more than just ensuring it holds a charge. For lead-acid batteries, regularly checking and replenishing the electrolyte level with distilled water is a crucial maintenance task that can significantly extend the battery's lifespan. Neglecting this aspect can lead to sulfation, reduced capacity, and ultimately, premature battery failure.
This article provides a comprehensive guide on how to safely and effectively fill a car battery with water, focusing on the necessary precautions and steps to ensure optimal battery performance. Understanding the process is essential for car owners looking to maintain their vehicles efficiently and avoid costly replacements.
Understanding Battery Types and Water Needs
Before proceeding, it's critical to identify the type of battery in your vehicle. Most older vehicles and some newer models utilize traditional lead-acid batteries with removable caps, designed for electrolyte level maintenance. These batteries require periodic water replenishment.
Newer vehicles often feature sealed or maintenance-free batteries, which are designed to prevent electrolyte loss and do not require the addition of water. Attempting to open a sealed battery can be dangerous and void the warranty.
Identifying a Battery That Needs Water
Several indicators suggest that a lead-acid battery needs water. A common sign is difficulty starting the engine, particularly in cold weather. Other indicators include visible corrosion around the battery terminals and a bulging or cracked battery case.
However, the most reliable method is to visually inspect the electrolyte level inside the battery cells. This involves removing the vent caps on top of the battery and looking inside each cell.
The electrolyte level should be high enough to cover the lead plates inside each cell. If the plates are exposed, it's time to add distilled water.
Safety First: Essential Precautions
Working with car batteries involves potential hazards, so safety is paramount. Always wear safety glasses and gloves to protect your eyes and skin from corrosive battery acid.
Work in a well-ventilated area to avoid inhaling potentially harmful fumes. Disconnect the battery from the vehicle's electrical system before starting any maintenance to prevent electrical shock.
Remove any metallic jewelry or objects that could come into contact with the battery terminals, potentially causing a short circuit. Keep a container of baking soda nearby to neutralize any spilled acid.
Step-by-Step Guide to Filling a Battery
The process of adding water to a car battery is straightforward if done correctly. The key is to use the right type of water and avoid overfilling.
Step 1: Gather Necessary Materials
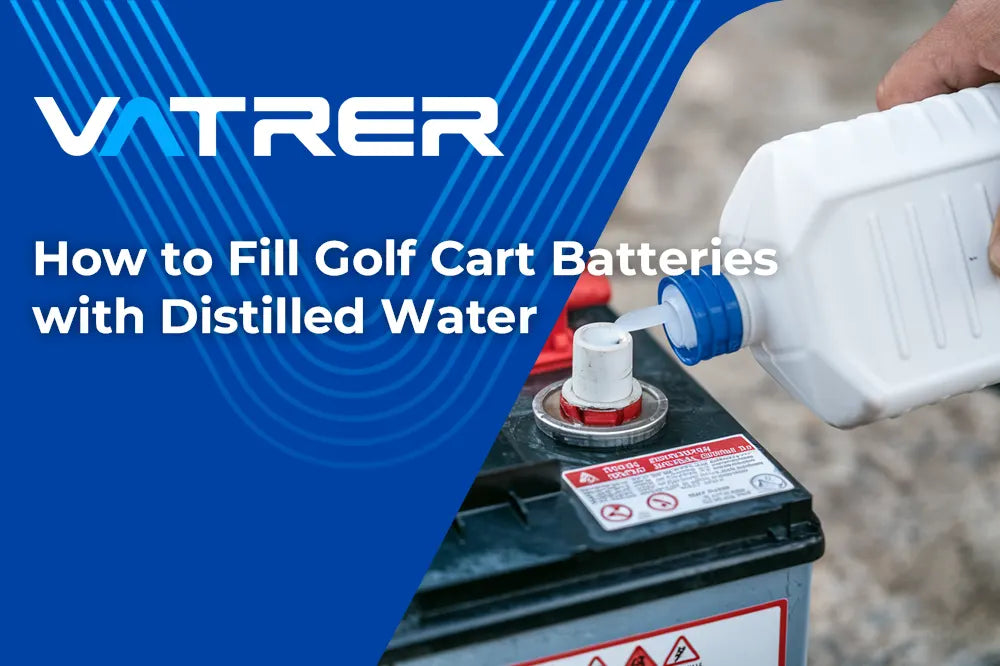
You will need distilled water, a small funnel, safety glasses, rubber gloves, and a clean cloth. Distilled water is crucial because it lacks minerals and impurities that can damage the battery.
Tap water or mineral water can introduce contaminants that shorten the battery's lifespan. The funnel helps direct the water into the cells without spillage.
Step 2: Prepare the Battery
Ensure the vehicle is turned off and the parking brake is engaged. Locate the battery, typically under the hood, in the trunk, or under a seat.
Disconnect the negative (black) terminal first, followed by the positive (red) terminal. This prevents accidental short circuits.
Clean the battery terminals with a wire brush to remove any corrosion, ensuring a good connection when reassembling.
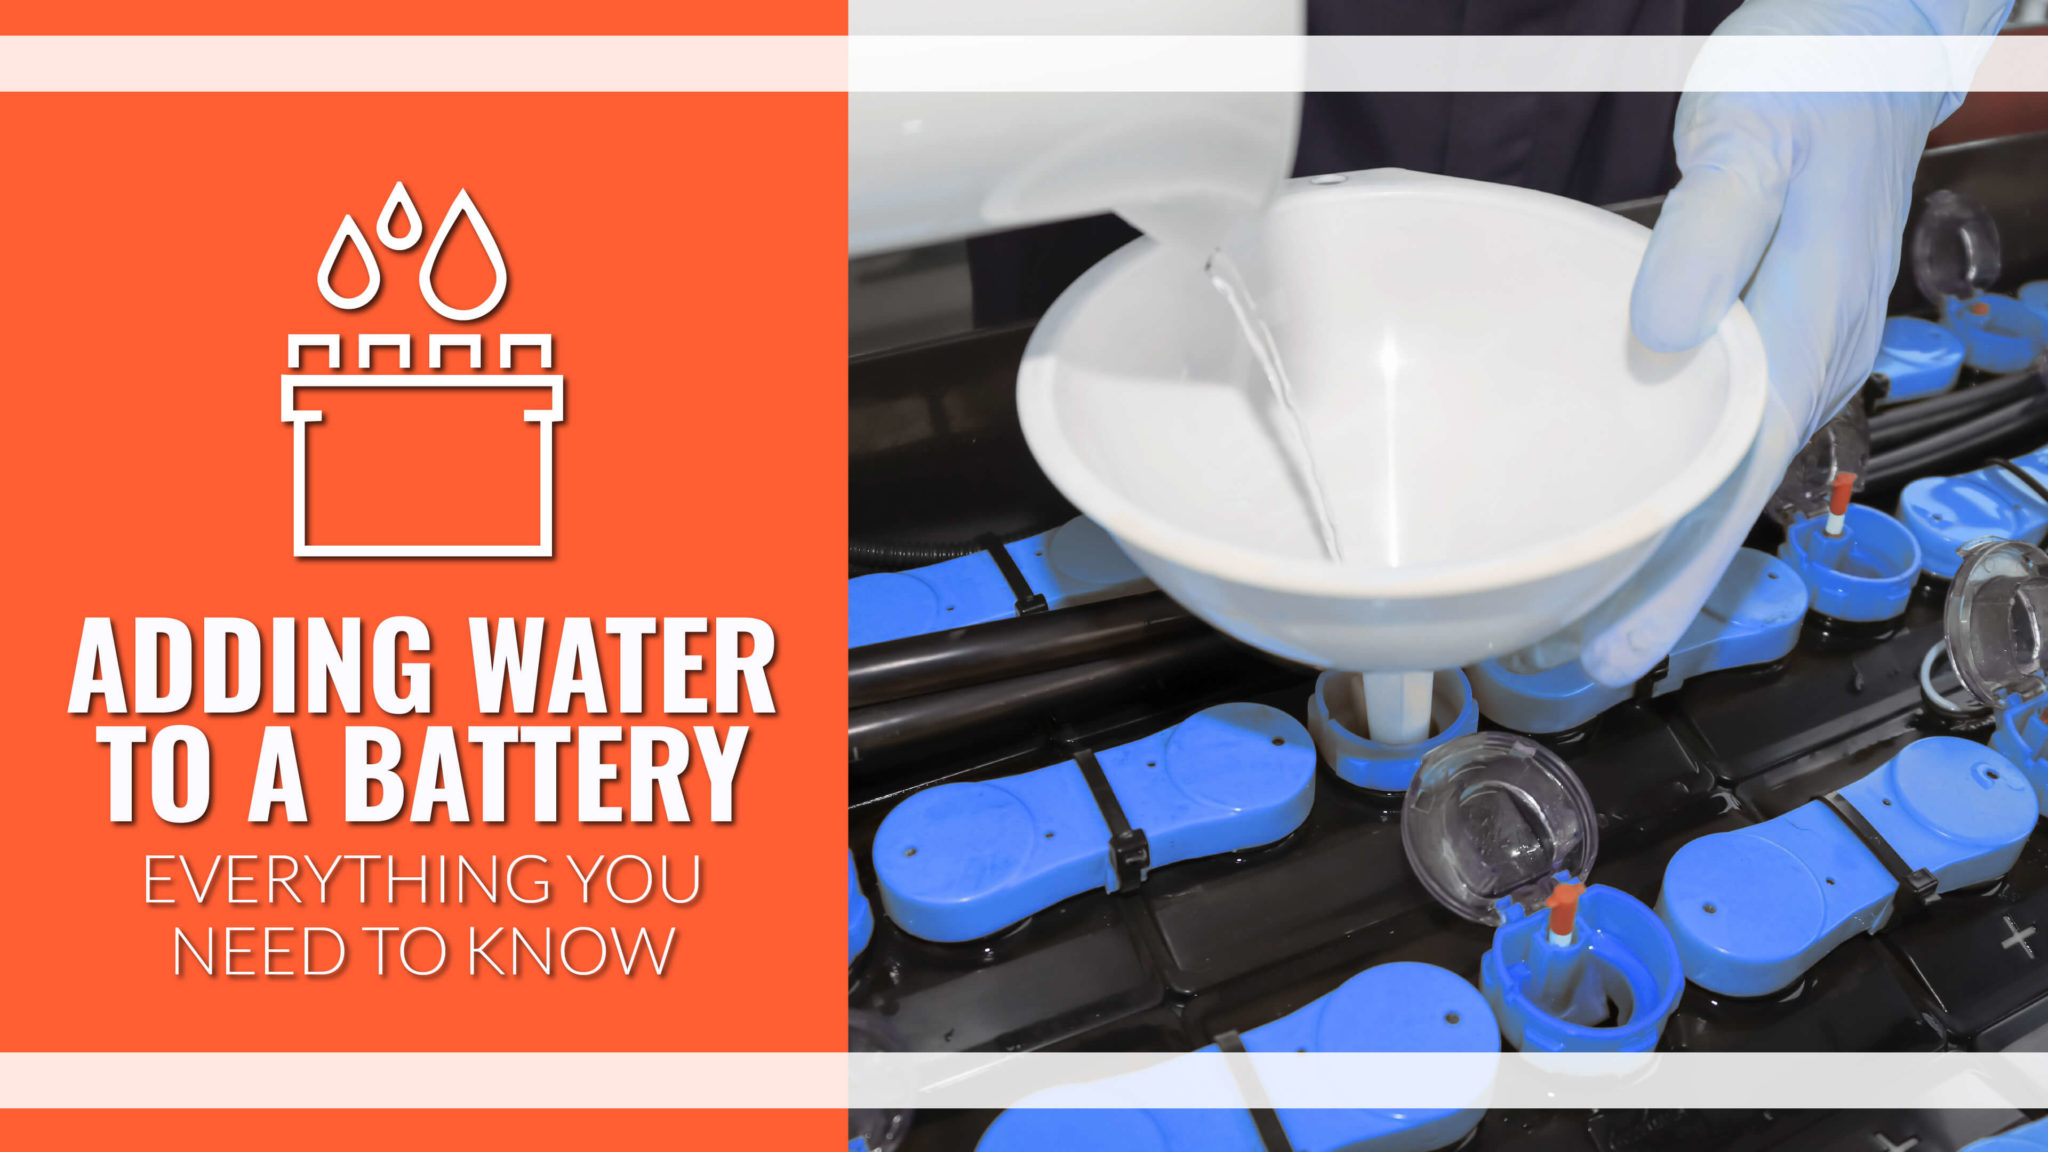
Step 3: Add Distilled Water
Remove the vent caps from the top of the battery. Use the funnel to carefully pour distilled water into each cell until the electrolyte level reaches the bottom of the fill well or covers the plates by approximately 1/4 to 1/2 inch.
Avoid overfilling, as this can cause the electrolyte to spill when the battery heats up during operation. Overfilling can also dilute the acid concentration, reducing the battery's performance.
If you accidentally overfill a cell, use a battery hydrometer or a turkey baster to carefully remove the excess fluid.
Step 4: Reassemble and Test
Once all cells are filled to the correct level, replace the vent caps securely. Reconnect the positive (red) terminal first, followed by the negative (black) terminal.
Ensure the terminals are tightened properly to prevent loose connections. Start the vehicle to test the battery's performance.
Monitor the battery's voltage with a multimeter. A fully charged battery should read approximately 12.6 volts.
Maintaining Optimal Battery Health
Regularly checking and maintaining the electrolyte level is a key aspect of battery care. However, there are other practices that can extend battery life.
Avoid leaving electronic devices on when the engine is off, as this can drain the battery. Clean the battery terminals periodically to prevent corrosion and ensure a good connection.
If the vehicle is not used for extended periods, consider using a battery maintainer or trickle charger to keep the battery fully charged. Consider consulting a professional mechanic like John Smith from AutoCare Experts for any battery-related problems.
Conclusion
Properly maintaining a car battery by checking and replenishing the electrolyte level with distilled water is a simple yet crucial task. By following these guidelines and taking necessary safety precautions, vehicle owners can prolong their battery's lifespan, ensure reliable performance, and save money on costly replacements. Ignoring this routine maintenance can lead to unexpected breakdowns and unnecessary expenses, highlighting the importance of proactive battery care. Regularly inspecting your battery, especially during seasonal changes, will contribute significantly to your vehicle's overall reliability.