How To Restore A Backup From Google
In today's digitally driven world, losing crucial data from your Android device can feel like a personal catastrophe. From cherished photos and important contacts to vital documents, our smartphones hold a wealth of irreplaceable information. Fortunately, Google offers a robust backup and restore system, providing a lifeline in the event of accidental deletion, device malfunction, or simply upgrading to a new phone.
This article provides a detailed, step-by-step guide on how to restore a backup from Google, ensuring a smooth and efficient data recovery process. We'll cover the different types of backups available, troubleshooting tips, and best practices for maintaining data security, empowering you to reclaim your digital life with confidence.
Understanding Google Backups
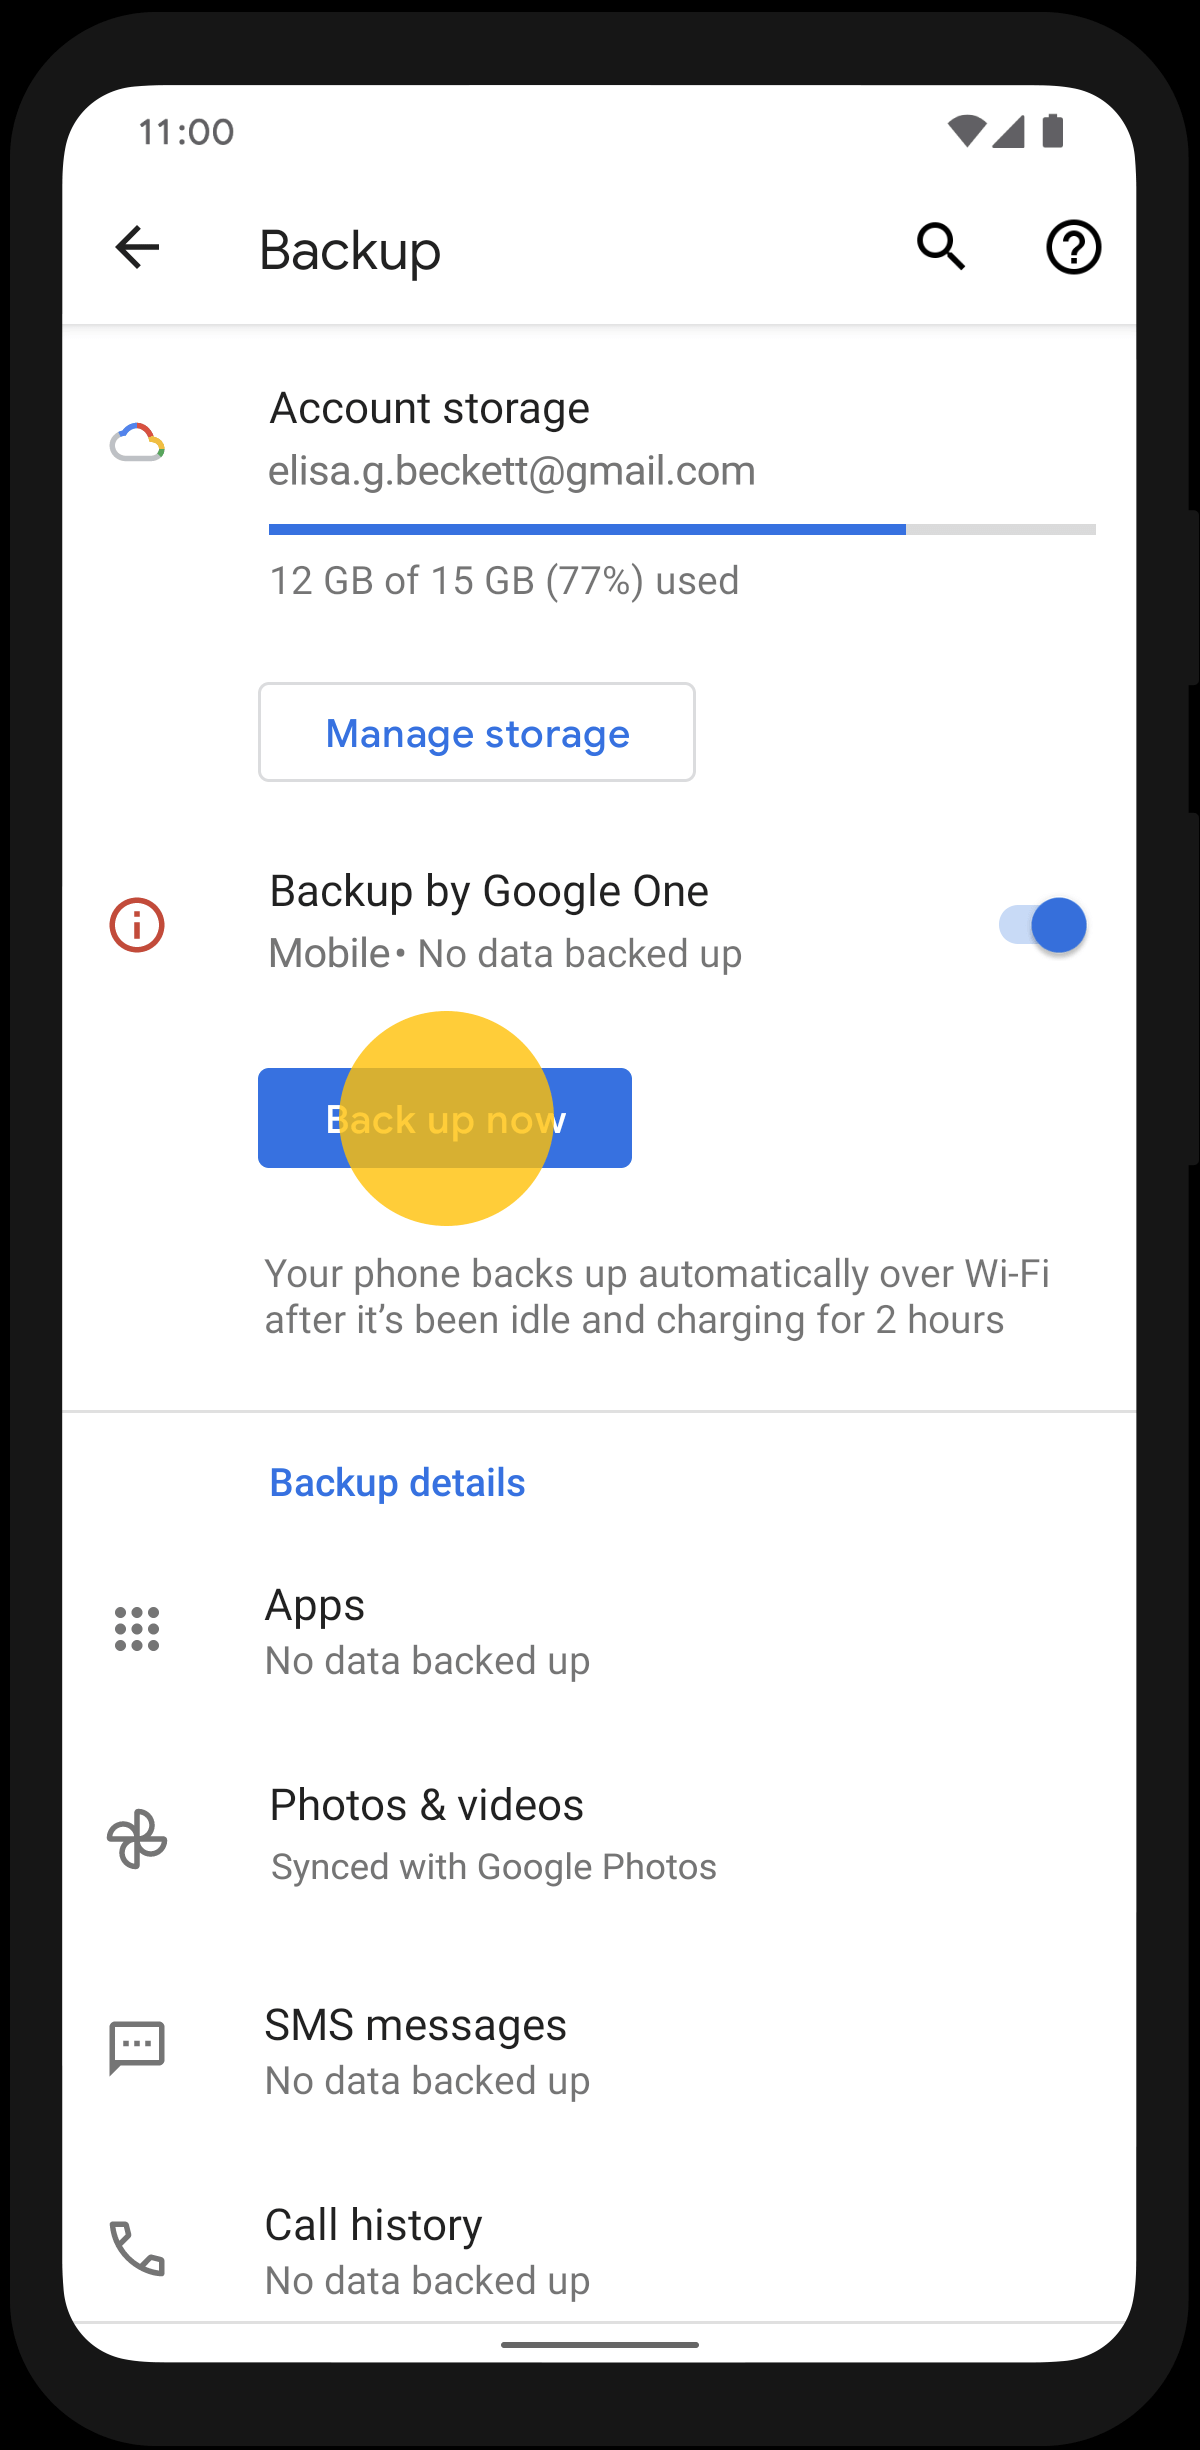
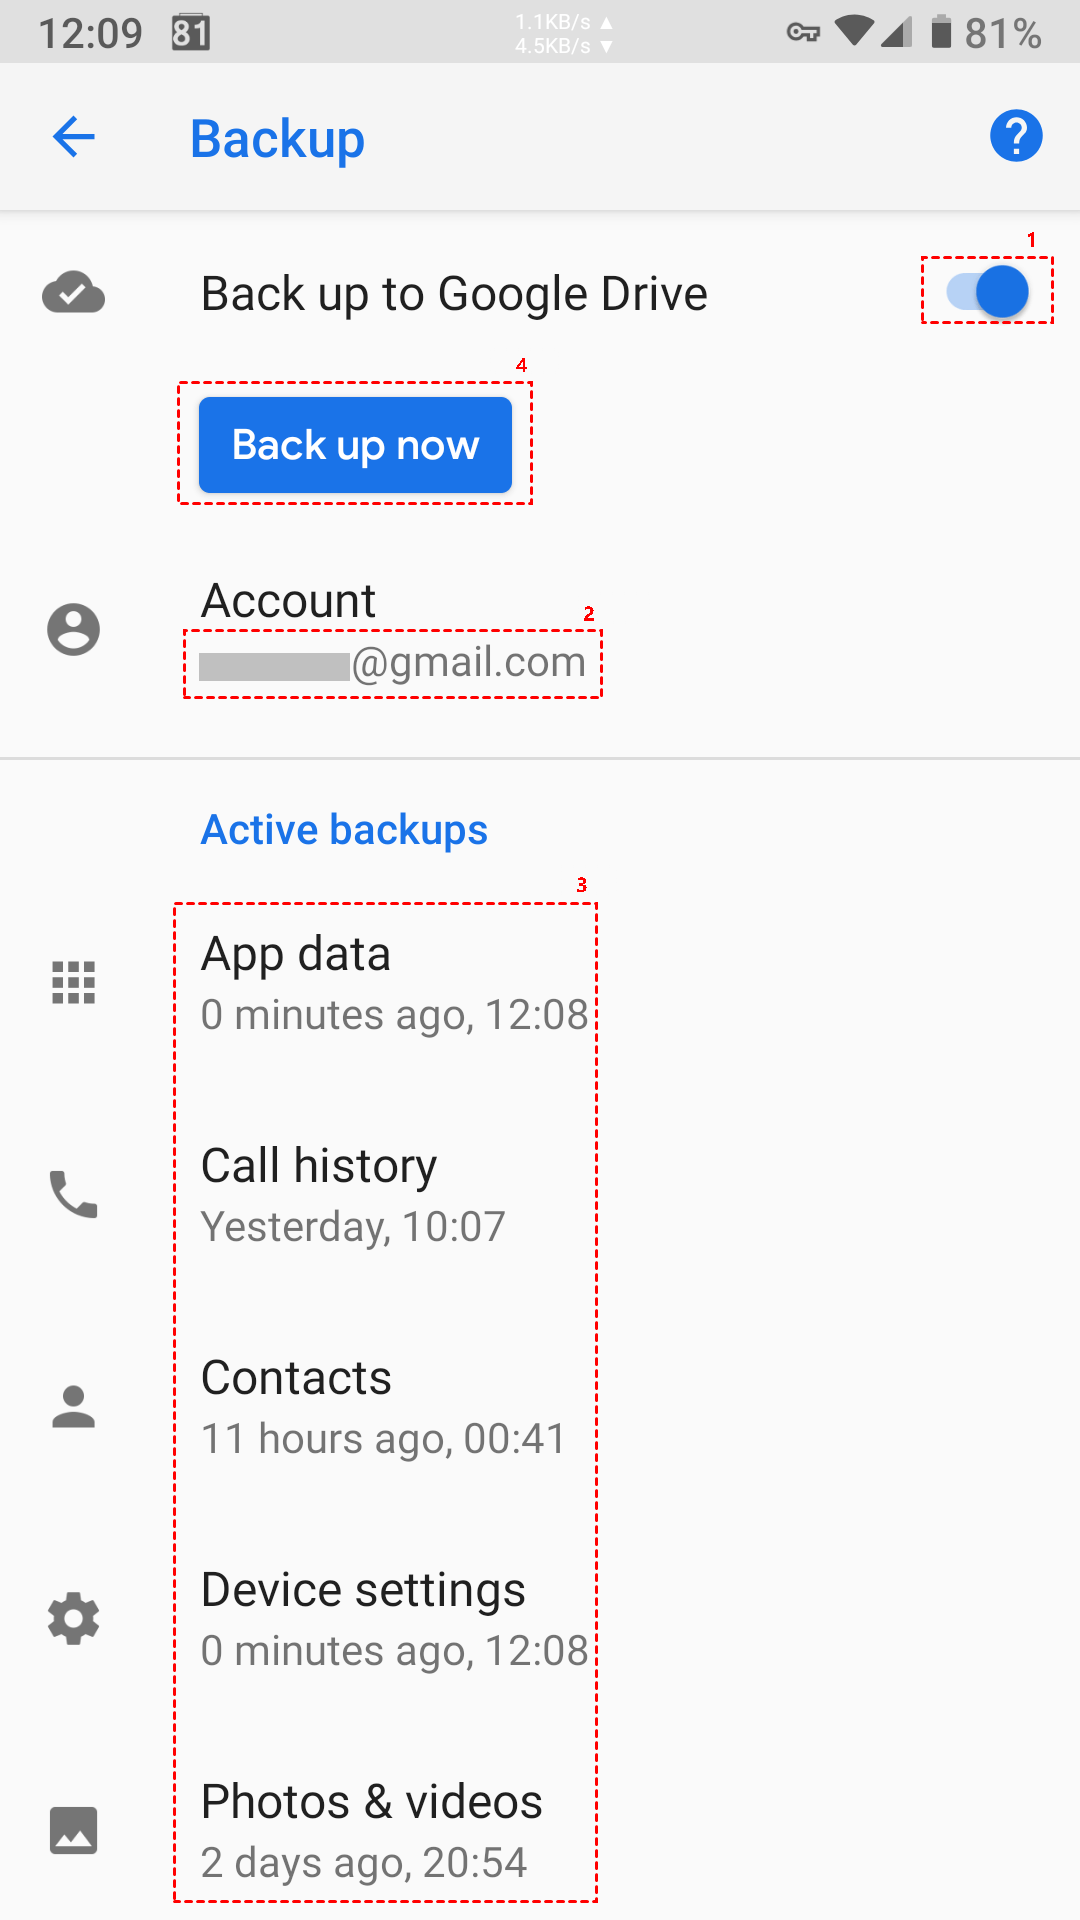
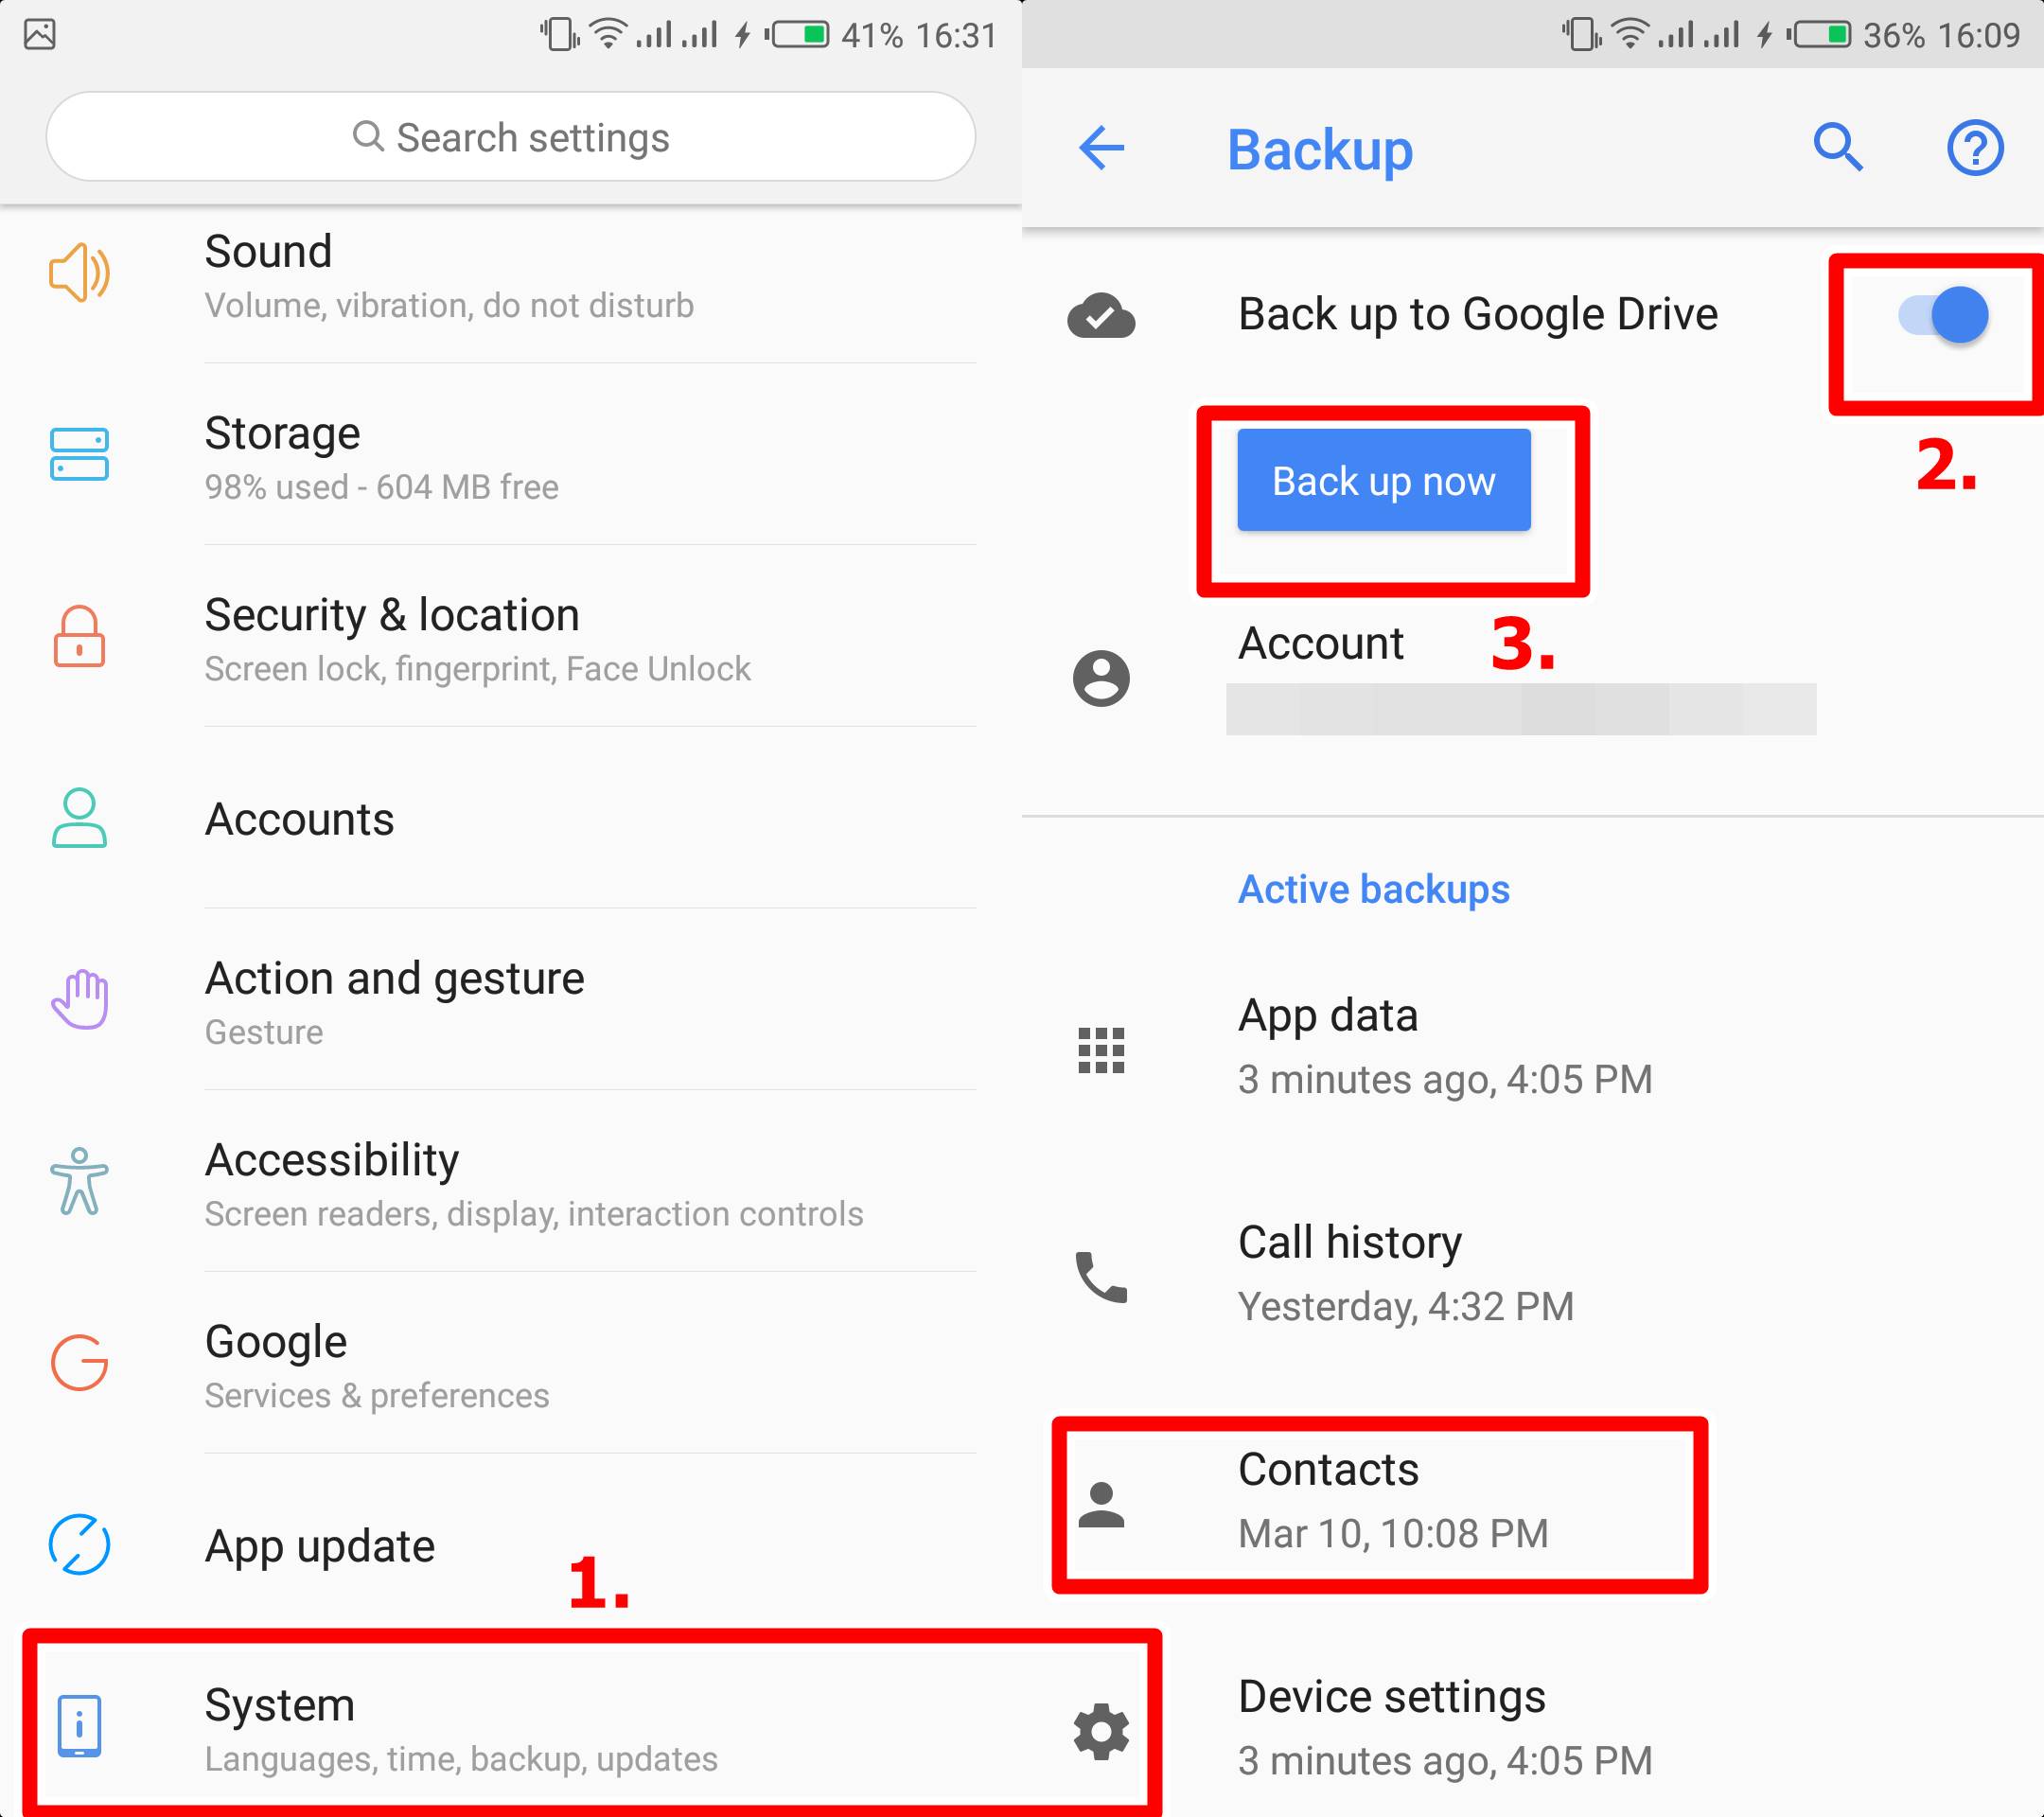
Google's backup system is primarily linked to your Google account and seamlessly integrates with Android devices. It’s essential to understand what data is typically backed up to ensure you're restoring the information you expect.
Generally, Google backs up app data (including settings and files), call history, contacts, device settings (such as Wi-Fi passwords and display preferences), SMS text messages, and photos and videos (if backed up to Google Photos). However, the specific data backed up can vary depending on your device manufacturer and Android version.
Initiating the Restore Process
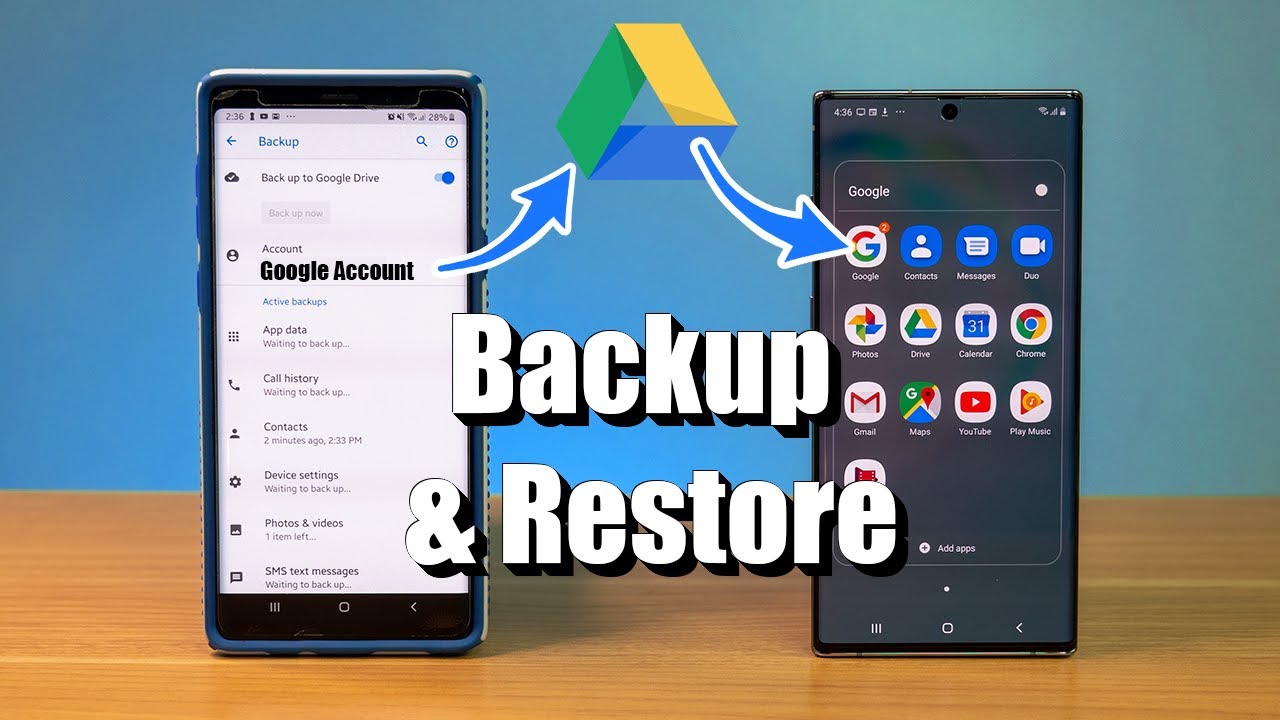
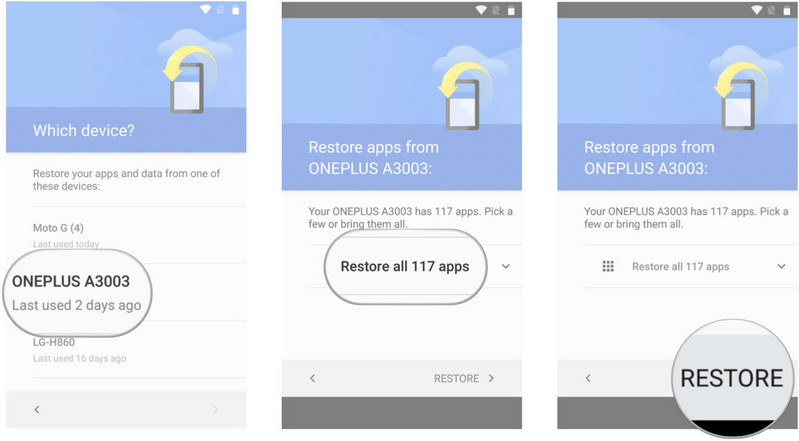
The restore process typically begins during the initial setup of a new or factory-reset Android device. After powering on the device and connecting to a Wi-Fi network, you'll be prompted to sign in to your Google account.
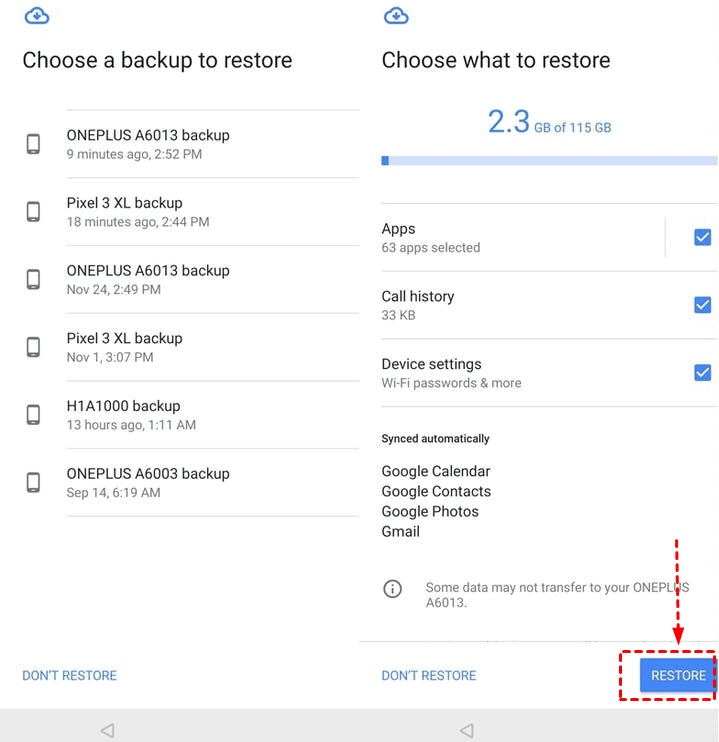
Once signed in, you'll be presented with the option to restore data from a previous backup. If you have multiple backups available, you can choose the specific one you want to restore based on the date and device name.
Choose the most relevant backup and tap "Restore."
Step-by-Step Restoration Guide
Following the initial setup prompts, the restoration process will begin. The time it takes to complete depends on the size of the backup and the speed of your internet connection.
First, the device will start downloading app data and settings. This process may take some time, and you'll see progress notifications as apps are being restored.
Second, be patient. While the initial restoration is underway, you can typically continue setting up other aspects of your device, like screen lock and fingerprint authentication.
Third, certain apps may require you to sign in again to fully restore their data. This is a standard security measure to ensure the correct user is accessing the information.
Alternative Restoration Methods
If you've already set up your device and need to restore a backup, you might be able to initiate the process through a factory reset. However, be aware that a factory reset will erase all data currently on your device, so ensure you have a separate backup of any recent information you haven't already backed up to Google.
To perform a factory reset, navigate to your device's settings menu, usually under "General Management" or "System." Look for the "Reset" option and select "Factory data reset." Follow the on-screen prompts to complete the reset and then follow the earlier steps.
Troubleshooting Common Issues
Sometimes, restoring a backup doesn't go as smoothly as planned. Several common issues can arise, and understanding how to troubleshoot them can save you time and frustration.
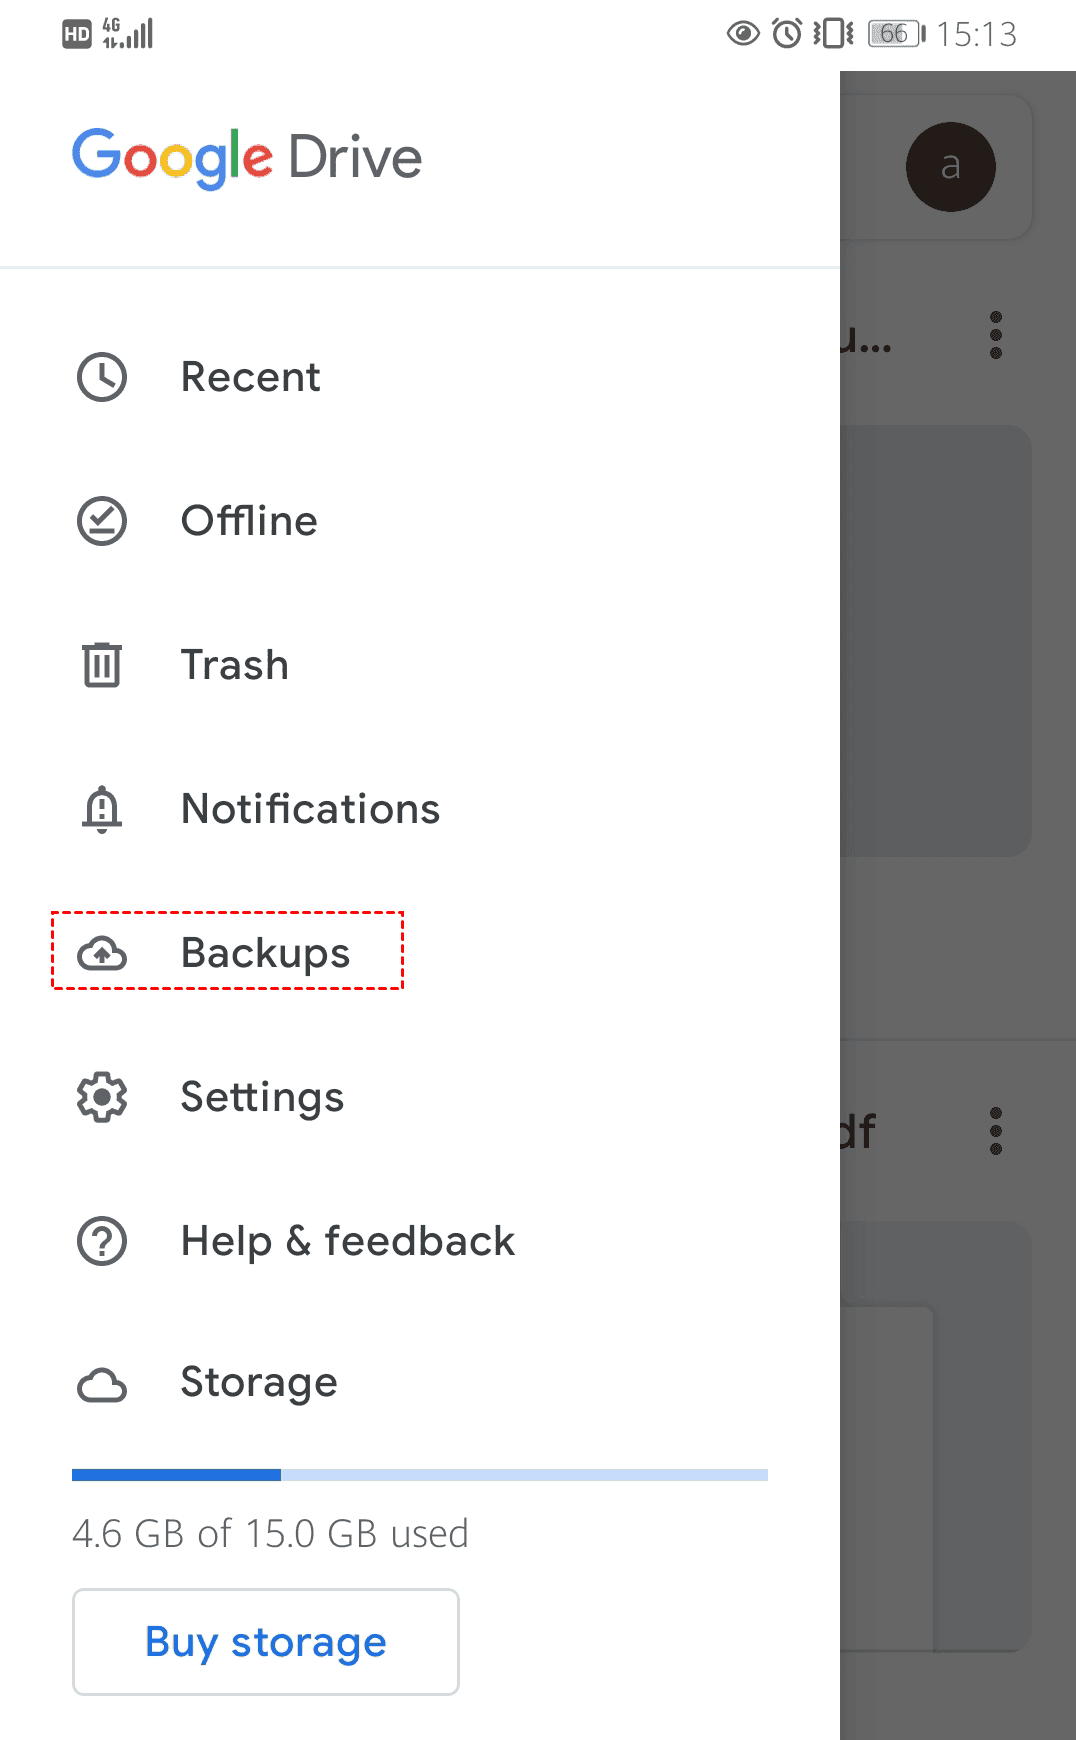
Problem: Backup not found. Ensure that backups are enabled in your Google account settings, and you are logged in using the same Google account used to create the backup. Check your Google Drive storage to verify the backup's existence. According to Google support pages, backups may be automatically deleted if a device is inactive for an extended period.
Problem: Slow restoration process. This is often due to a slow or unstable internet connection. Try connecting to a different Wi-Fi network or using a wired connection (if possible) to improve the speed. Consider doing the restoration at night, where network usage is less.
Problem: Incomplete data restoration. Verify that all the apps you want to restore are compatible with your new device and Android version. Clear cache of Google Play Services and Google Play Store and restart the device.
Maintaining Data Security and Backup Hygiene
Regularly backing up your data is crucial, but maintaining data security is equally important. Enable two-factor authentication on your Google account to prevent unauthorized access to your backups.
Additionally, review your Google account's backup settings periodically to ensure that the data you want to protect is actually being backed up. Consider using Google One to expand the storage and manage backups more effectively.
Looking Ahead: The Future of Data Restoration
Google continues to refine its backup and restore system, aiming to make it even more seamless and user-friendly. Future iterations may include more granular control over what data is backed up and restored, faster restoration speeds, and improved integration with other Google services.
For now, understanding the current backup and restore process, and maintaining good data security practices, is paramount for protecting your digital life. Always refer to official Google support documentation for the latest information and troubleshooting guidance.

![How To Restore A Backup From Google [3 Effective Ways] How to Restore Backup from Google Drive](https://images.anyrecover.com/anyrecoveren/assets/article/android_recovery/restore-files-from-google-drive.png)
![How To Restore A Backup From Google [3 Effective Ways] How to Restore Backup from Google Drive](https://images.anyrecover.com/anyrecoveren/assets/article/android_recovery/google-drive-storage-section-backups.png)


![How To Restore A Backup From Google [2 Ways] How to Restore Android Phone from Google Backup Selectively](https://i.ytimg.com/vi/AppKW-7xIvM/maxresdefault.jpg)