How To Wire Well Pressure Switch
A reliable water supply is the lifeblood of countless homes and businesses, often taken for granted until a sudden interruption throws daily routines into chaos. At the heart of a smoothly functioning well water system lies a seemingly unassuming component: the well pressure switch. This critical device, responsible for maintaining consistent water pressure, can falter, leaving homeowners facing the frustrating prospect of sputtering faucets and dysfunctional appliances. Correctly wiring a well pressure switch is paramount, not only for restoring water flow but also for ensuring the safety and longevity of the entire well system.
This article provides a comprehensive guide to safely and effectively wiring a well pressure switch. It will delve into the necessary tools, safety precautions, step-by-step wiring instructions, troubleshooting common issues, and the importance of regular maintenance to prevent future disruptions. We will consult industry best practices and expert advice to equip readers with the knowledge and skills to tackle this essential plumbing task. Improper wiring can lead to equipment damage, electrical hazards, and inconsistent water pressure, underscoring the importance of meticulous attention to detail.
Understanding the Well Pressure Switch
A well pressure switch is an electromechanical device that monitors the water pressure in a well system and automatically turns the well pump on and off to maintain a pre-set pressure range. It acts as the central nervous system of the water system, ensuring a steady and reliable water supply. When the water pressure drops below a certain threshold, the switch activates the pump, replenishing the water supply in the pressure tank. Once the desired pressure is reached, the switch deactivates the pump, preventing over-pressurization.
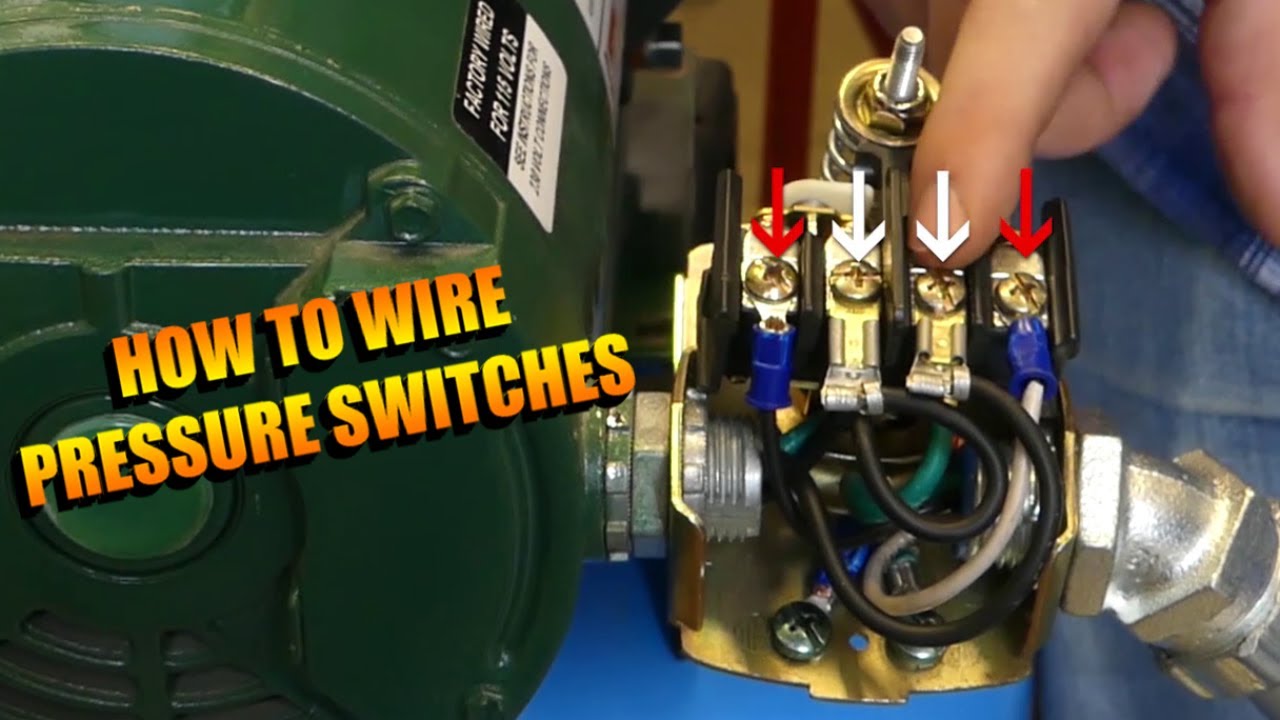
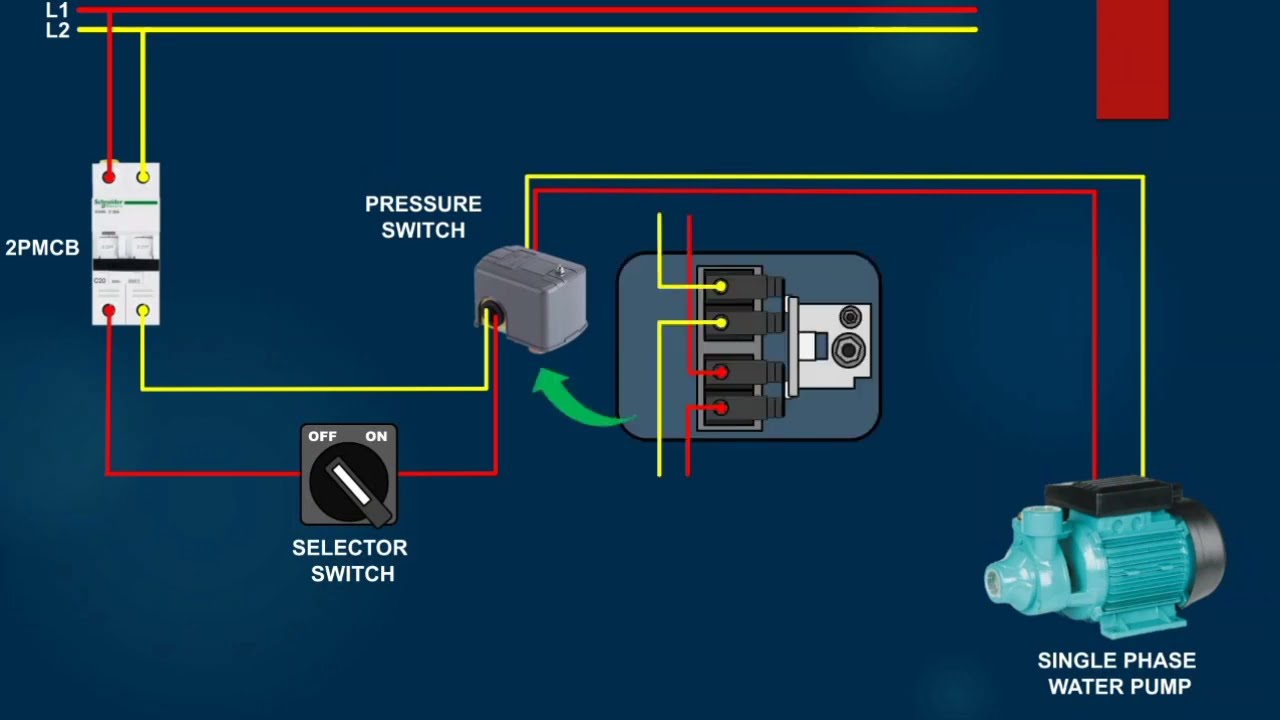
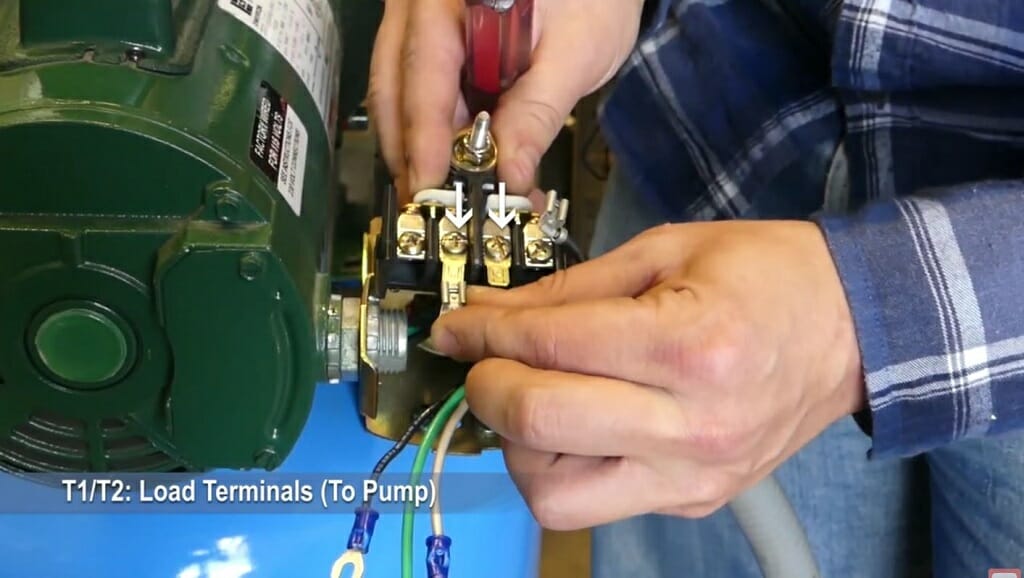
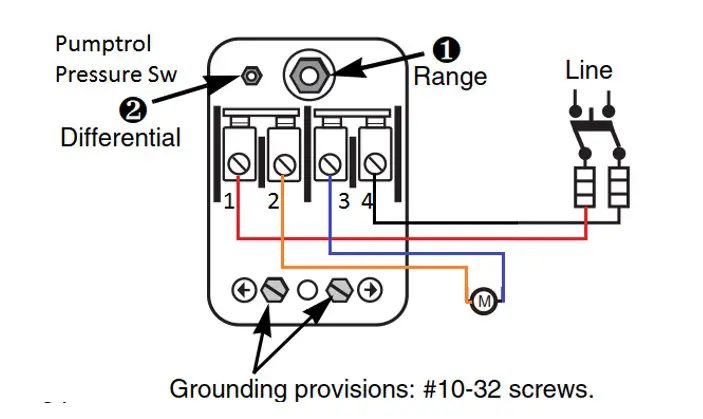
These switches typically have four terminals, although some models might have two. These terminals are usually labeled L1, L2, T1, and T2. L1 and L2 connect to the power supply, while T1 and T2 connect to the pump. Understanding these connections is crucial for accurate wiring.
Essential Tools and Materials
Before commencing any electrical work, ensure you have the necessary tools and materials to perform the job safely and effectively. Gathering everything beforehand minimizes interruptions and enhances safety. Here’s a checklist of essential items:
- Safety Glasses: Protect your eyes from debris and accidental sparks.
- Insulated Gloves: Crucial for preventing electric shock.
- Voltage Tester: To confirm the power is off before working on any wires.
- Screwdrivers (various sizes): Both flathead and Phillips head may be required.
- Wire Strippers/Crimpers: For preparing wires and making secure connections.
- Electrical Tape: For insulating wire connections.
- New Well Pressure Switch: Ensure it's compatible with your existing system.
- Wire Connectors (wire nuts): For joining wires securely.
- Pliers: For gripping and manipulating wires.
Always prioritize safety. Never work on electrical systems without proper protective gear. Double-check that the power is off before touching any wires.
Safety First: Disconnecting the Power
The most critical step before working on any electrical component is to disconnect the power supply. Failure to do so can result in severe electric shock or even death. Locate the circuit breaker that controls the well pump and switch it to the "OFF" position.
After switching off the breaker, use a voltage tester to confirm that the power is indeed off at the pressure switch location. Touch the tester probes to the terminals and ensure no voltage is detected. This step is non-negotiable.
Even after confirming the power is off, treat all wires as if they are live. Adhering to this principle ensures a safe working environment.
Step-by-Step Wiring Instructions
With the power safely disconnected, you can proceed with the wiring process. Follow these steps meticulously for a correct and safe installation:
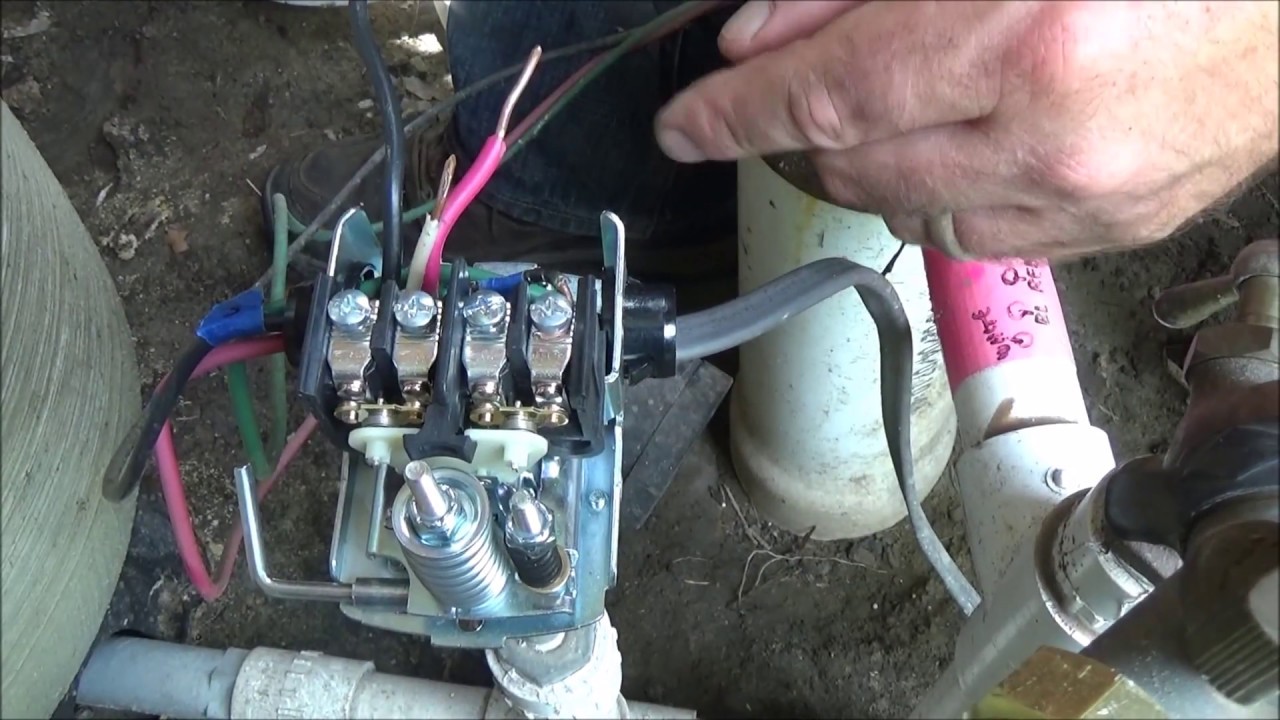
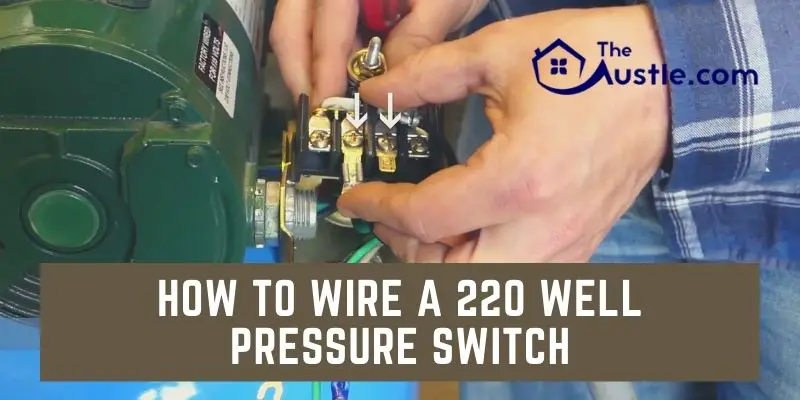
- Remove the Old Switch: Carefully disconnect the wires from the old pressure switch, noting their positions. It's helpful to take a picture or draw a diagram to remember which wire goes where.
- Prepare the Wires: Using wire strippers, carefully remove about ½ inch of insulation from the ends of each wire. Avoid nicking the copper wire, as this can weaken it.
- Connect the Wires: Refer to the wiring diagram that came with your new pressure switch. Connect the wires to the corresponding terminals (L1, L2, T1, T2). Typically, the power supply wires (from the breaker) connect to L1 and L2, and the pump wires connect to T1 and T2. Use wire connectors (wire nuts) to securely join the wires. Twist the wires together tightly and then screw on the wire nut. Give the connection a gentle tug to ensure it's secure.
- Secure the Connections: Wrap each wire nut with electrical tape to provide an extra layer of insulation and prevent accidental shorts. This step is particularly important in damp environments.
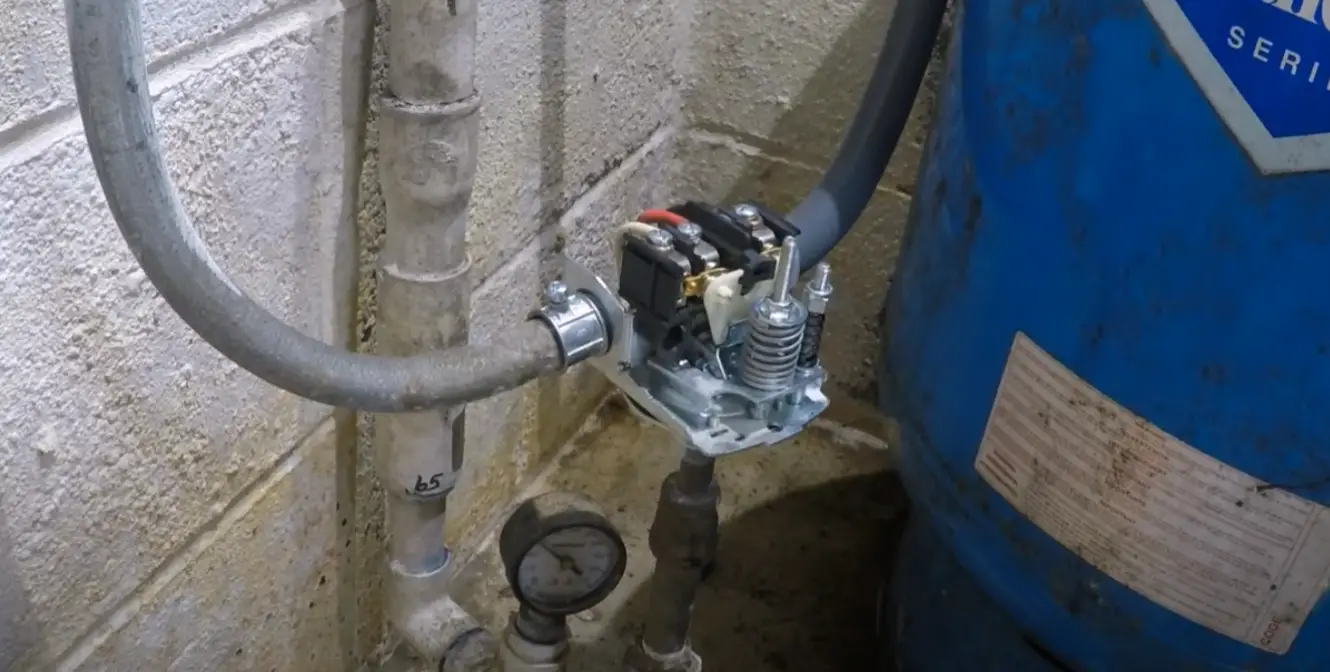
- Mount the New Switch: Carefully mount the new pressure switch in the same location as the old one, ensuring it is securely attached to the plumbing fitting.
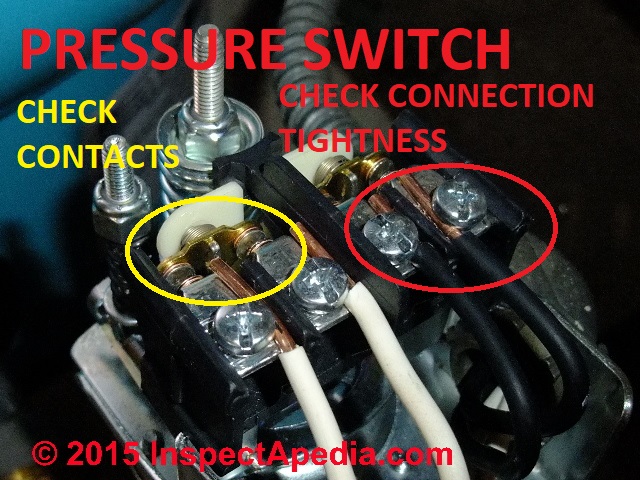
Double-check all connections to ensure they are tight and properly insulated. A loose connection can cause arcing, which is a fire hazard.
Troubleshooting Common Issues
Even with careful wiring, issues can sometimes arise. Here are some common problems and their potential solutions:
- Pump Not Turning On: Check the circuit breaker to ensure it hasn't tripped. Verify the pressure switch is properly wired and that the pressure setting is appropriate. A faulty pump motor could also be the culprit.
- Pump Not Turning Off: This could indicate a problem with the pressure switch itself or with the pressure tank. Check the pressure tank's air charge. A defective pressure switch may need replacement.
- Erratic Pressure: Fluctuating pressure could be due to a clogged pressure switch, a leak in the system, or a failing pressure tank. Clean the pressure switch port or address any leaks.
Consult a qualified electrician or plumber if you are unsure about any aspect of troubleshooting. Never attempt repairs you are not comfortable with.
Regular Maintenance and Prevention
To ensure the longevity and reliable operation of your well pressure switch, regular maintenance is essential. Periodically inspect the switch for signs of corrosion or damage. Clean the pressure switch port to remove any sediment or debris that may accumulate and affect its performance. Consider having your entire well system professionally inspected annually.
Maintaining a consistent water pressure can save energy and extend the life of your well pump. Preventing problems is always more cost-effective than addressing them after they arise.
Looking Ahead: Smart Well Systems
The future of well water systems is leaning towards smart technology. Smart well controllers offer advanced features such as remote monitoring, leak detection, and automated adjustments. These systems can optimize pump performance, conserve water, and provide early warnings of potential problems. While still relatively new, smart well systems promise to further enhance the reliability and efficiency of well water supplies.
Wiring a well pressure switch correctly is a fundamental skill for homeowners relying on well water. By following the safety precautions and detailed instructions outlined in this guide, you can ensure a reliable and efficient water supply. Remember to prioritize safety, double-check your work, and seek professional help when needed. With proper care and maintenance, your well pressure switch will continue to provide years of dependable service, keeping the water flowing freely.