Installing Ditra Heat Over Concrete

The popularity of radiant floor heating systems is growing, with homeowners increasingly seeking energy-efficient and comfortable heating solutions. One popular method for installing these systems, particularly over concrete slabs, involves the Ditra Heat system.
Ditra Heat, manufactured by Schluter Systems, integrates uncoupling, waterproofing, load support, and heat distribution within a single layer.
Understanding Ditra Heat Installation Over Concrete
Installing Ditra Heat over concrete requires careful preparation and adherence to manufacturer guidelines. The process involves several key steps. These include assessing the concrete slab, applying thin-set mortar, embedding the Ditra Heat membrane, installing the heating cables, and finally, tiling over the system.
Concrete Slab Assessment
Before any work begins, the concrete slab must be thoroughly inspected. Cracks, unevenness, and moisture issues can compromise the performance of the heating system. Schluter Systems recommends that the concrete slab be structurally sound and free from any contaminants that could interfere with the bond of the thin-set mortar.
The company also stresses the importance of moisture testing to ensure the slab meets acceptable levels for installation.
Thin-Set Mortar Application
The next step is to apply a layer of thin-set mortar specifically designed for use with Ditra Heat. This mortar acts as the bonding agent between the concrete slab and the Ditra Heat membrane. Schluter Systems provides a list of recommended thin-set mortars to ensure proper adhesion and performance.
Using a notched trowel, the thin-set is applied evenly across the concrete surface.
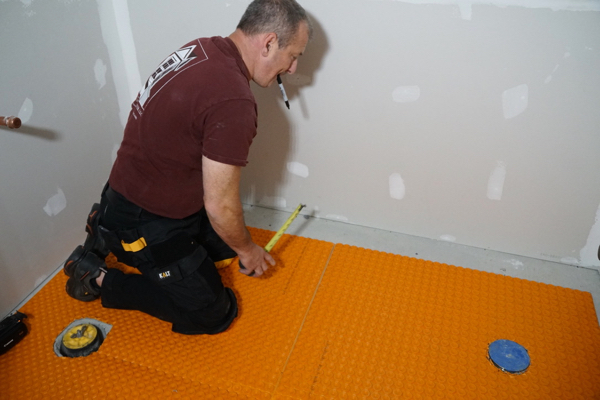
Embedding the Ditra Heat Membrane
The Ditra Heat membrane is then embedded into the thin-set mortar. This membrane features a studded design that allows for the heating cables to be easily snapped into place.
The uncoupling properties of the membrane also help to prevent cracking in the tile layer due to movement in the concrete slab.
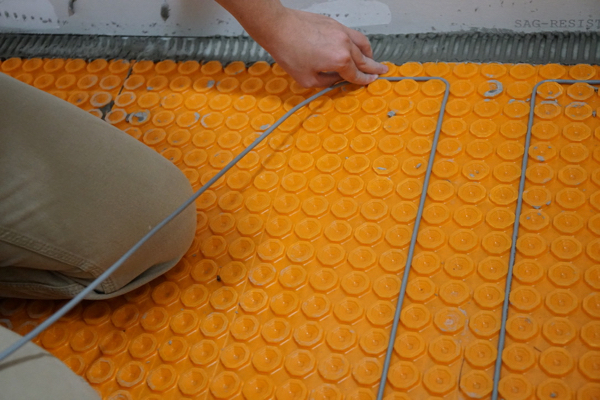
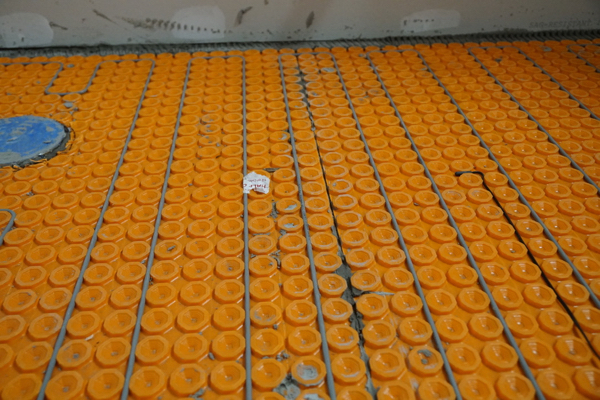
Heating Cable Installation
Once the membrane is securely in place, the heating cables are installed. These cables are carefully snapped into the studs of the Ditra Heat membrane, ensuring even spacing and distribution of heat.
The cable spacing is determined by the desired heat output, typically ranging from 3" spacing for higher output to 4" spacing for lower output. The thermostat is then connected to the heating cables to control the temperature.
Tiling Over the System
The final step is to tile over the Ditra Heat system. This requires another layer of thin-set mortar, this time applied over the Ditra Heat membrane. Schluter Systems recommends using a non-modified thin-set mortar for this purpose.
The tile is then installed according to standard tiling practices.
Significance and Impact
The installation of Ditra Heat over concrete offers several benefits to homeowners. It provides a comfortable and energy-efficient heating solution.
The uncoupling properties of the Ditra Heat membrane also help to protect the tile from cracking, extending the lifespan of the floor.
Furthermore, the waterproofing properties of the membrane make it suitable for use in bathrooms and other wet areas. Schluter Systems reports a growing demand for its Ditra Heat product, citing increased awareness of its benefits among homeowners and contractors.
Proper installation, however, is crucial to ensure optimal performance and longevity of the system. Following the manufacturer's instructions and using recommended materials are essential for a successful Ditra Heat installation over concrete.
"Homeowners should always consult with qualified installers to ensure their radiant heating system is installed correctly and safely," states a representative from the Tile Council of North America (TCNA).