4 Digit 7 Segment Display Counter Arduino Code

Ever wanted to make something blink and count? Something that looks like it came straight out of an old sci-fi movie? You can, and it's surprisingly easy with an Arduino and a 4-digit 7-segment display!
What's the Big Deal?
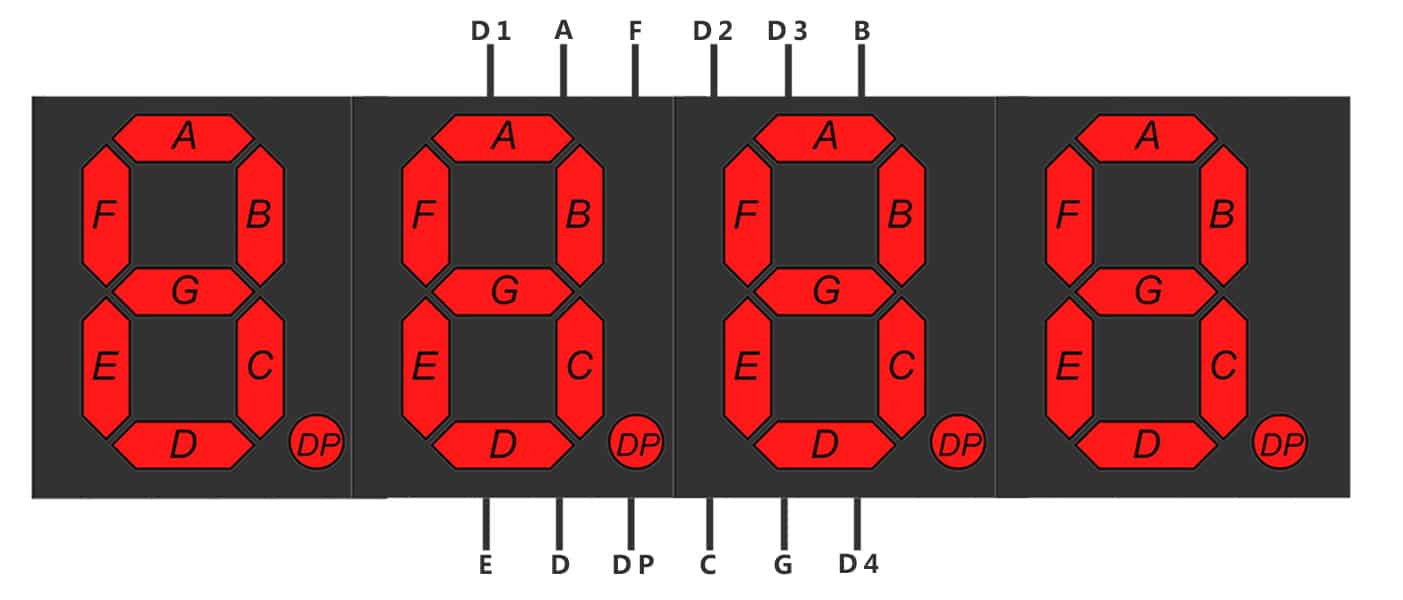
Imagine a digital clock. Now imagine building one yourself! A 4-digit 7-segment display is basically four of those numbers side-by-side. It's like a tiny, reusable scoreboard you can control.
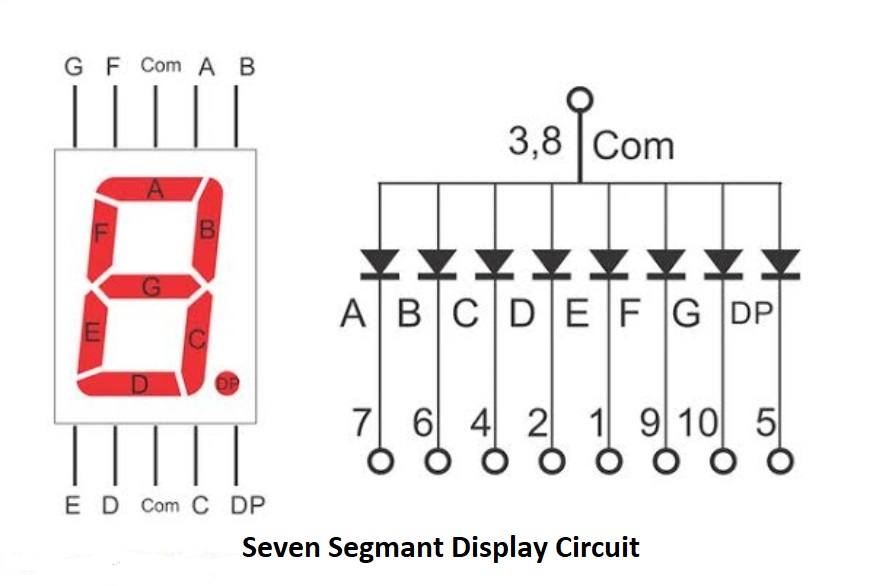
The beauty lies in its simplicity. Each digit is made of seven little lights (segments), and you can turn them on or off to form any number from 0 to 9. Combine four of these, and boom – you can count to 9999!
With a bit of Arduino code, you can make this display count up, count down, or even show random numbers. It’s pure digital magic!
The Fun Factor
So, why is this so cool? It's all about seeing your code come to life. Writing code to make a light blink is one thing. Building a counter is another level of awesome!
Think of the possibilities! You could build a timer for your next board game night. Or a counter for how many cups of coffee you've had. (Maybe don't actually do that one!).
The best part? It's a fantastic learning experience. You get to understand how digital displays work and how to control them with code.
Decoding the Code
The Arduino code itself isn't as scary as it might seem. It's all about telling the Arduino which segments to turn on for each digit.
Think of it like a recipe. Each number has a specific combination of ingredients (segments) that need to be activated. The Arduino simply follows the recipe.
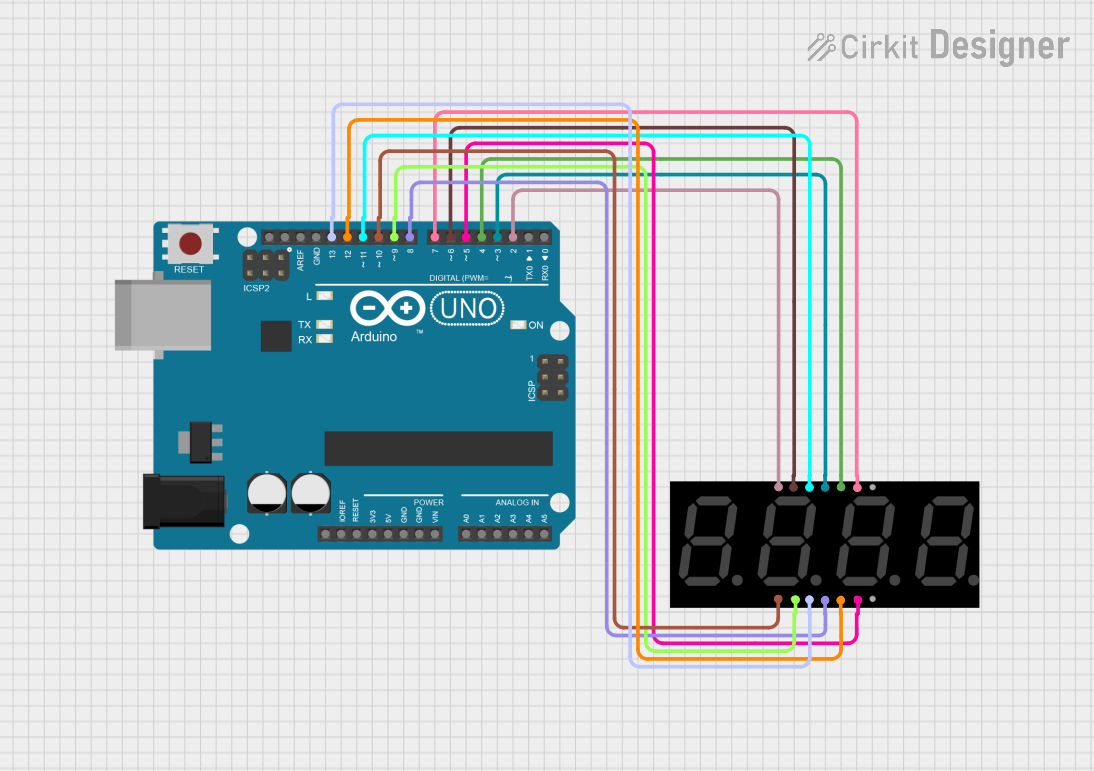
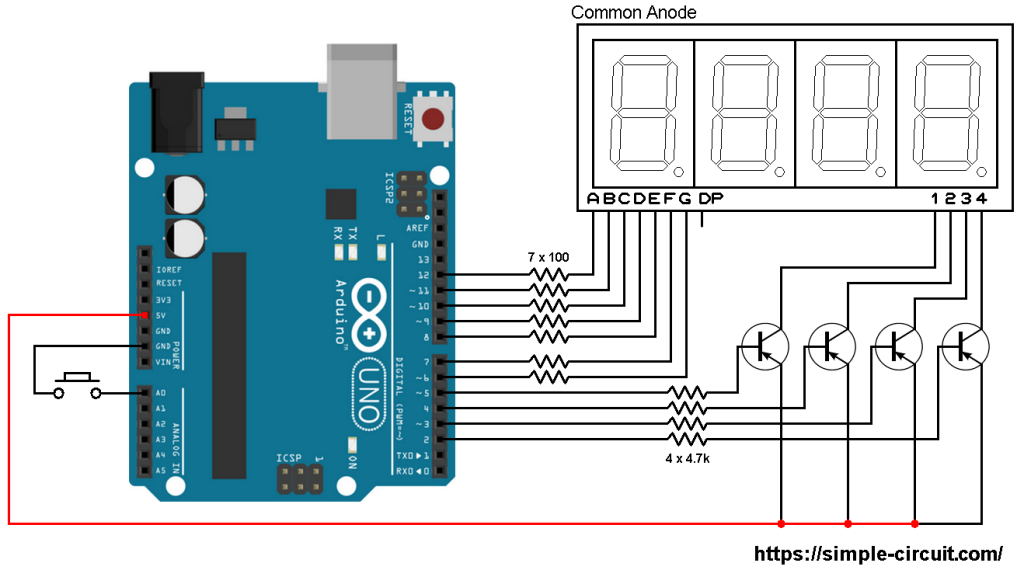
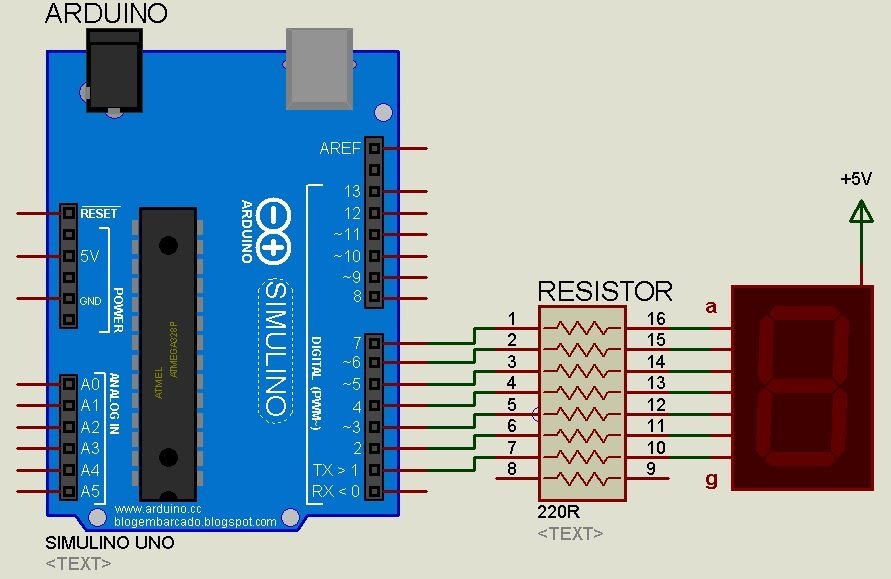
You'll need to define which pins on your Arduino are connected to each segment of the display. Then, you create a function that takes a number as input and lights up the correct segments.
Beyond Counting
Don't stop at just counting! The 4-digit 7-segment display is a gateway to many other projects.
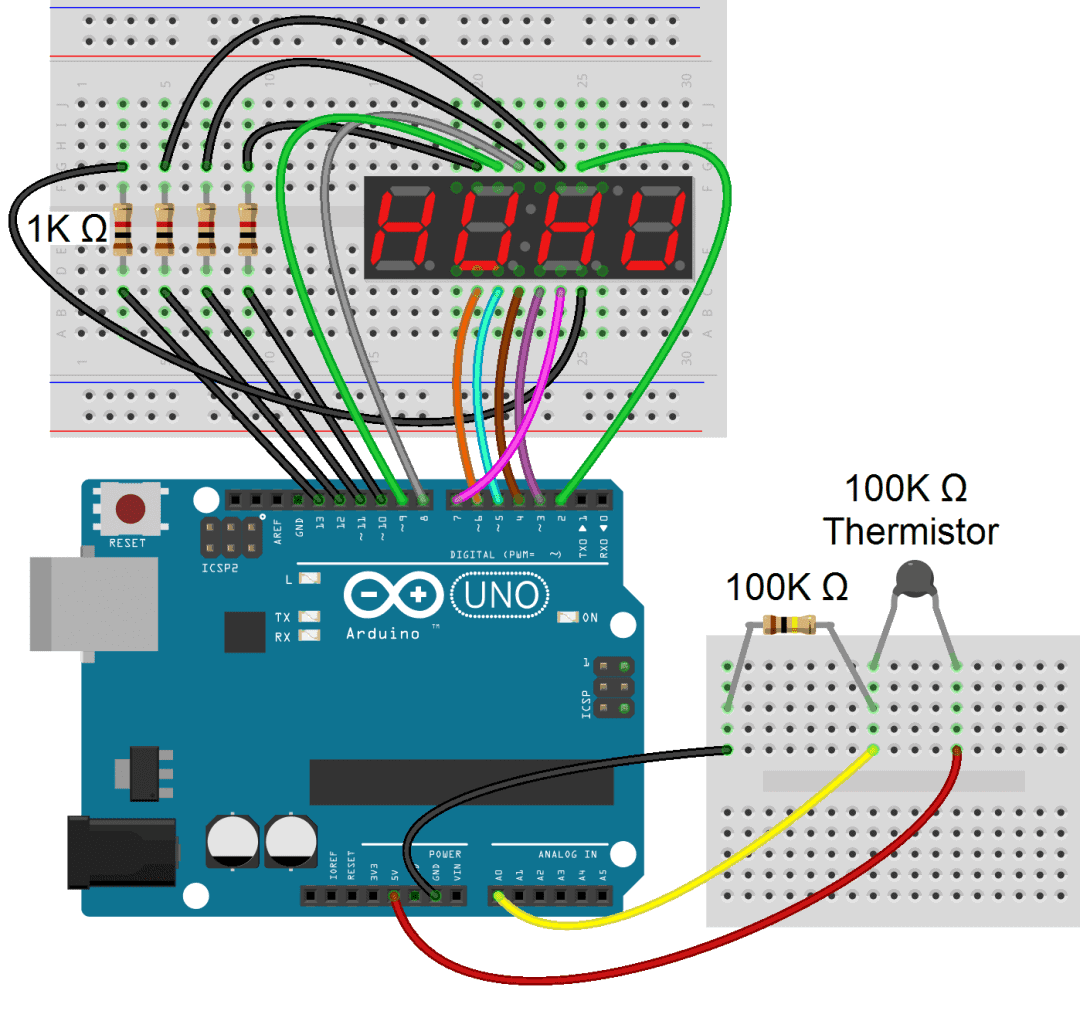
Want to display the temperature from a sensor? Hook up a temperature sensor to your Arduino and display the reading. Want to create a simple game? Use buttons to control the counter and create a high score display!
These displays can be part of something bigger. Envision using it in a DIY alarm clock or a custom-built stop watch for timing races with your friends.
Ready to Get Started?
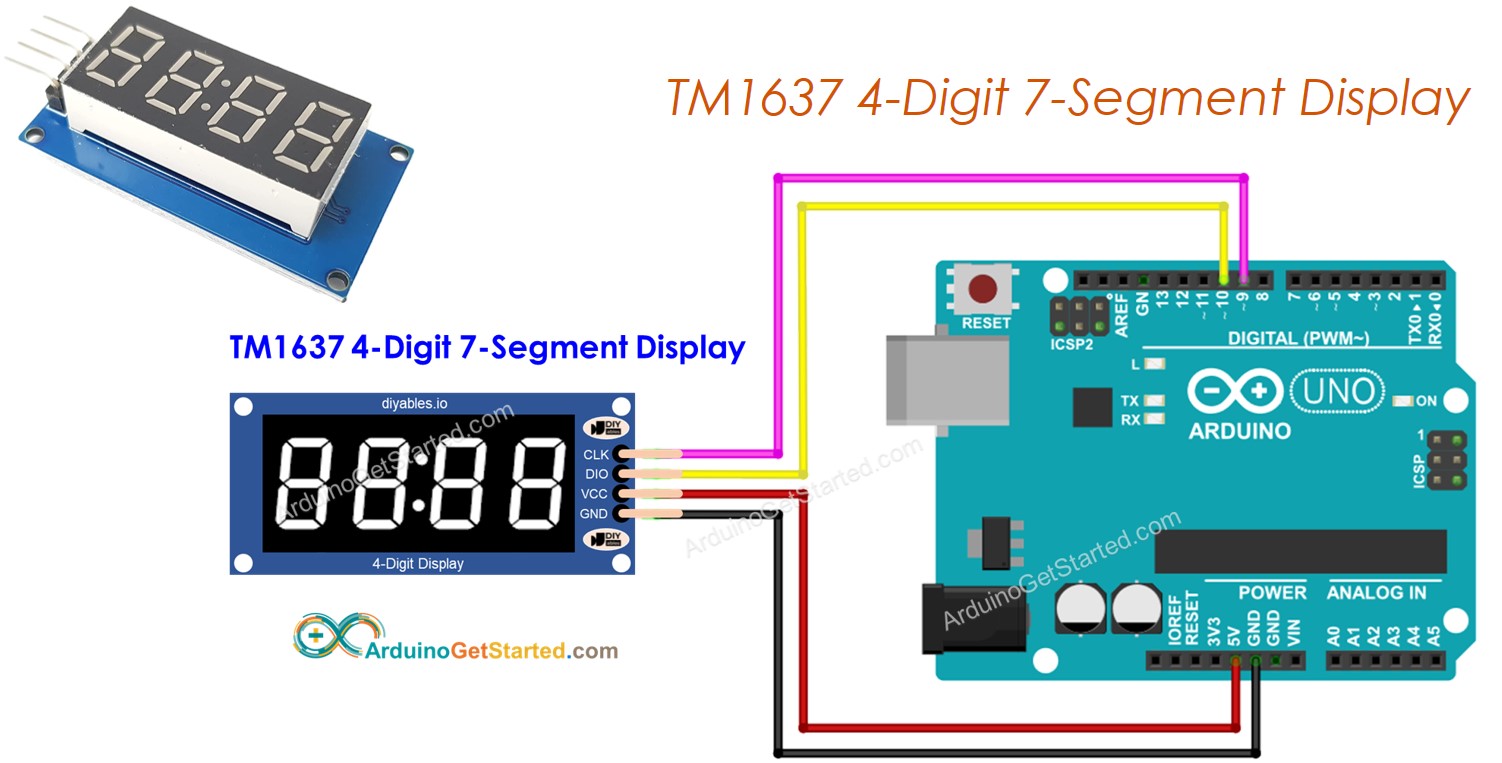
There are tons of online tutorials and examples to get you started. Just search for "Arduino 4-digit 7-segment display counter" and you'll find a wealth of information.
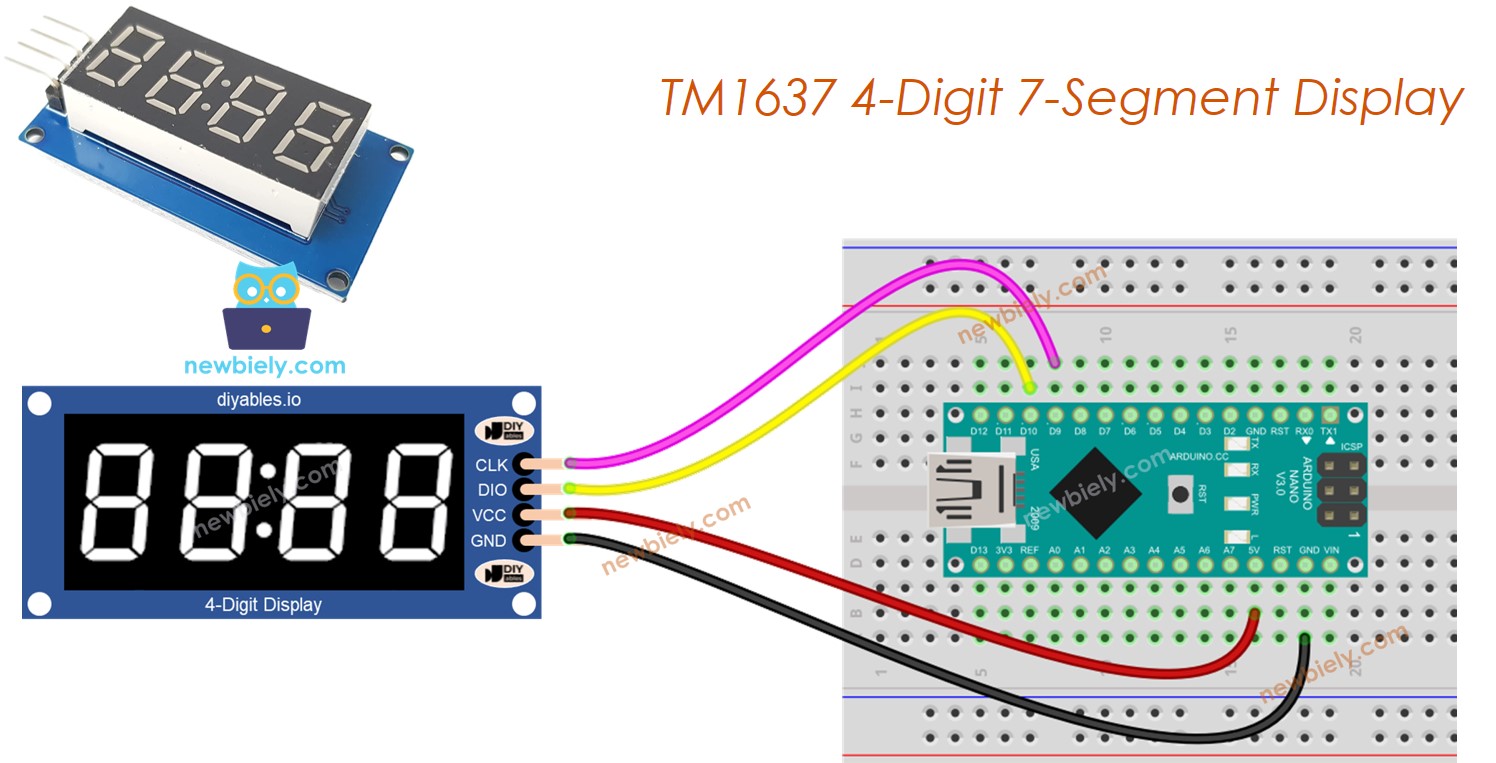
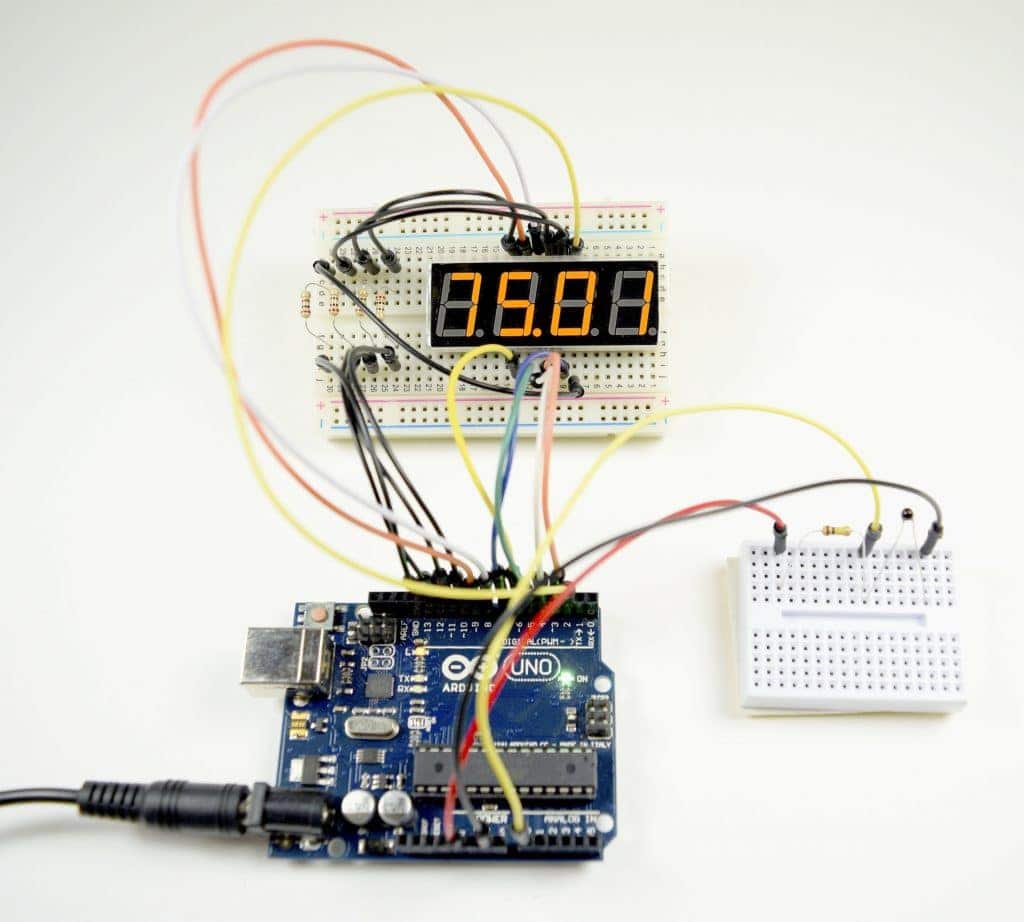
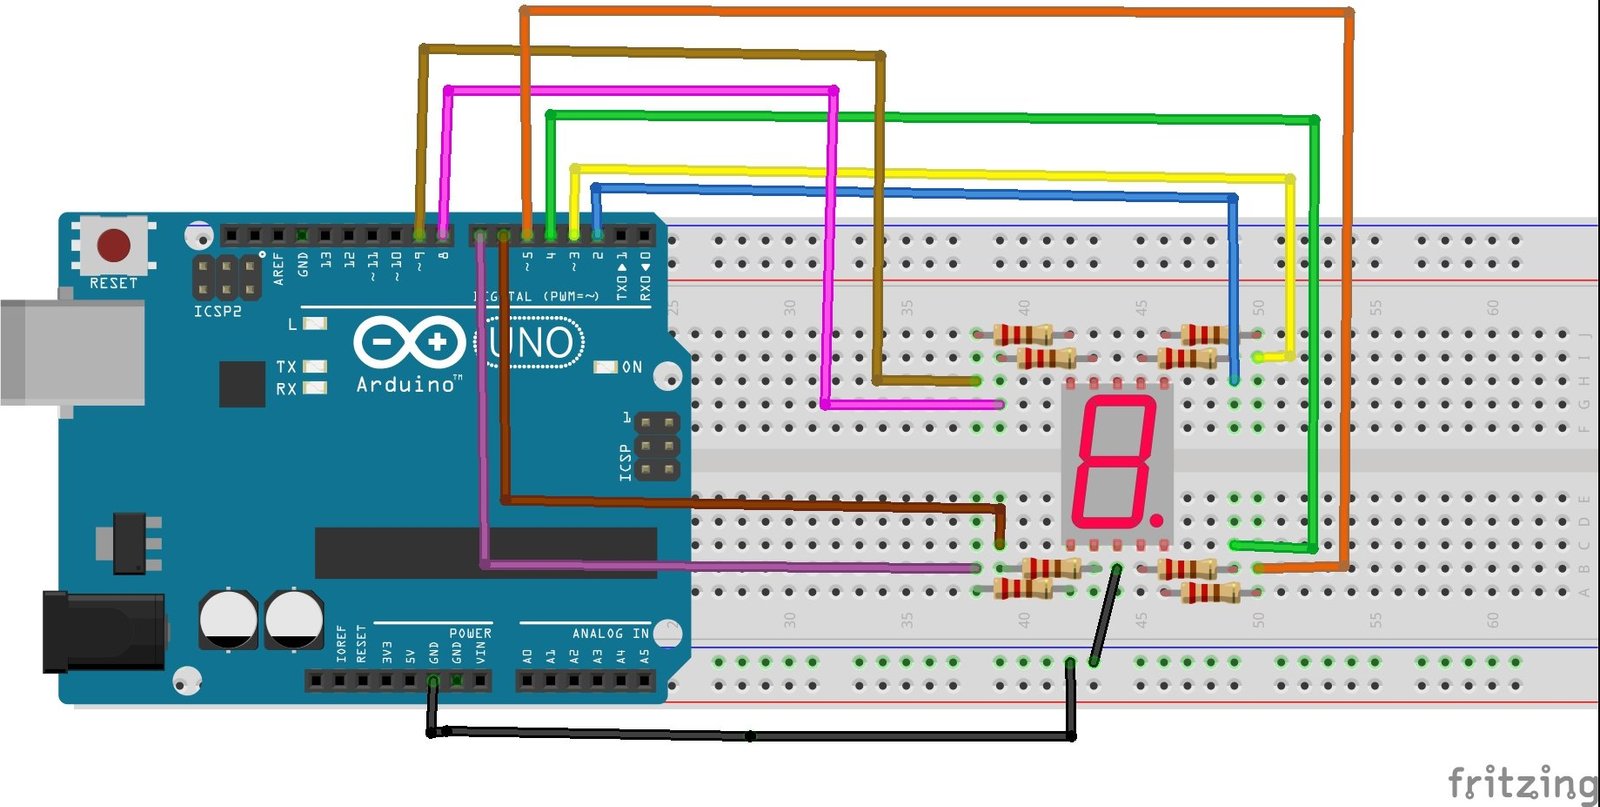
You’ll need an Arduino board, a 4-digit 7-segment display, some resistors, and a handful of jumper wires. These parts are readily available and relatively inexpensive.
The learning curve is gentle, and the feeling of accomplishment when you see your counter ticking away is priceless. Give it a try! You might just surprise yourself with what you can create.
So, ditch the pre-made gadgets for a while and dive into the world of DIY electronics. You'll have fun and learn something new along the way.
The possibilities with Arduino and 7-segment displays are truly endless. Start simple, and watch your imagination take over.