Easy Waterfall Painting - Step By Step

So, you want to paint a waterfall? Awesome! You’ve come to the right place. I promise, it’s not as scary as it looks. We’re going to make it so easy, you’ll practically hear the rushing water.
What you'll need (aka, the Fun Supplies!)
First, let's gather our supplies. You’ll need some paint, duh! Acrylics are great for beginners, they’re like the friendly puppies of the art world: forgiving and eager to please.
Grab a canvas or some sturdy paper. Next up? Brushes! A few different sizes will do the trick; think a big fluffy one and a smaller, pointy one for details.
Don’t forget a cup of water and a palette. And finally, paper towels, because let’s be honest, things are about to get messy in the best way possible.
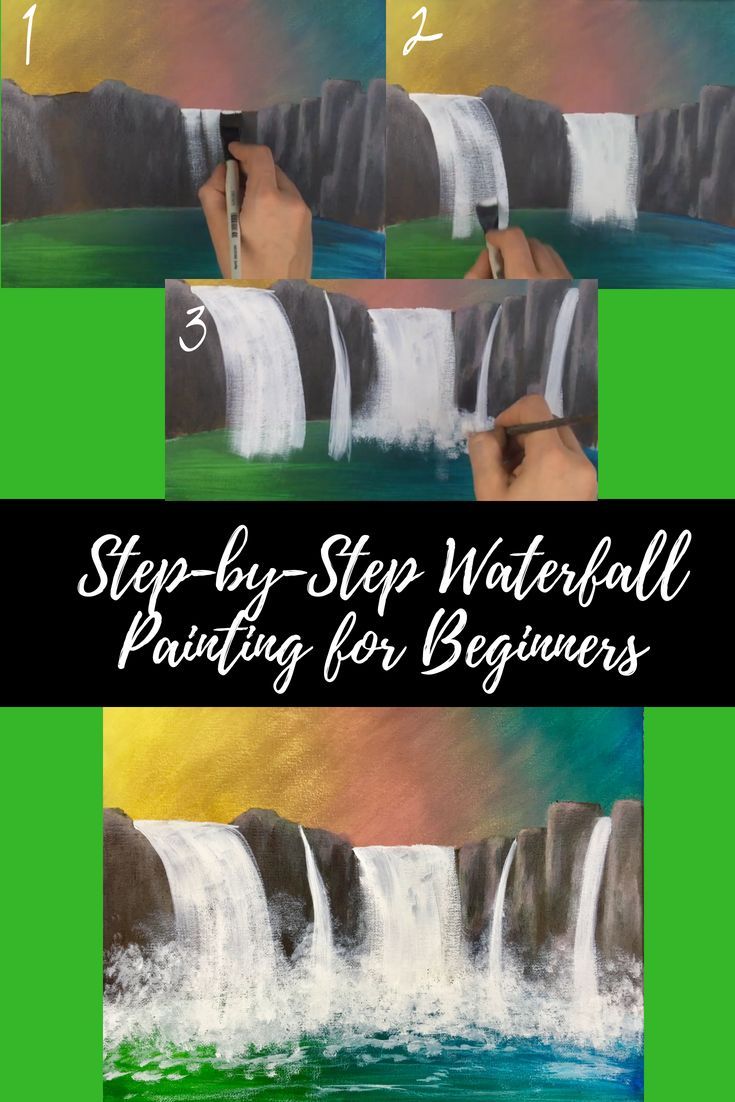
Step 1: Blocking in the Basics
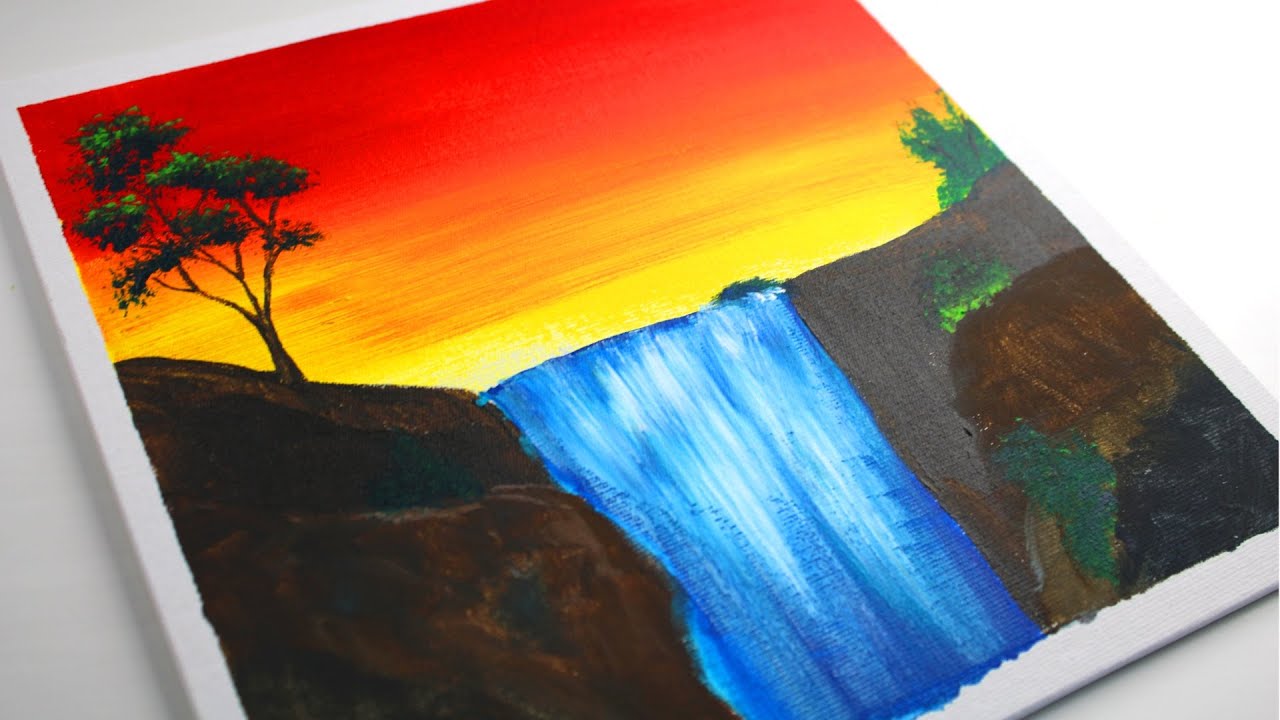
Start by sketching the outline of your waterfall. Don’t worry about being perfect; think of it as making friends with the canvas. Lightly draw where the rocks and water will go.
Now, for the background. Paint the sky and the surrounding foliage. Blues and greens are your friends here. We're not aiming for photo-realism, remember? We want happy little trees (thanks, Bob Ross!).
Next up is the rocks, blocking in the general colors. Use shades of brown and gray, adding in some darker areas for shadows. It’s like building a fortress, but with paint!
Step 2: The Waterfall Itself!
Alright, here comes the star of the show: the waterfall! Mix some white paint with a touch of blue. Start painting the general shape of the falling water.
Don’t make it one solid block of white! Leave some gaps and uneven edges to suggest movement and texture. Water isn't a wall, after all.
Use a lighter blue to paint some shadows within the waterfall. This will create depth and make it look more realistic. Think about how the light would hit the water as it falls.
Step 3: Adding the Details (aka, the Sparkle!)
Here comes the fun part: adding highlights! With a thin brush and some pure white paint, create thin lines and splashes to represent the water’s movement. These are like the water's own fireworks.
Pay attention to where the water hits the rocks at the bottom. Add some extra white paint to show the splashing and foam. It's all about capturing that energy!
Now, add some dark shadows underneath the rocks. This will help to ground the waterfall and make it look more three-dimensional. It's all about creating contrast.
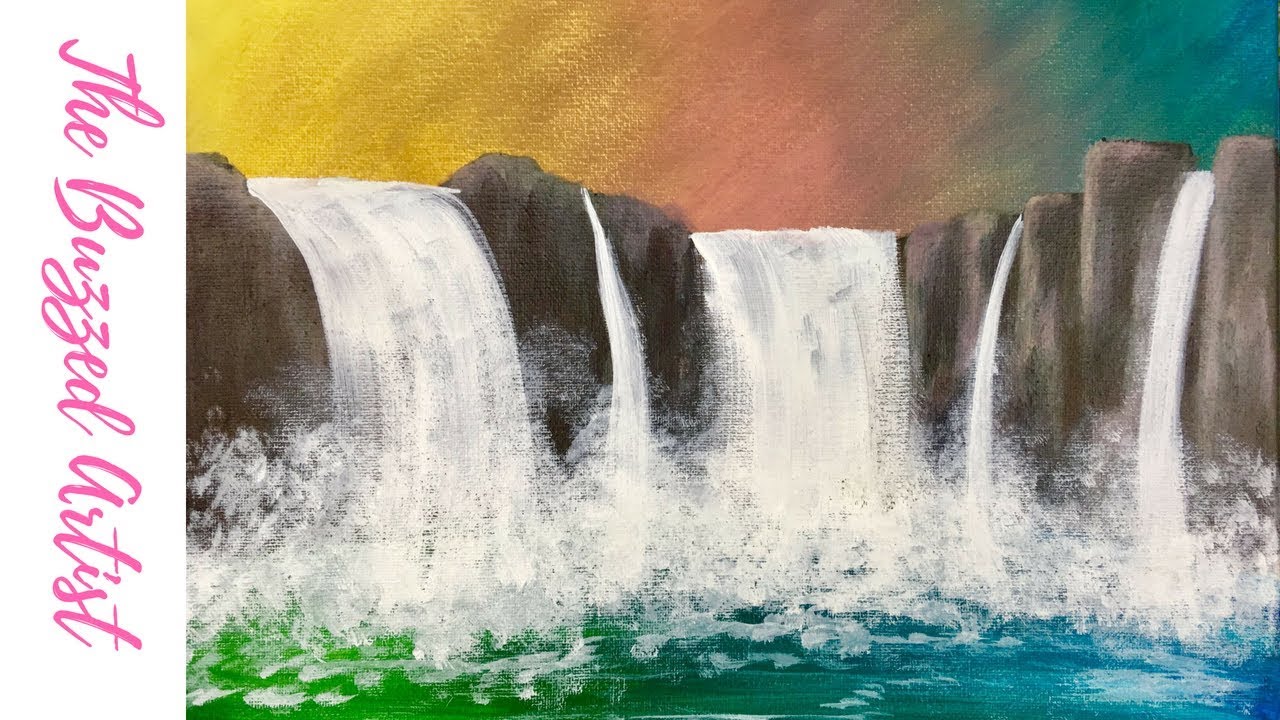
Step 4: Finishing Touches
Step back and take a look at your painting. What does it need? Maybe some more highlights, or some darker shadows?
Add some details to the surrounding rocks and foliage. This will help to integrate the waterfall into the landscape. Think about adding some moss or some small plants clinging to the rocks.
And finally, sign your name! You’ve created a masterpiece! (Okay, maybe not a *masterpiece* yet, but definitely something to be proud of!) Congratulations!
Important Art Secrets
Don't be afraid to experiment! Art is all about having fun and exploring. Embrace the happy accidents. It’s like learning to ride a bike: you’re going to wobble a bit, but eventually, you’ll be soaring!
If you mess up, don’t panic! You can always paint over it or adjust it. Paint is incredibly forgiving, just like your grandma.
Most importantly, have fun! Art should be enjoyable. Relax, put on some music, and let your creativity flow. Now go forth and paint some amazing waterfalls!