How To Build A Cardboard Vending Machine
Okay, let’s be honest. We've all looked at a vending machine and thought, "I could totally build that." Especially when it's decided to swallow your dollar without dispensing your precious snack!
First, the Blueprint (Kind Of)
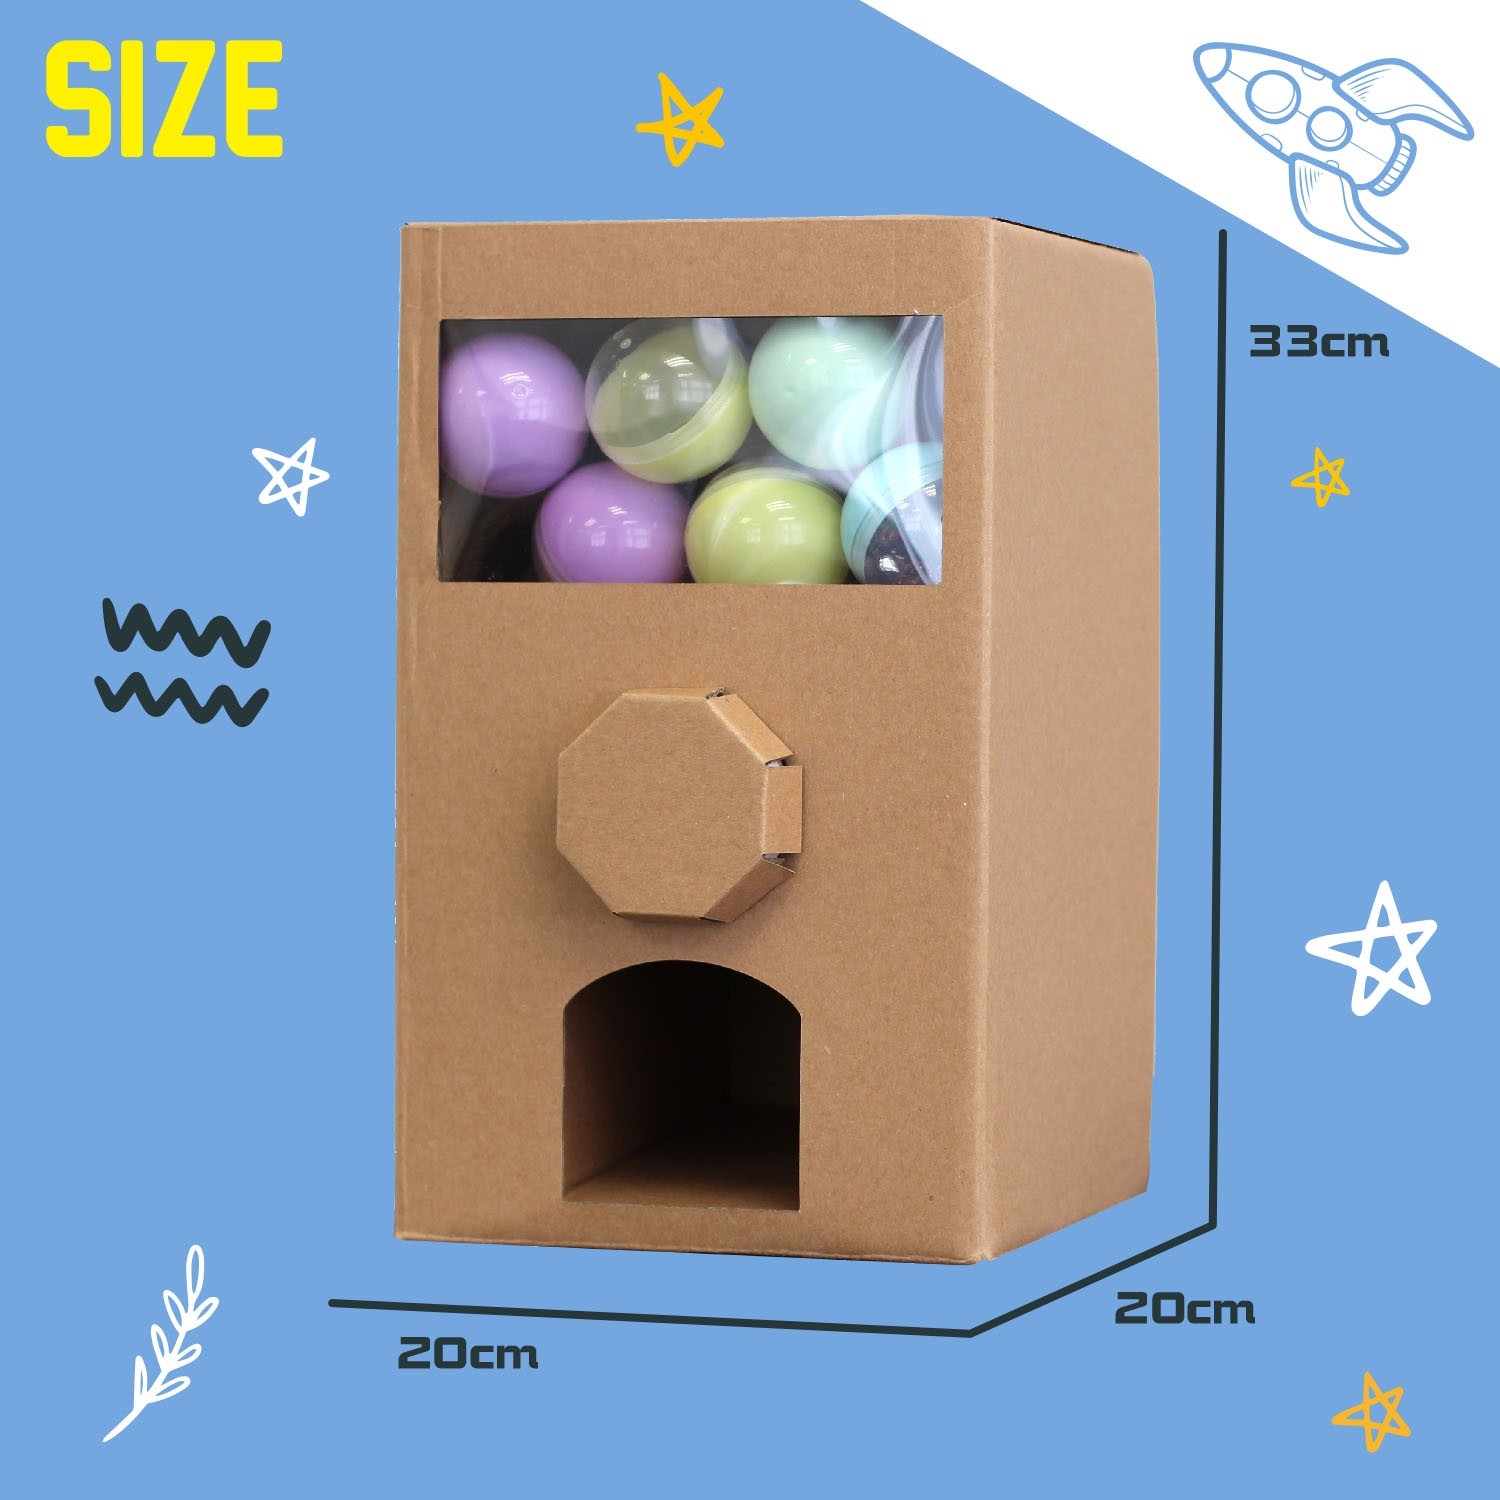
Forget complicated diagrams. We're doing this the cardboard way. Grab a big cardboard box. Seriously, the bigger, the better. You need space for snacks!
Now, imagine your vending machine. Think of it as a multi-story cardboard condo. Each floor will hold a different treat. The key is organization!
Cutting Time! (Safety First, Obviously)
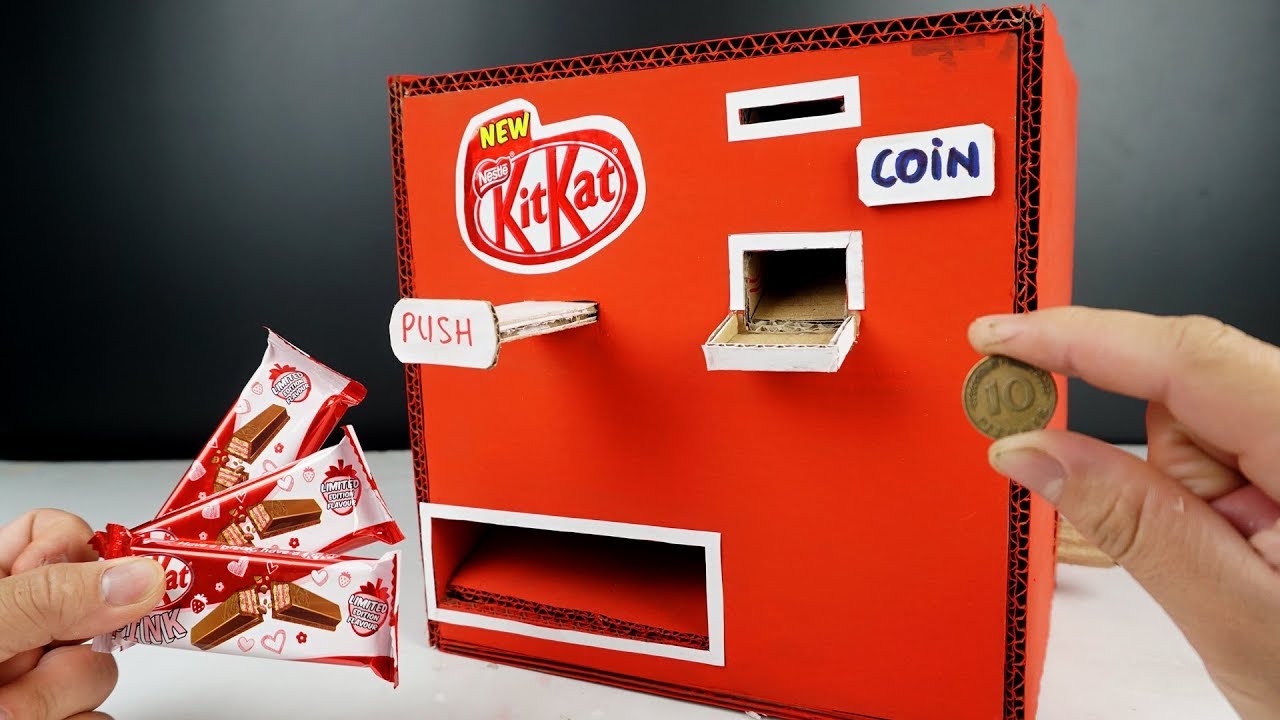
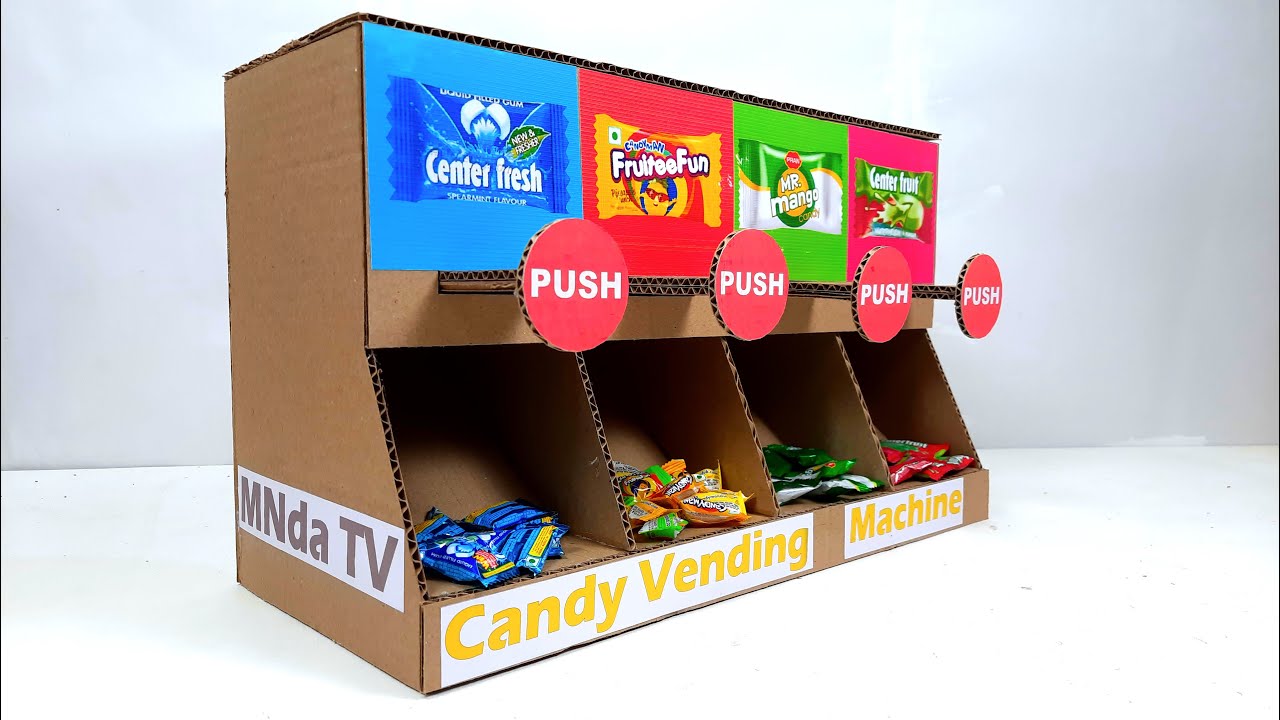
Carefully cut rectangular slots on the front. These are your snack windows. Make sure they're big enough for people to see the glorious treats inside.
This is where things get tricky. You need a delivery system. My "unpopular" opinion? Simple is best. Forget fancy spirals and levers.
The "Push-and-Pray" Method
Create individual shelves for each snack. Use cardboard strips to make little walls. This stops everything from tumbling out at once.
Now, for the dispensing. Behind each window, you need a push mechanism. Think cardboard flaps or levers that, when pushed, nudge the snack forward.
It's all about the nudge! It may take a few tries to get the angle just right. But isn't that half the fun?
The Money Situation (aka The Honor System)
Let's face it, a real coin mechanism is beyond our cardboard capabilities. So, we're going with the honor system. A simple cardboard box with a slot for money will do.
Clearly label it with the price of each snack. Honesty is key, people! Although, let’s be real, you might need to be a strict manager to see any money going inside it.
Decoration Time! (Get Creative!)
This is where you can really let your personality shine. Paint it! Add stickers! Draw pictures of the snacks inside!
Don't forget a catchy name for your vending machine. "The Cardboard Convenience Store" has a nice ring to it. Or maybe "Snacktopia?"
Pro-tip: Use bright colors. They'll attract customers! (aka your family or roommates).
Snack Stocking (The Fun Part!)
Load up your vending machine with your favorite treats. Mini chocolate bars, bags of chips, maybe even some homemade cookies (if you're feeling ambitious).
Arrange them neatly. Presentation is important. A messy vending machine is a sad vending machine.
Consider adding price tags. Especially if your “customers” are prone to “forgetting” the prices.
Testing and Troubleshooting
Time for the moment of truth. Try dispensing each snack. See what works and what doesn't.
Chances are, something will get stuck. Don't panic! Cardboard engineering is all about trial and error. Adjust your flaps and levers as needed. This could take hours, but you didn’t have plans anyway, right?
Reinforce weak spots with tape. Lots and lots of tape. Duct tape is your best friend.
Congratulations! You (Probably) Built a Vending Machine!
Okay, maybe it's not a *perfect* vending machine. But you built something with your own two hands (and a lot of cardboard).
Embrace the imperfections. That's what makes it unique! And, let’s be honest, far more entertaining than a real, boring, mass-produced vending machine.
Now, go forth and vend! (Just don't expect to get rich). My unpopular opinion? The joy of creating is worth more than any amount of pocket change. Besides, the look on someone's face when they use your cardboard contraption is priceless.