How To Convert 3d Polyline To 2d

Ever wrestled with a 3D polyline that just refuses to flatten out? Like trying to fold a fitted sheet? Fear not, intrepid adventurer, because we're about to embark on a journey to tame that unruly beast and convert it into a perfectly obedient 2D line!
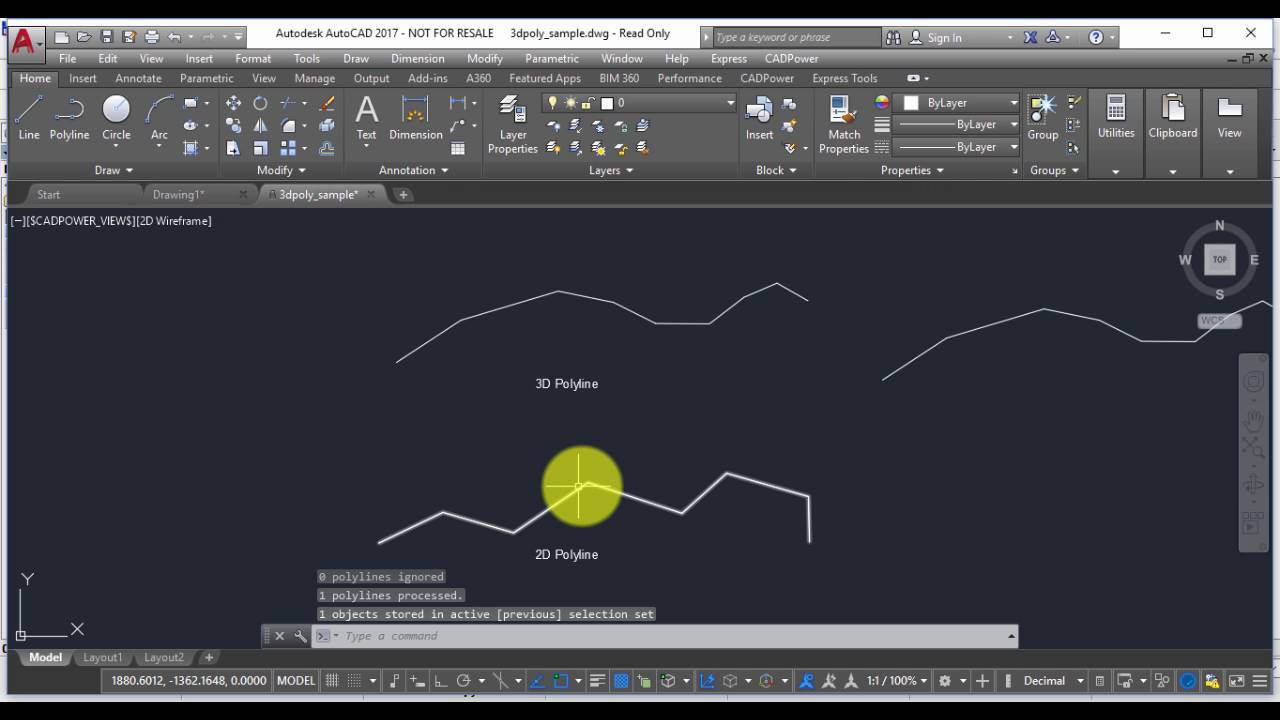
First things first, find that stubborn 3D polyline in your software. It's probably lurking somewhere, plotting its escape back into the third dimension. Get ready to show it who's boss!
Flattening the Beast: The Z-Value Vanishing Act
Imagine your 3D polyline as a mountain range. We're going to perform a geological miracle and make those mountains disappear! We're going to make all Z-values become zero.
Most software has a command specifically designed for this purpose. It might be called "Flatten," "Make 2D," or something equally descriptive. Hunt it down like a seasoned detective!
Once you've located the command, prepare to unleash its power. Select your 3D polyline. Then, activate the "Flatten" command.
BOOM! All the Z-values are now zero. The mountain range has become a pancake. Your 3D polyline is officially a 2D resident now!
The "Project to View" Ploy
Sometimes, the "Flatten" command is playing hide-and-seek. Or, perhaps, you want to control how the 3D polyline is converted based on your current view. That's where the "Project to View" technique comes in.
Think of it like shining a flashlight directly onto the 3D polyline. You are projecting its shadow onto a flat wall (your 2D plane). The resulting shadow becomes your 2D representation.
Make sure you're in the view you want to project from. This is crucial. If you want a top-down 2D version, ensure you're looking straight down at the 3D polyline.
Now, look for a command like "Project to View" or "View Geometry." Again, the name might vary depending on your software.
Activate the command, select your 3D polyline, and watch the magic happen. A 2D version, perfectly aligned with your view, will appear. It’s like instant origami, but without the paper cuts!
A Word of Caution (and a Little Exaggeration)
Before you go wild flattening every 3D object in sight, remember one crucial thing: the accuracy of your 2D representation depends on your initial 3D model. If your 3D polyline is a tangled mess, the 2D version will likely inherit that messiness. So, sometimes, a little clean-up is required. Think of it as giving your 3D model a spa day before its 2D debut.
Also, be mindful of overlapping lines. Projecting a complex 3D object onto a 2D plane can result in lines piling on top of each other. It might look like a plate of digital spaghetti! You may need to manually edit the 2D result to untangle the mess and achieve clarity.
And if all else fails, remember the ancient wisdom passed down through generations of CAD users: Save. Your. Work. Before attempting any potentially catastrophic conversion, create a backup. This single act can save you from digital heartbreak and countless hours of re-drawing.
Congratulations, 2D Master!
You've successfully conquered the 3D polyline and transformed it into a perfectly well-behaved 2D citizen. Go forth and create amazing 2D drawings, knowing you have the power to flatten any unruly 3D object that dares to cross your path!
And remember, even the most complex 3D models can be tamed with a little know-how and a dash of playful enthusiasm. Now go, my friend, and flatten the world! Well, at least flatten your 3D polyline. That's a good start.