How To Cut End Cap Quarter Round

So, you're staring at that little strip of wood, the end cap quarter round, and it’s staring back. It’s the final boss of your home improvement project, the last piece of the puzzle that stands between you and sweet, sweet victory.
Fear not, brave DIY warrior! This seemingly insignificant piece can be conquered with a little bit of know-how and a dash of humor.
The Humble Saw: Your Trusty Sidekick
First, you'll need a saw. A miter saw is the star here, but a hand saw will do in a pinch.
Think of your saw as a light saber; a precision instrument that can slice through the dark side of unfinished trim.
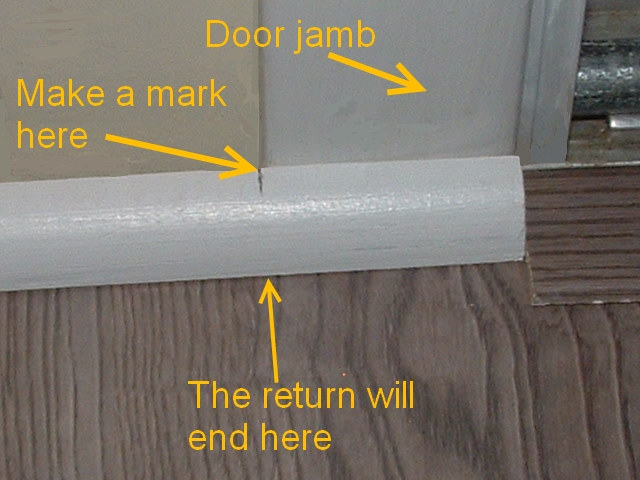
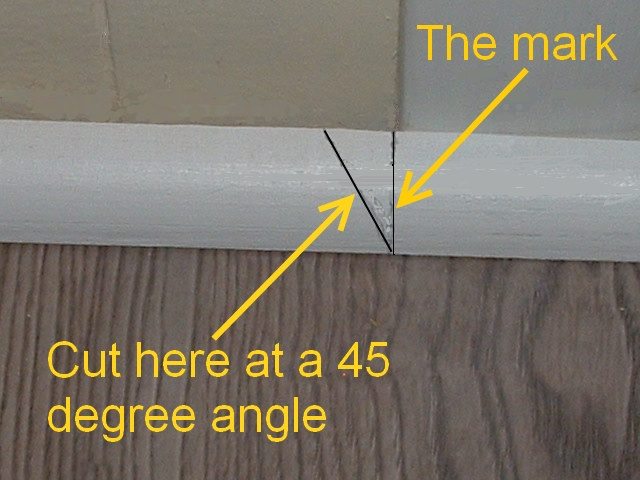
Measuring is Key (Mostly)
Now, measure the gap where the end cap will live. Write it down, say it out loud, maybe even sing it a little song.
Just be sure to remember it when you get to the saw.
A pro tip: measure twice, cut once. Or measure thrice, just to be absolutely sure you don't have to make a sad trip to the hardware store for more *end cap quarter round*.
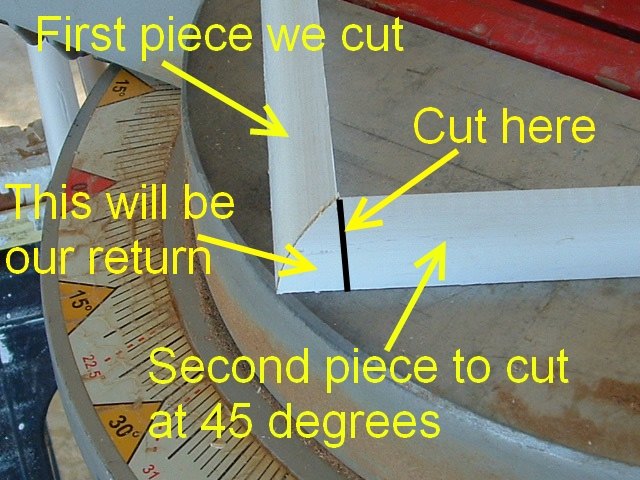
The Art of the Angle
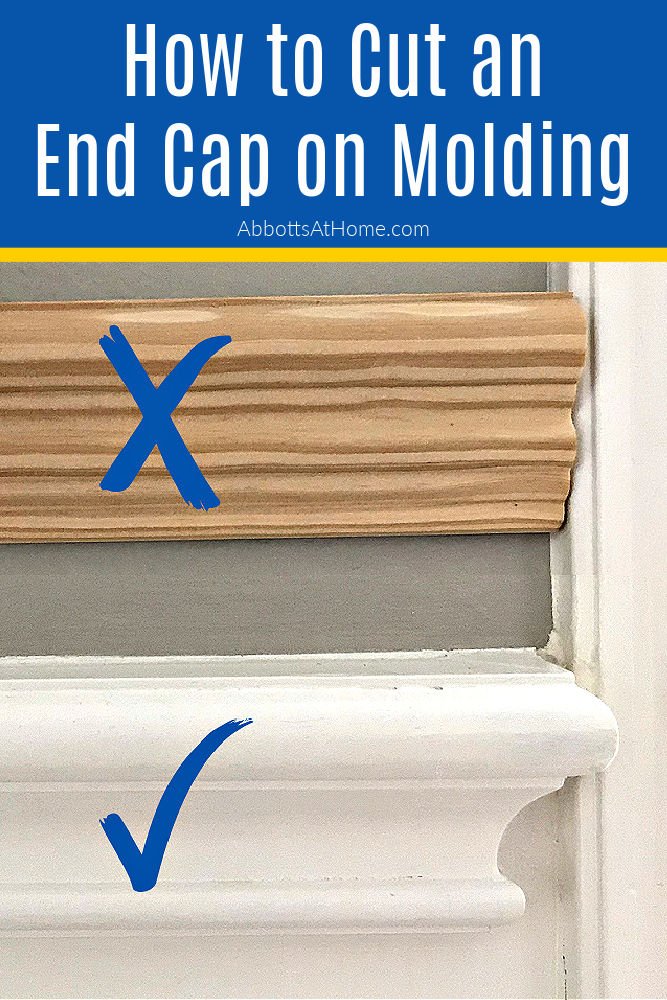
Here's where things get interesting: the angle. For an end cap, you're generally looking at a straight, 90-degree cut, or, if you're going for that perfect corner look, a 45-degree miter.
Imagine you are cutting a pie, what pieces you need to make a perfect circle. Same as end cap, think of the angles that creates beautiful corners.
Set your saw to the desired angle. This is when following the manual will save you a lot of headache.
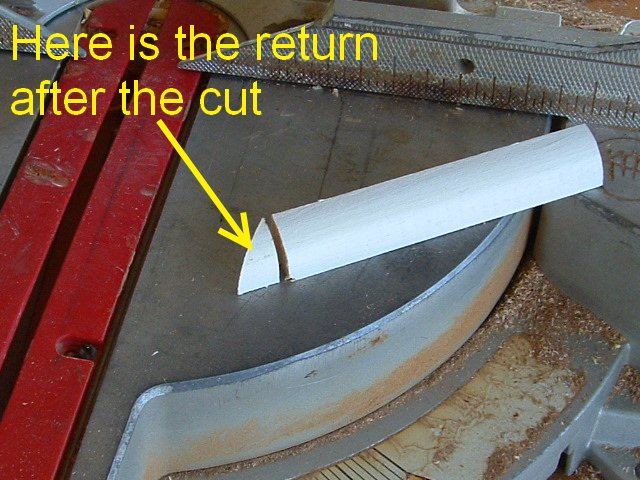
Making the Cut: A Leap of Faith (Sort Of)
Place the end cap firmly against the fence of your saw. Take a deep breath, channel your inner wood whisperer, and make the cut.
It’s like performing a delicate surgery. You are the surgeon and the *quarter round* is your patient.
If you are using hand saw, remember to take your time and avoid splintering.
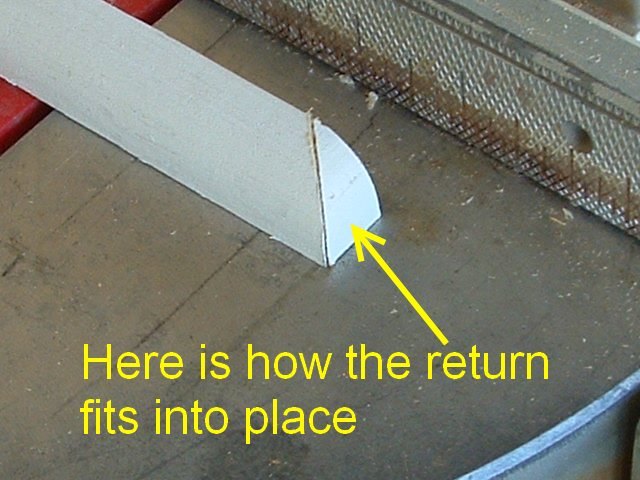
The Moment of Truth: The Test Fit
Now, gently place the freshly cut end cap into its final resting place. Does it fit? Does it sing?
If it's perfect, congratulations! You're a champion of trim. If it's a little off, don't despair. A bit of sanding or shaving can work miracles.
It is perfectly okay to adjust the end cap, you are aiming at perfection. Embrace those tiny adjustments!
When Things Go Wrong (and They Will)
Sometimes, despite our best efforts, things go sideways. The cut is too short, the angle is wonky, and the end cap resembles something chewed on by a badger.
This is where a sense of humor comes in handy. Laugh, learn from your mistake, and grab another piece of *end cap quarter round*.
Every DIY project has its bloopers. Embrace them, document them, and tell stories about them later. Because who wants a perfectly perfect house anyway?
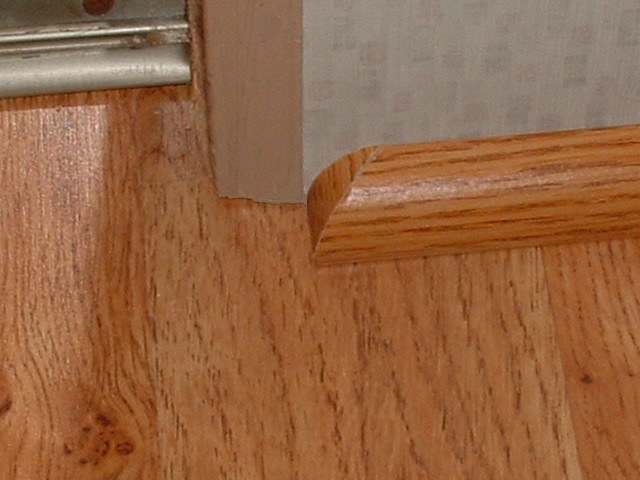
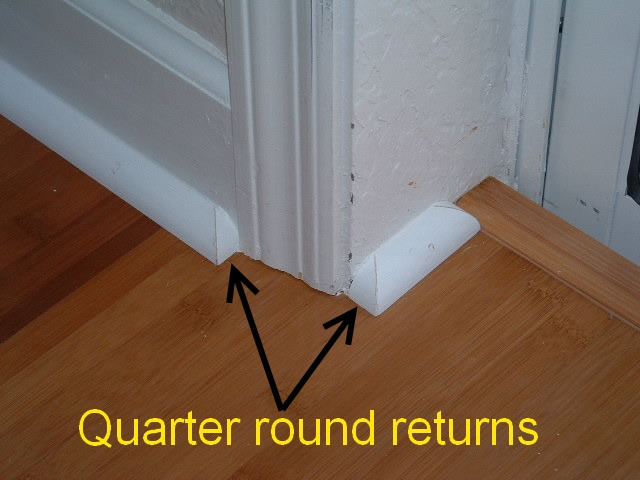
The Grand Finale: Installation and Celebration
Once you're satisfied with the fit, it's time to install the end cap. A little adhesive or a few carefully placed nails will do the trick.
Step back, admire your work, and give yourself a pat on the back. You conquered the end cap quarter round!
Now, go forth and enjoy your beautifully trimmed space. You earned it!