How To Draw A Parrot Step By Step
Ready to Unleash Your Inner Picasso? (Parrot Edition!)
Let's face it. We've all stared longingly at a parrot, those vibrant, feathered showoffs. Ever thought, "Hey, I could totally draw that?" Maybe you have, maybe you haven't. But I'm here to tell you, you can!
And honestly? I think drawing a parrot is way more fun than drawing, say, a bowl of fruit. Don't @ me!
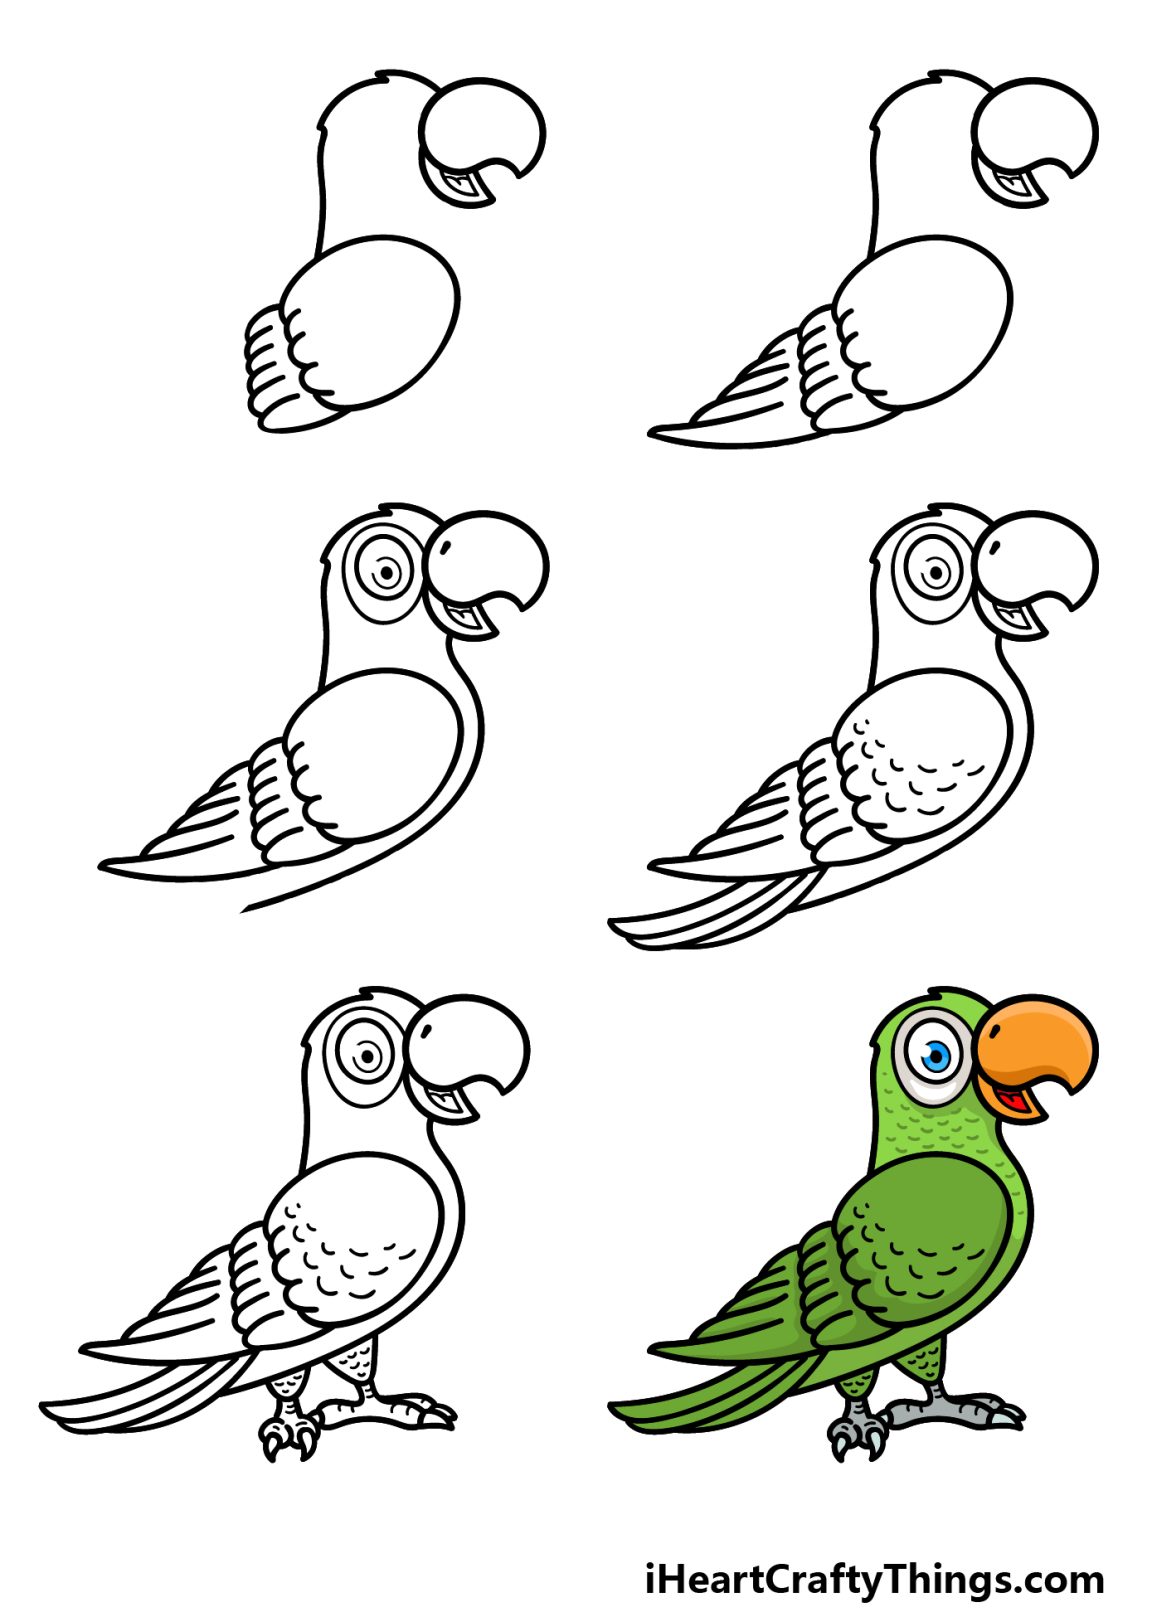
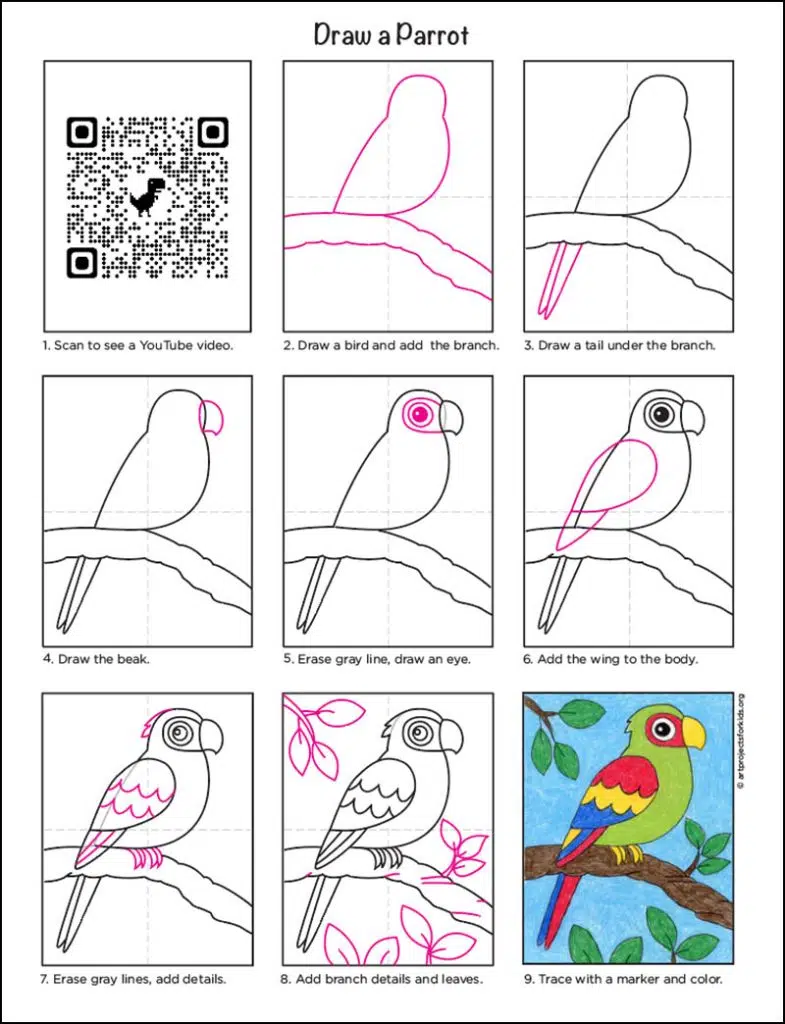
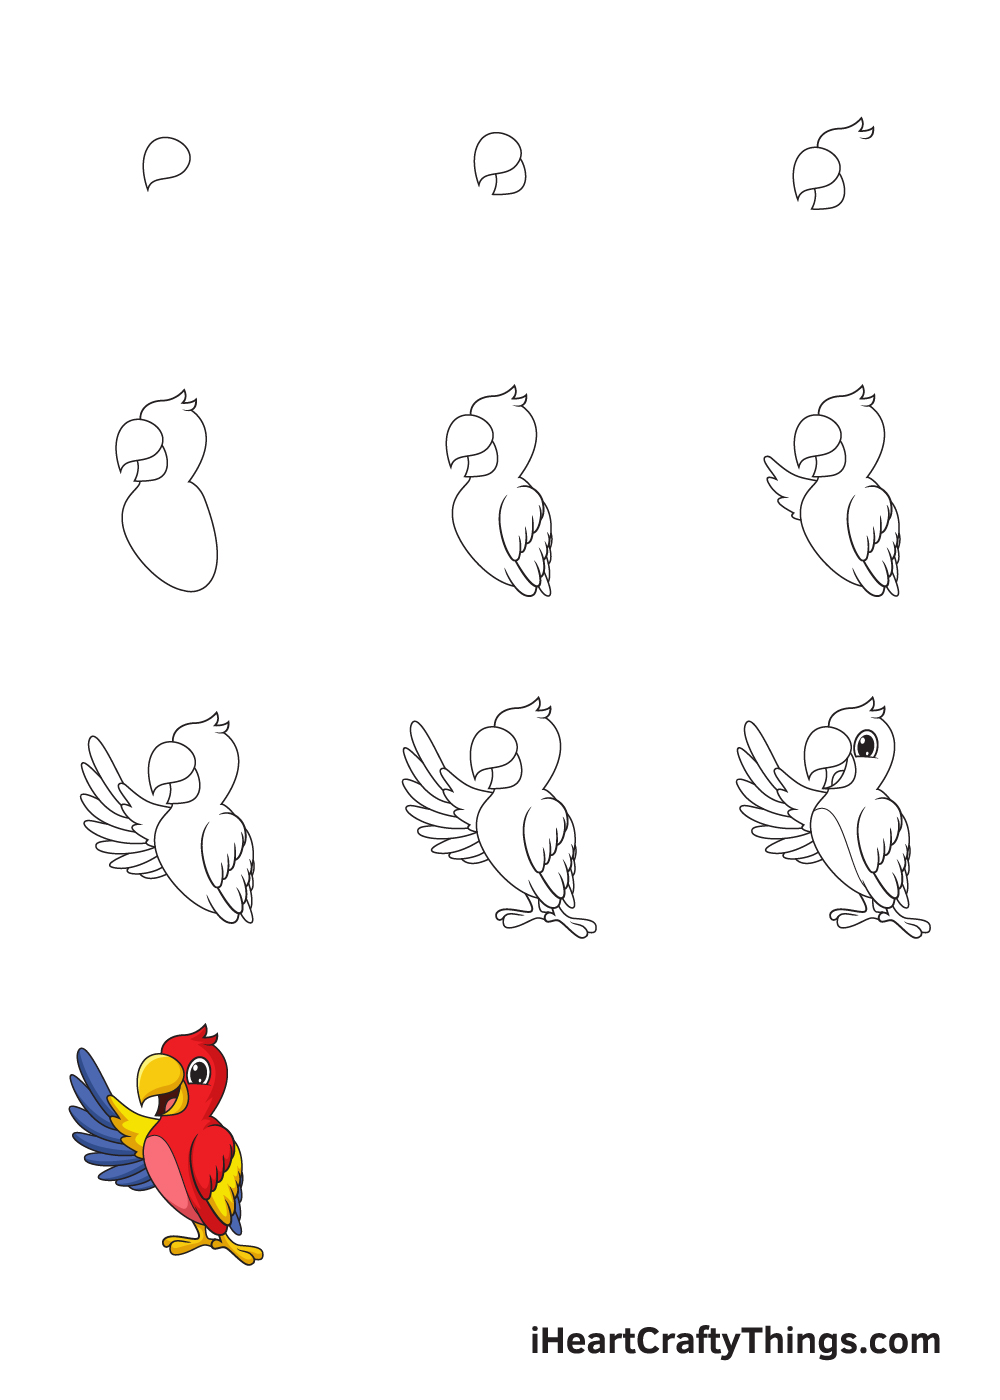
Step 1: The "Oblong-ish" Beginning
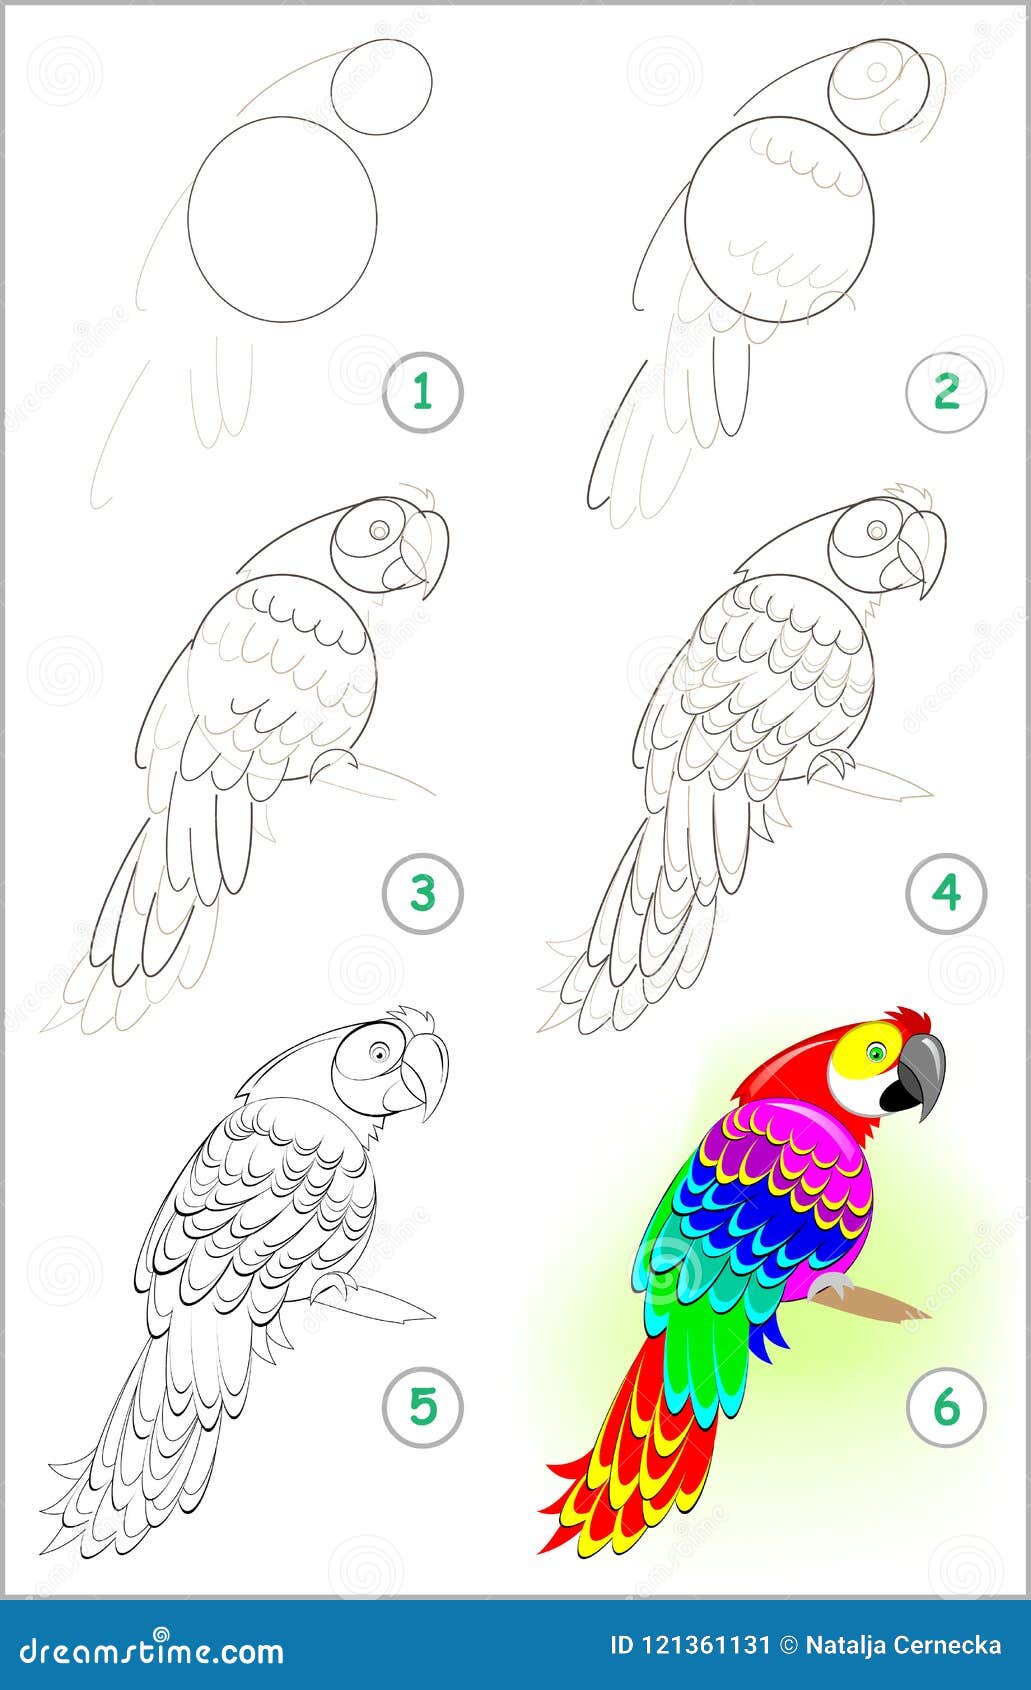
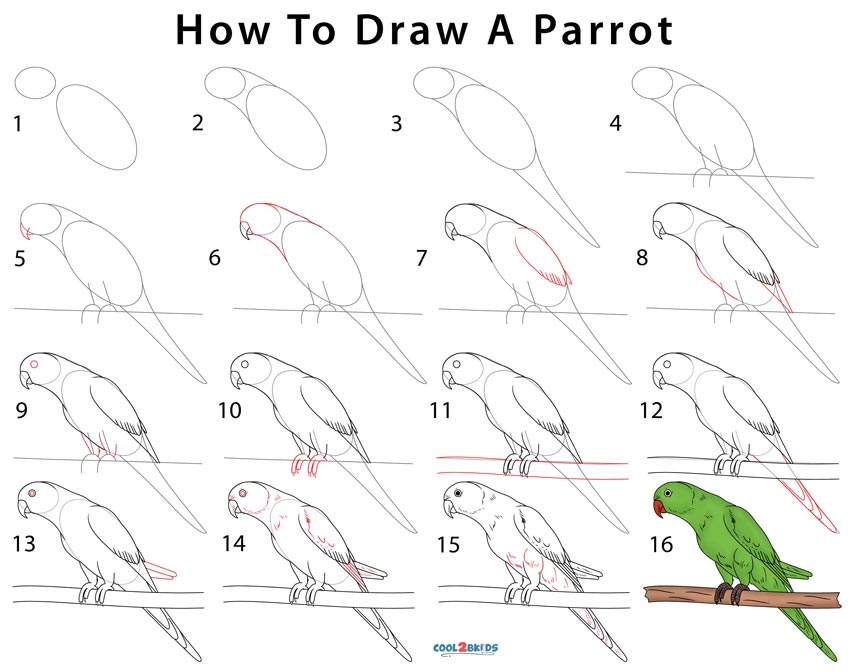
First, sketch a kind of lopsided egg. Not perfectly round, mind you. Think more like an egg that's been gently sat on. It's the parrot's body. Don't worry about perfection here. Imperfection is charming!
I know what you’re thinking. Why an egg? Just trust me on this one.
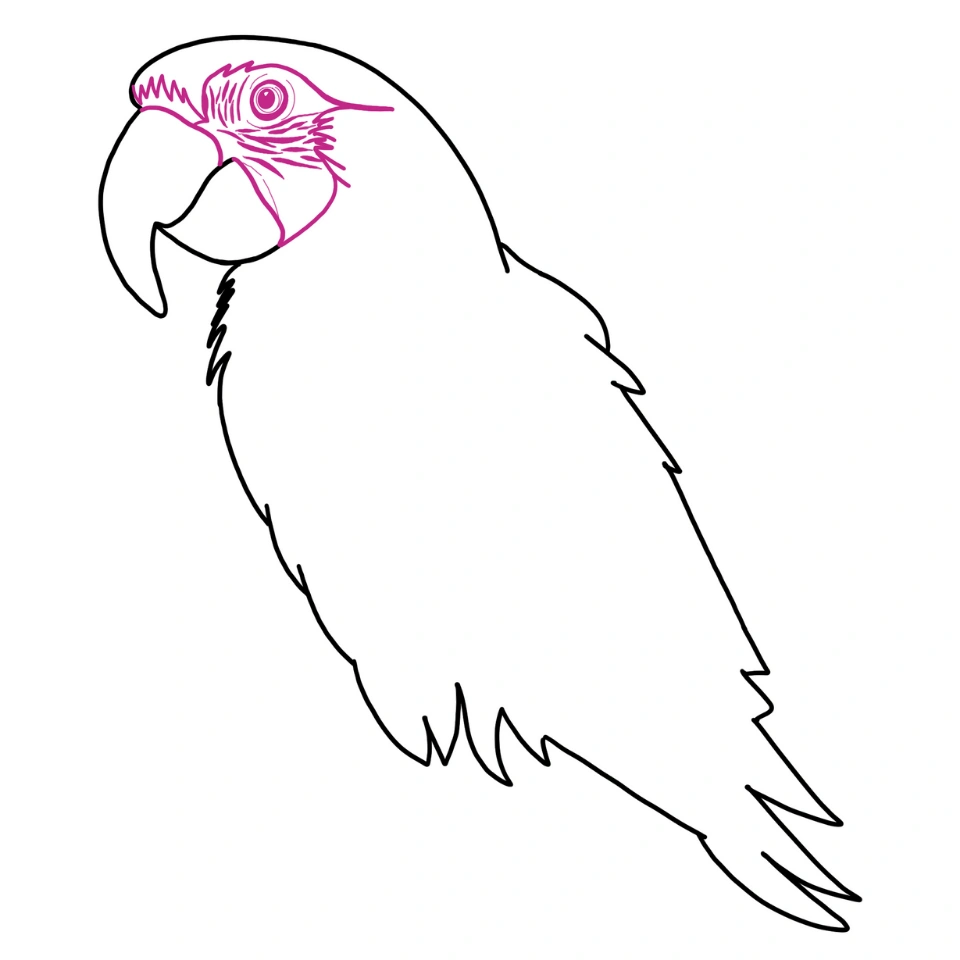
Step 2: Head's Up! (Literally)
Now, add a circle at the top of your oblong-ish shape. This is the head. Make it slightly smaller than the body. We're not going for a bobblehead effect, unless you *want* a bobblehead parrot. Your art, your rules!
My unpopular opinion? Bobblehead parrots are severely underrated.
Step 3: Beak-a-Boo!
Time for that iconic parrot beak! Draw a curved, downward-pointing shape on the head. Like a little mountain range, but less intimidating. Remember, parrots are mostly harmless… mostly.
Okay, maybe that beak *is* a little intimidating. But let's focus on the cute.
Step 4: The All-Seeing Eye
Add a small circle for the eye. Place it towards the top of the head, close to the beak. Give it a little sparkle for extra personality. Parrots are nothing if not full of personality!
If you want to make it look a bit mischievous, I fully support that decision.
Step 5: Winging It (Get It?)
Draw a curved line extending from the back of the body. This is the wing. Give it a bit of a feathery edge. Don't overthink it. It's just a wing. You've got this!
Honestly, drawing wings is always the hardest part for me. But hey, practice makes… slightly less terrible!
Step 6: Tail Tales
Add some long, slightly curved lines extending from the bottom of the body. This is the tail. Think of it as a feathery rudder. It helps them steer, or something.
The longer the tail, the more majestic the parrot. It's science!
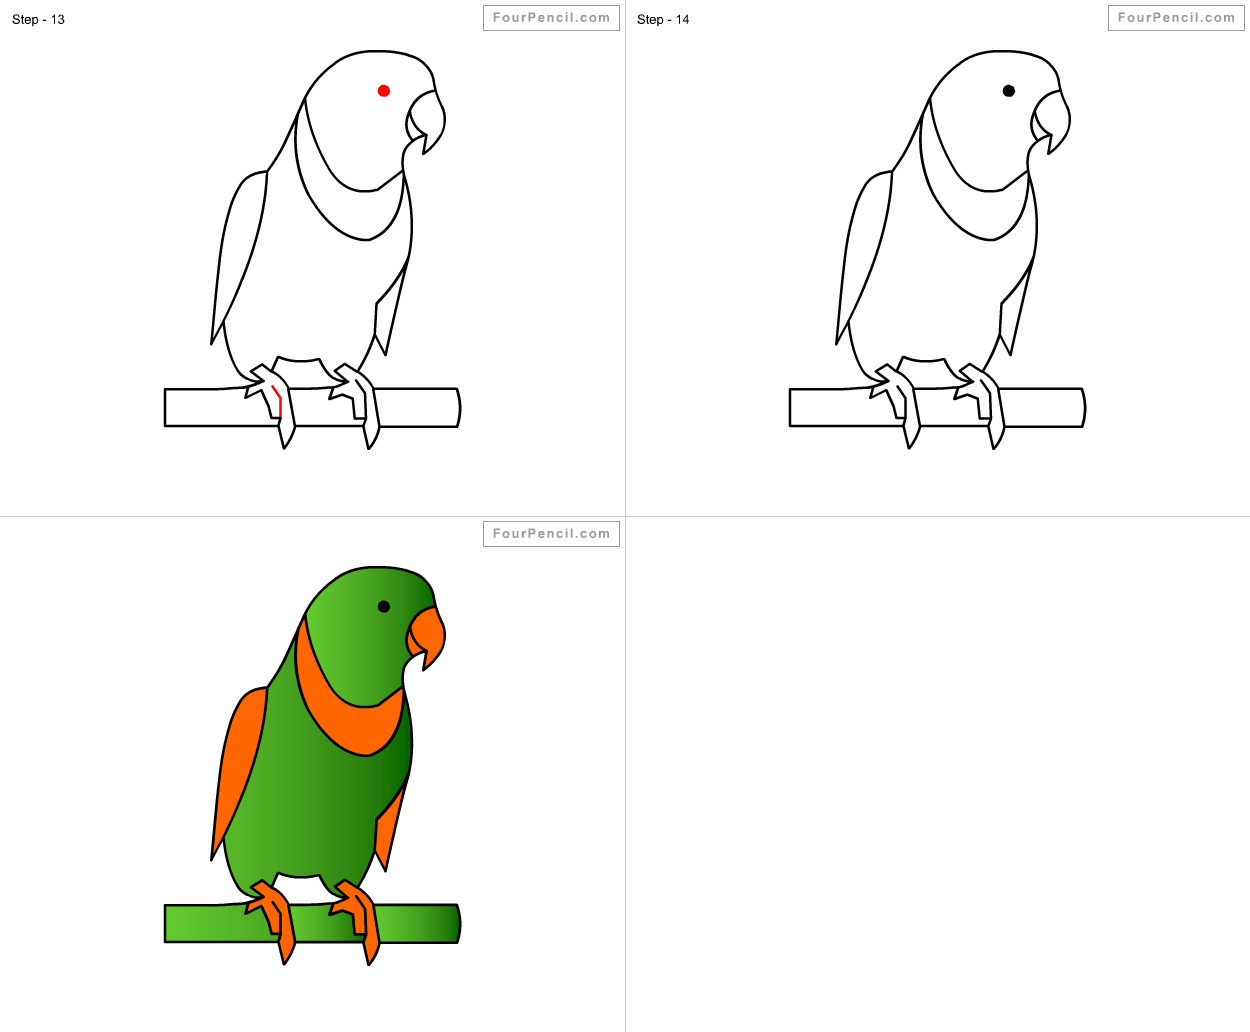
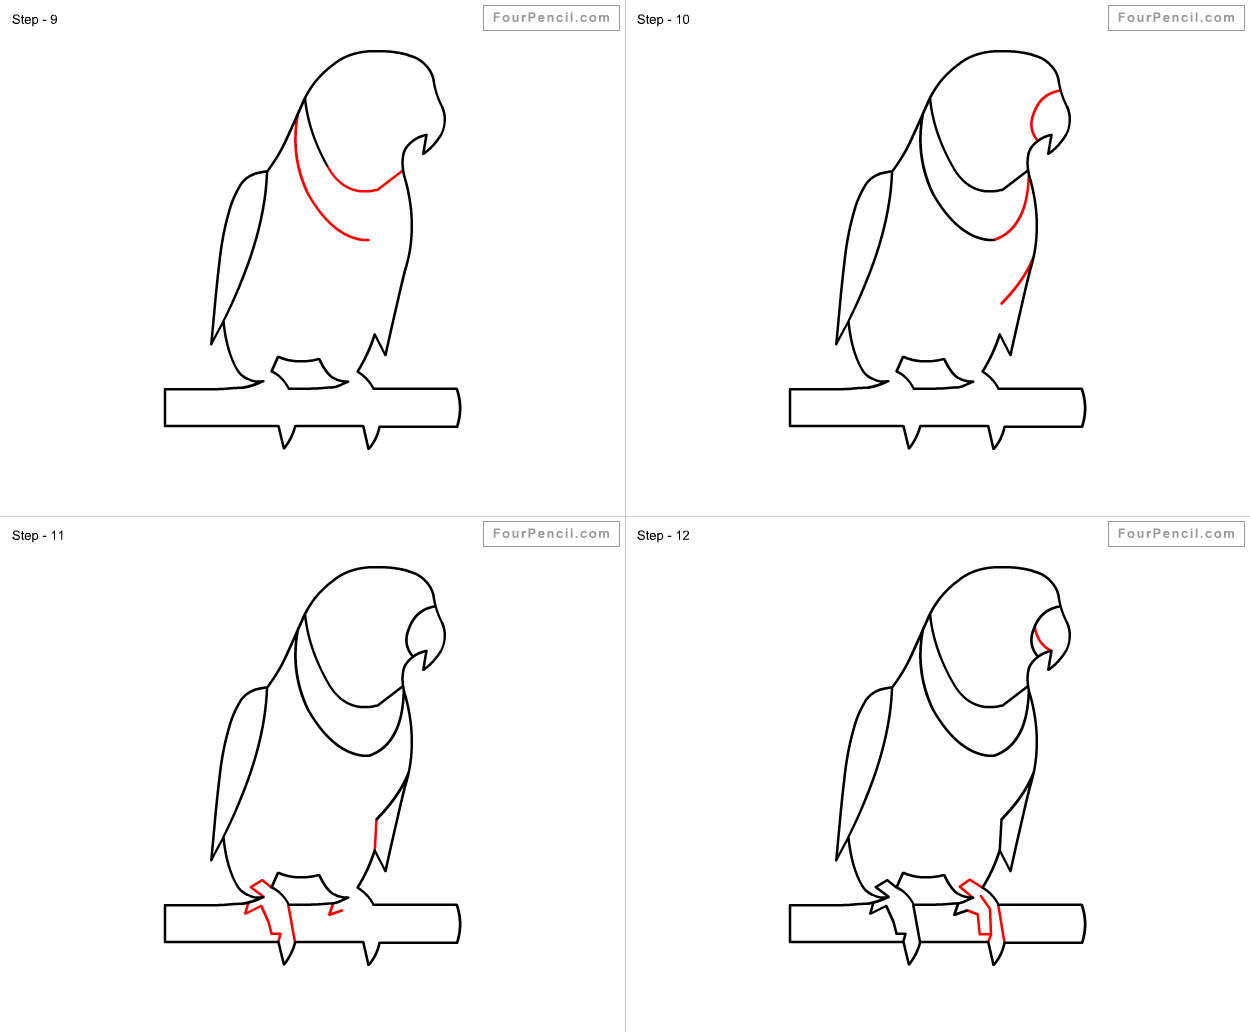
Step 7: Branching Out
Draw a simple branch for your parrot to perch on. Two slightly curved lines will do. Add some little clawed feet gripping the branch. Give those claws some attitude!
My unpopular opinion: parrots on branches are way cuter than parrots in cages.
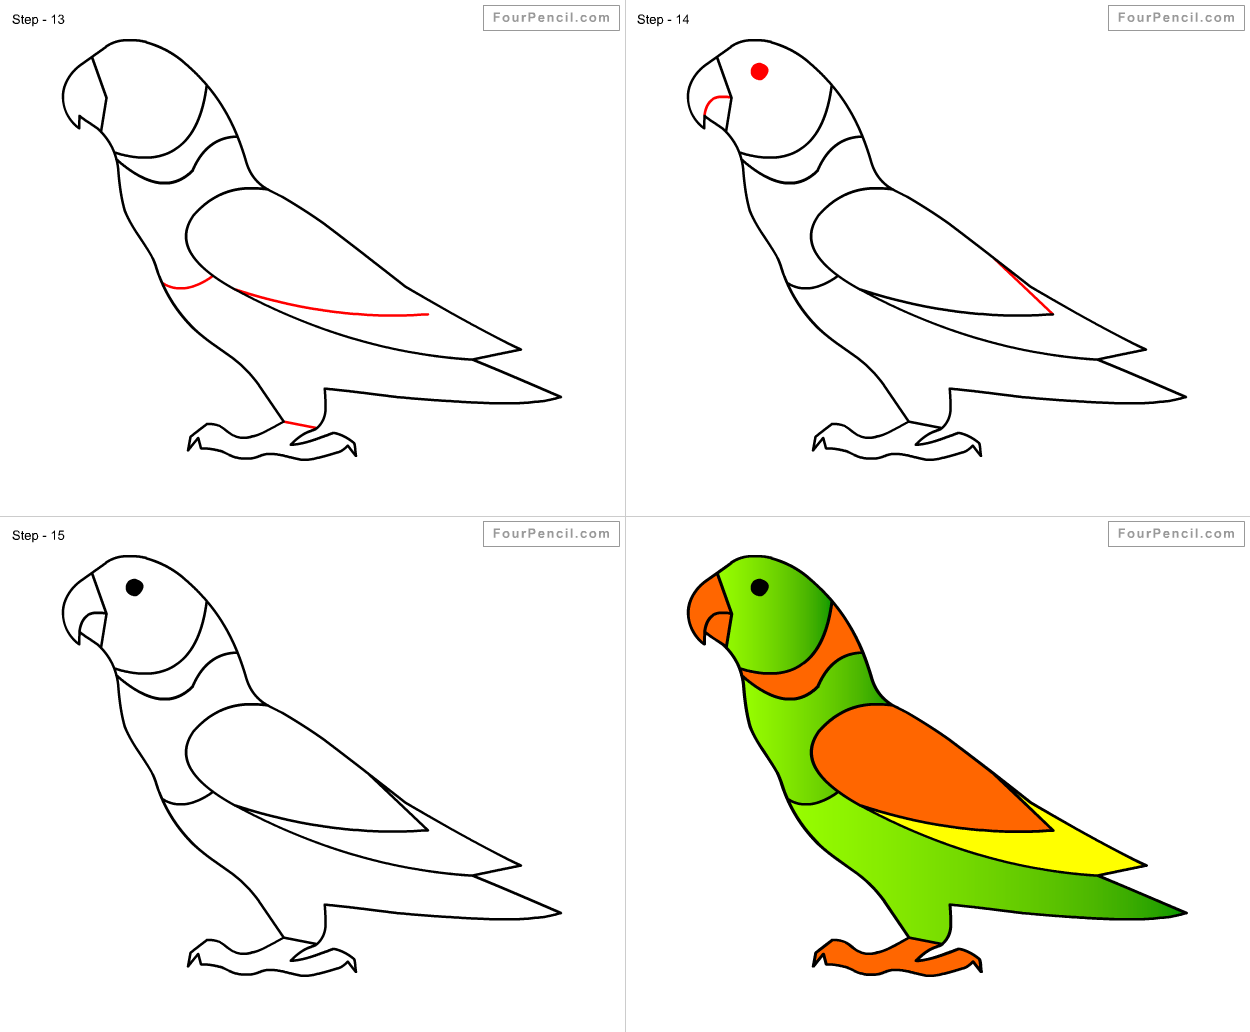
Step 8: Feather Frenzy!
Now, for the fun part: details! Add some lines to suggest feathers. Don't go overboard. A few well-placed lines will do the trick. We're going for "feathered friend," not "feather explosion."
Feel free to add a little feather sticking up on its head. It's quirky and adorable!
Step 9: Color Me Impressed!
Grab your colors! Parrots are famous for their vibrant plumage. Go wild! Reds, blues, greens, yellows – the more the merrier. Don't be afraid to experiment. It's a parrot! It's *supposed* to be colorful.
My unpopular opinion? Rainbow parrots are the best parrots.
Step 10: Show Off Your Masterpiece!
Congratulations! You've drawn a parrot! Now, proudly display your artwork. Stick it on the fridge. Frame it. Send it to David Attenborough. The world needs to see your parrot.
Seriously, don’t be shy. The world needs more parrot art!
So there you have it. A simple, step-by-step guide to drawing a parrot. Now go forth and create! And remember, even if your parrot looks a little wonky, it's still a parrot. And that's something to be proud of. Happy drawing!