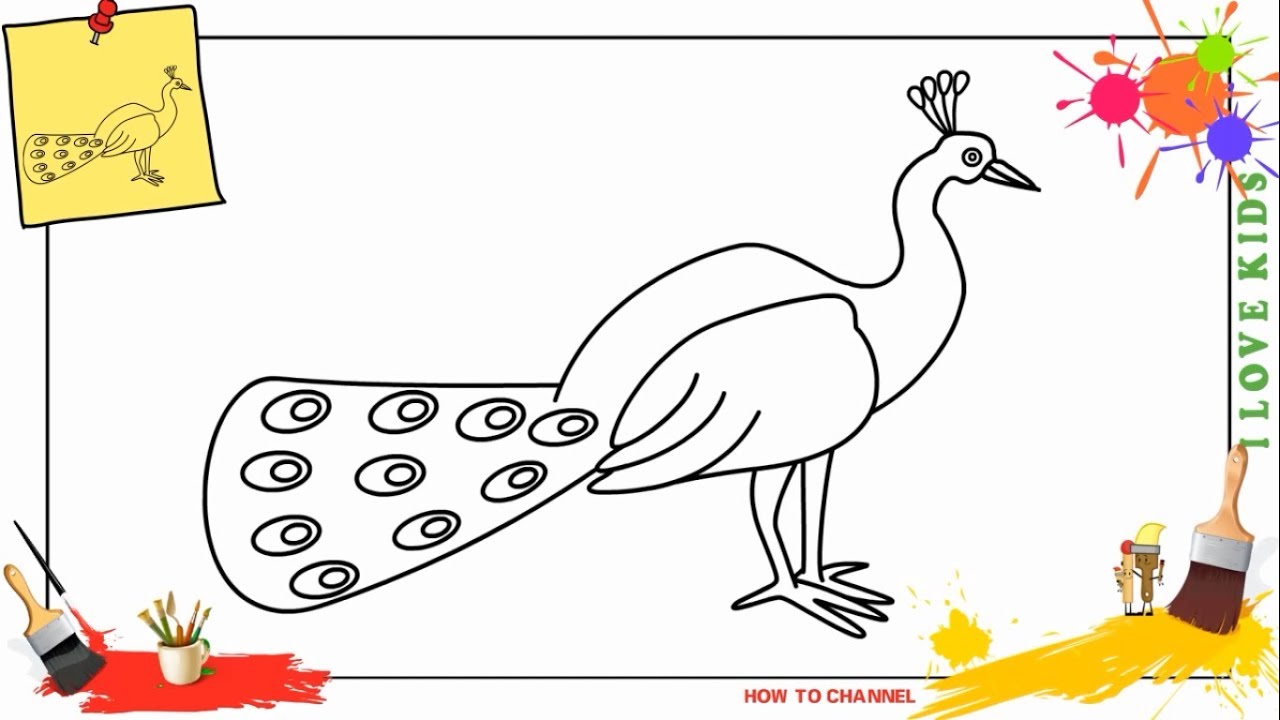
How To Draw Peacock Step By Step
Unleash Your Inner Artist: A Peacock Drawing Adventure
Ever looked at a peacock strutting its stuff and thought, "Wow, I wish I could draw that!"? Well, guess what? You absolutely can! We're about to embark on a journey to create our own magnificent peacock masterpiece, one simple step at a time.
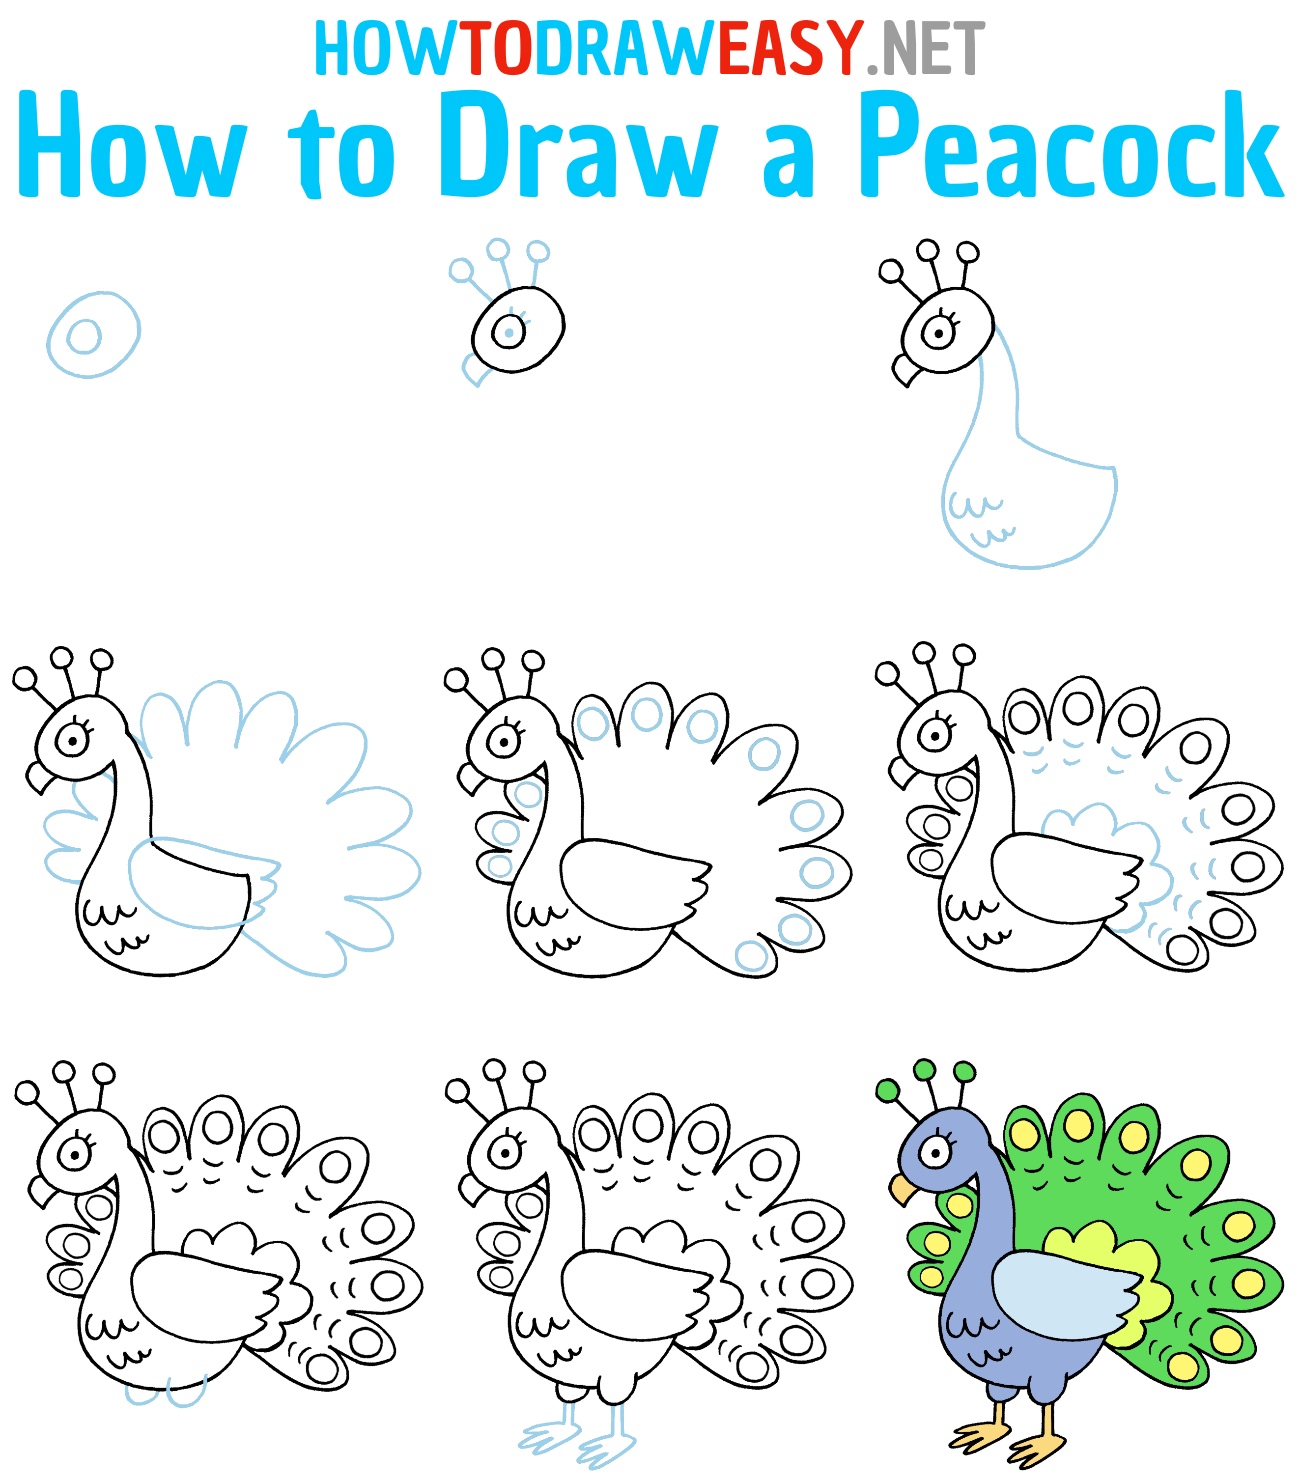
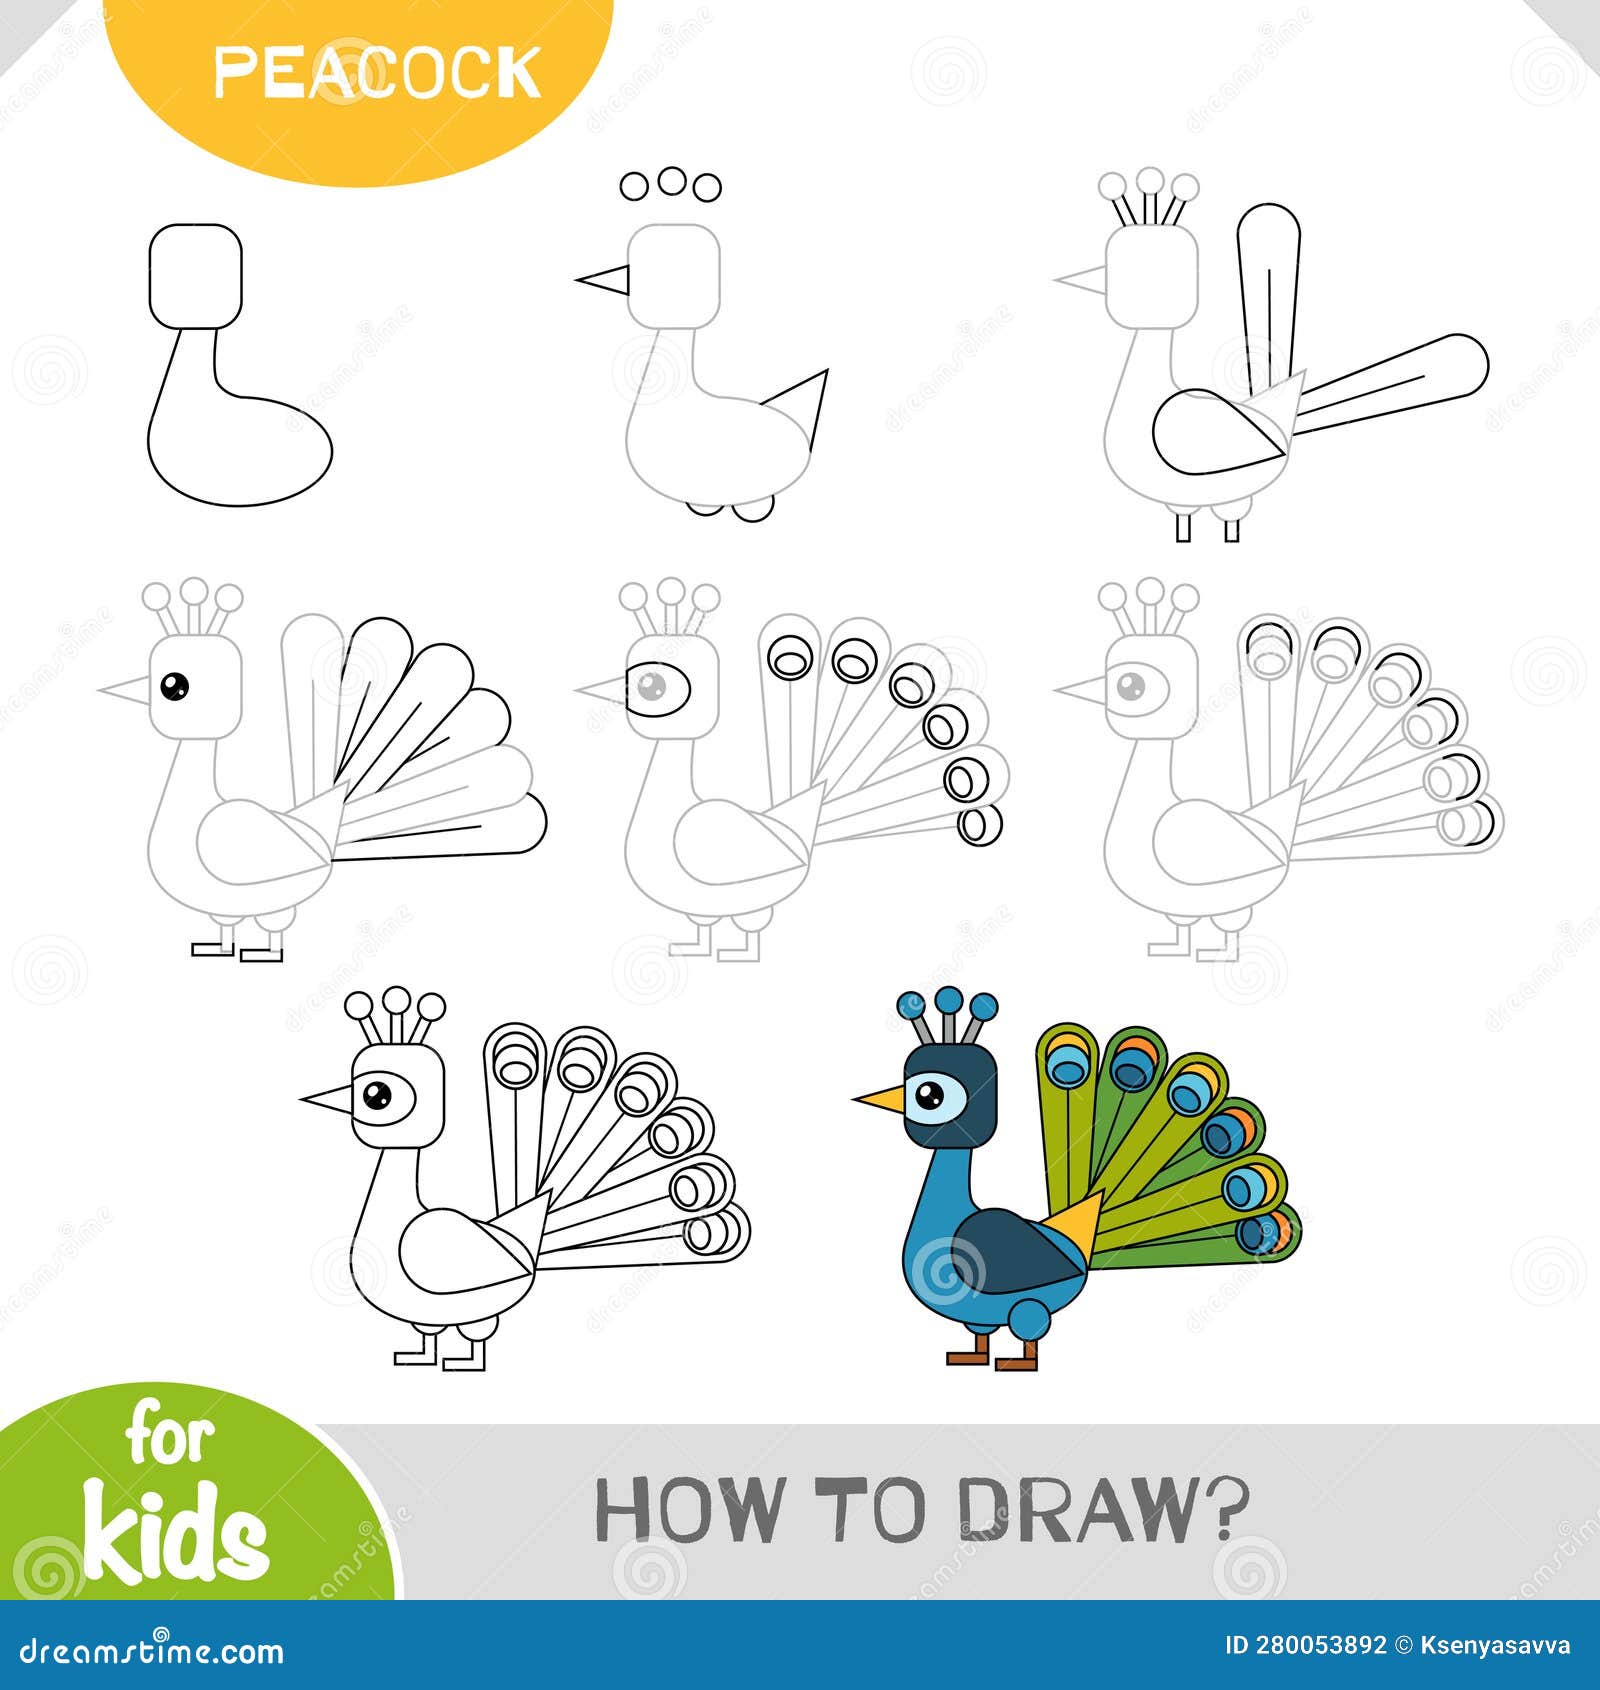
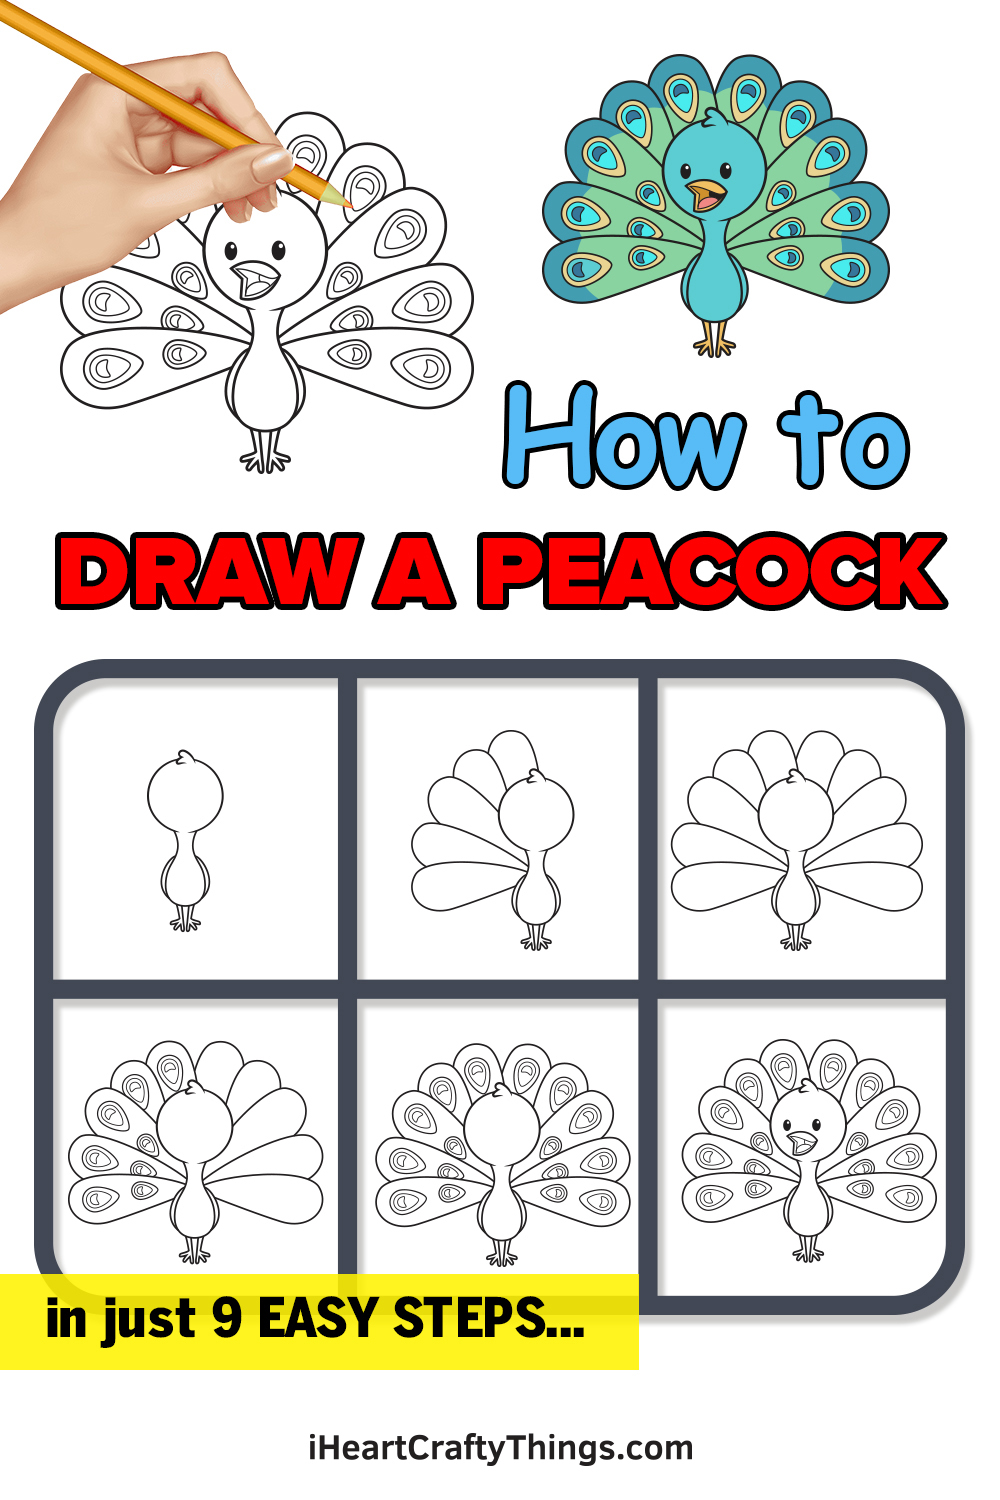
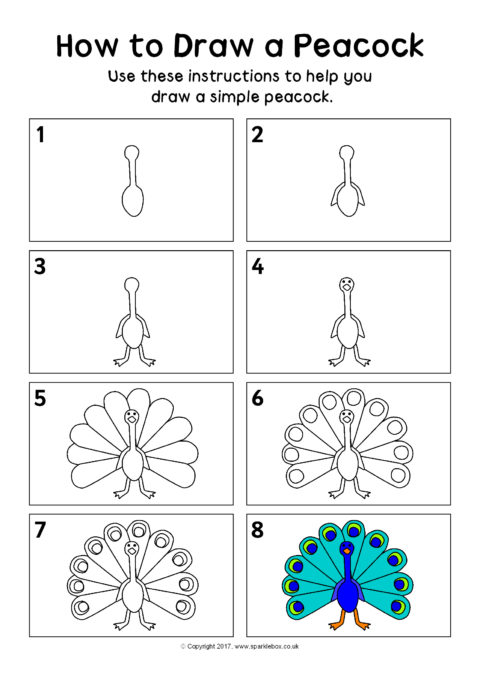
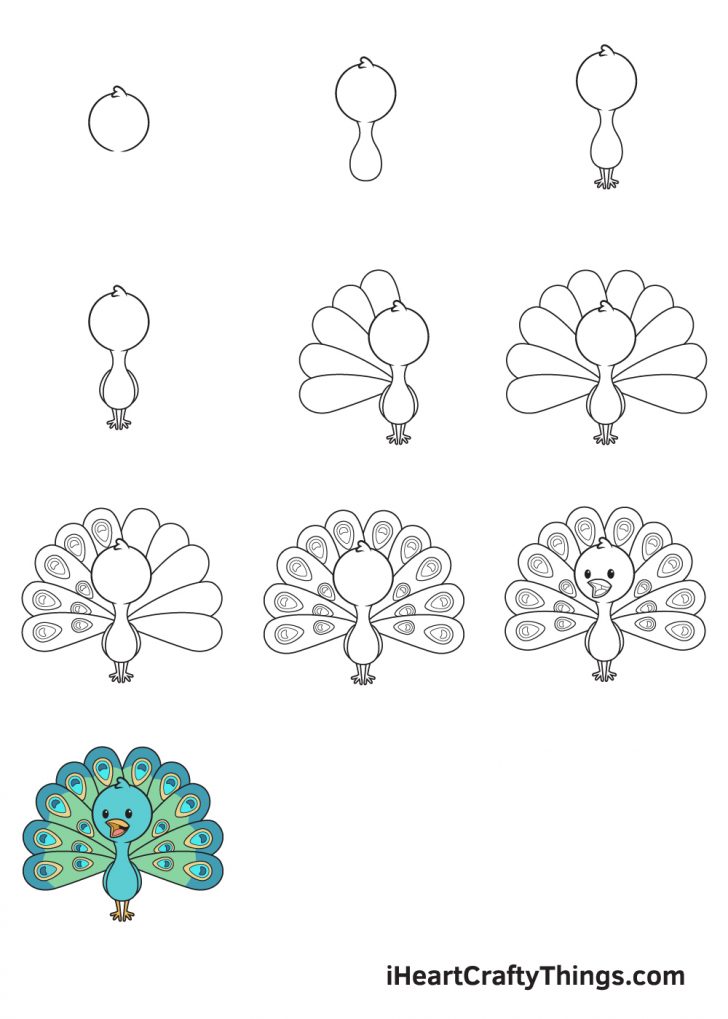
Step 1: The Bod
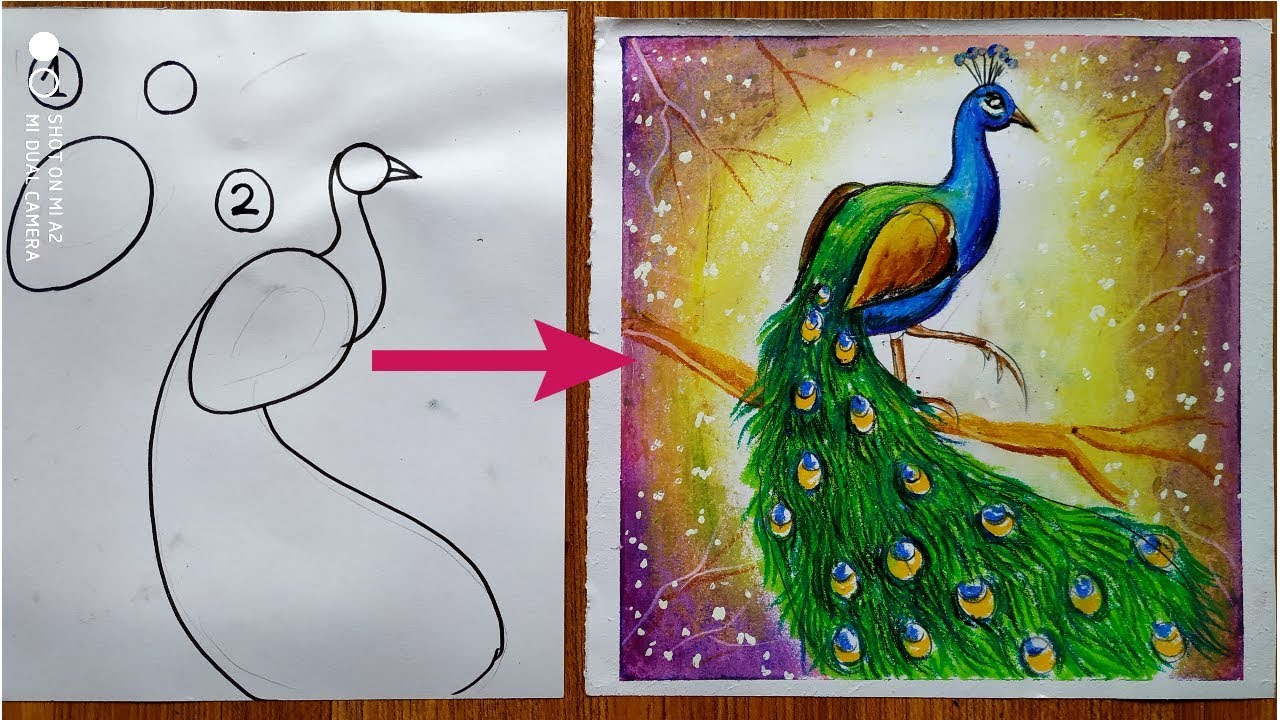
First, we need the body. Think of a slightly tilted teardrop – that’s our starting point. Don’t worry about being perfect. Peacocks probably aren't judging your artistic abilities!
Step 2: Head and Neck
Now, let's add a curved neck to the top of the body. Think graceful swan, but maybe a tad less uptight. Attach a small circle at the top for the head – that’s our peacock braincase!
Step 3: Beak and Eye
Give your peacock a beak. A little triangle jutting out from the head will do the trick. Add a tiny circle for the eye. Try not to make it look too shifty.
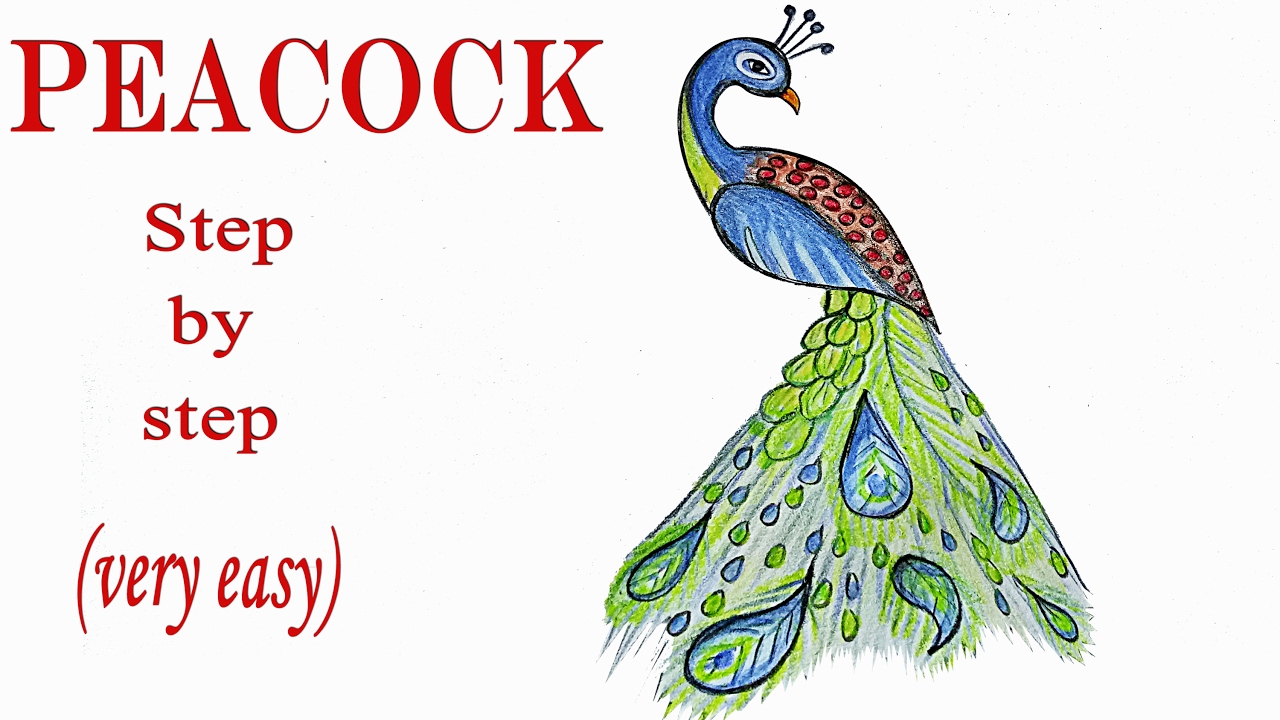
Step 4: The Crest
Time for some flair! Peacocks are known for their fabulous crests, so let's give ours one too. Three or four little feather shapes sprouting from the top of the head is all it takes.
Step 5: Legs
Every bird needs legs! Draw two simple lines extending down from the body. Add little "V" shapes at the bottom for the feet. Think cartoon chicken legs, but fancier.
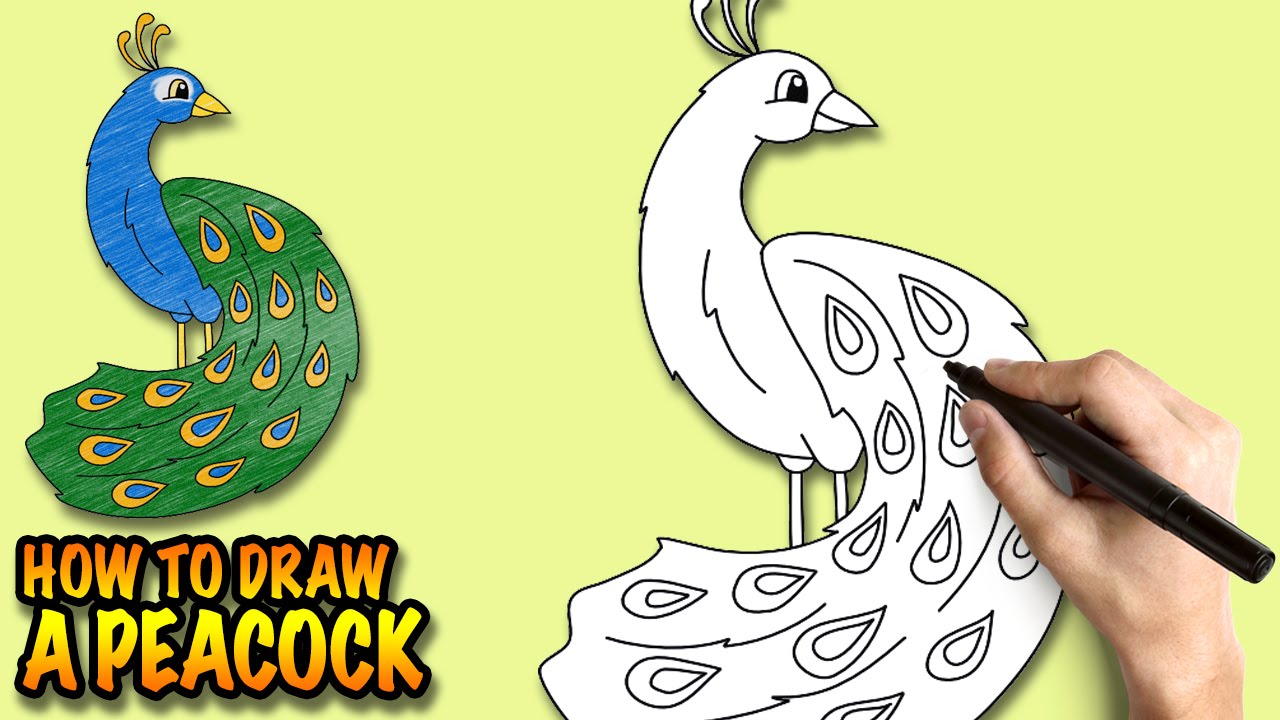
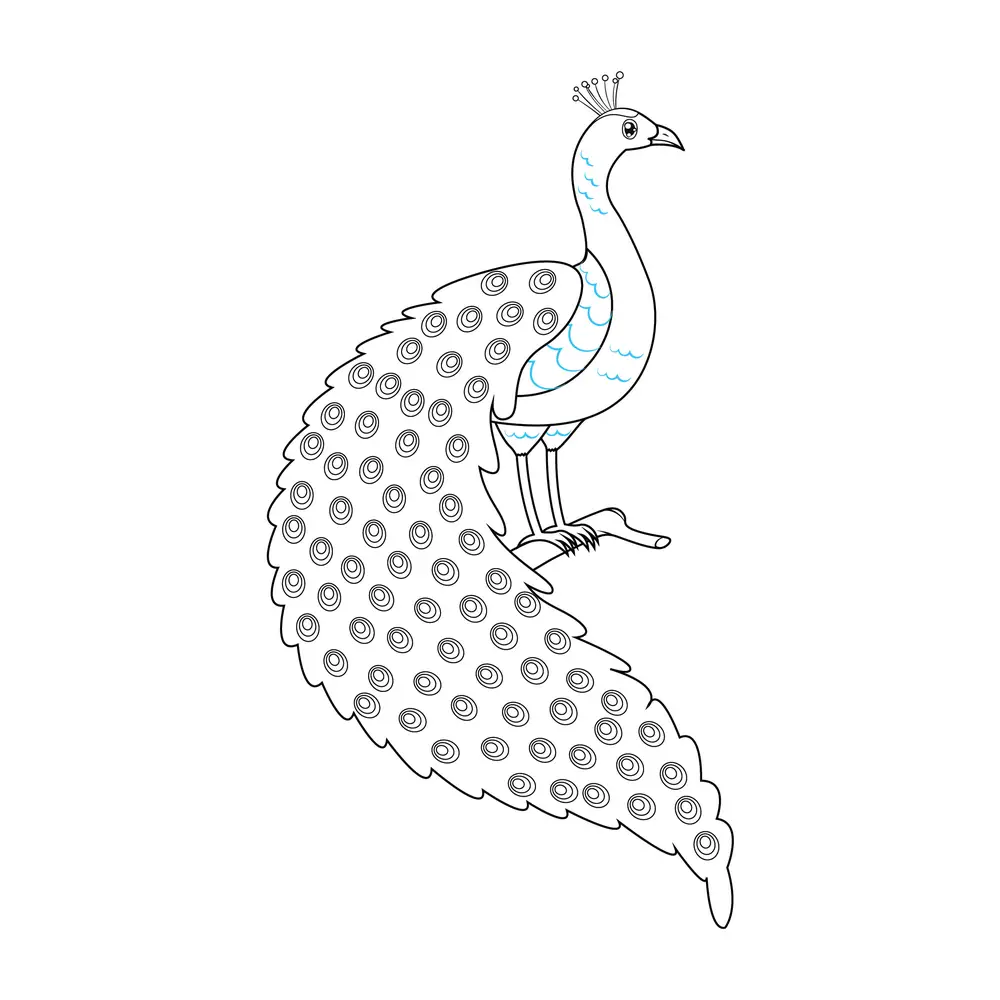
Step 6: The Magnificent Tail (Part 1)
This is where the magic happens! Start with a large, slightly curved shape behind the body. This is the base for all those glorious feathers. Imagine a giant fan, but way cooler.
Step 7: The Magnificent Tail (Part 2)
Now, let’s add the individual feathers. Draw long, slender shapes radiating outwards from the base. Don’t try to draw every single feather – that’s a recipe for artistic insanity! Just create the illusion of a magnificent display.
Step 8: The "Eye" Details
Each feather needs an "eye," the signature peacock marking. Draw a small oval on each feather near the end. These are the peacock's bling. You can color them in later to make them pop.
Step 9: Adding Details
Time to add some personality! Maybe add some lines to the body to suggest feathers. Perhaps give your peacock a slightly smug expression. Remember, it's your masterpiece!
Step 10: Color and Shine!
Now for the fun part: color! Peacocks are famous for their vibrant blues, greens, and golds. Let your imagination run wild! And don’t forget to add some highlights to make it shine.
Congratulations! You've just drawn your very own peacock. Give it a name. Hang it on your refrigerator. Brag about it to your friends. You deserve it!
Remember, drawing is about having fun and expressing yourself. Don't worry about perfection. Just enjoy the process of bringing your own unique peacock to life.
And who knows, maybe one day, your peacock masterpiece will inspire someone else to pick up a pencil and unleash their inner artist!
So go forth, and create! You've got this. Now, if you'll excuse me, I'm off to draw a whole flock of them. Maybe I'll name one Percy.
"The creative adult is the child who survived." - Ursula K. Le Guin