How To Export Video In Vegas Pro 15
The Great Escape: Getting Your Video Out of Vegas Pro 15
So, you've spent hours, maybe even days, crafting your masterpiece in Vegas Pro 15. You've trimmed, spliced, added funky transitions, and even that questionable meme sound effect. Now what? It's time for the great escape – exporting your video into the wild!
Don't worry, it's easier than teaching your grandma how to use TikTok (though that might be a fun video project, just sayin'). We're going to make this process as smooth as butter and less intimidating than a squirrel trying to cross a busy street.
The "Render As" Adventure
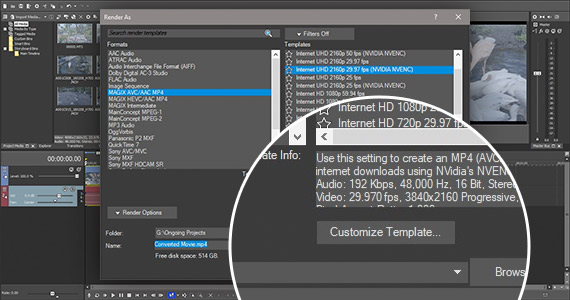
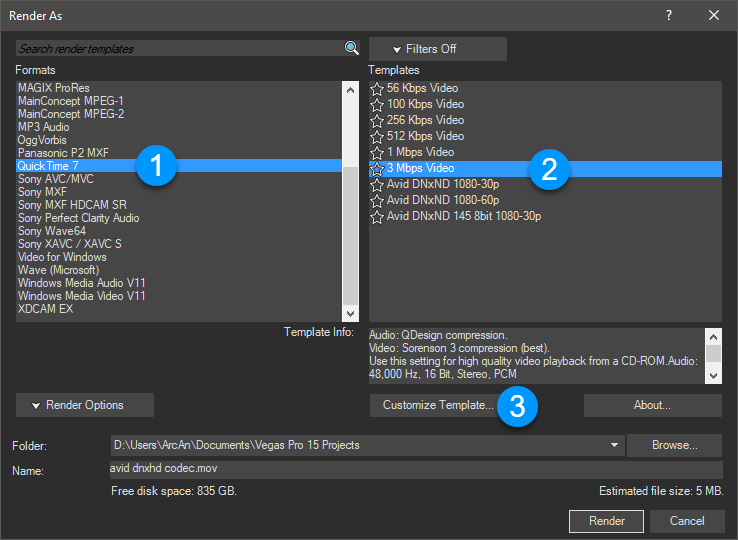
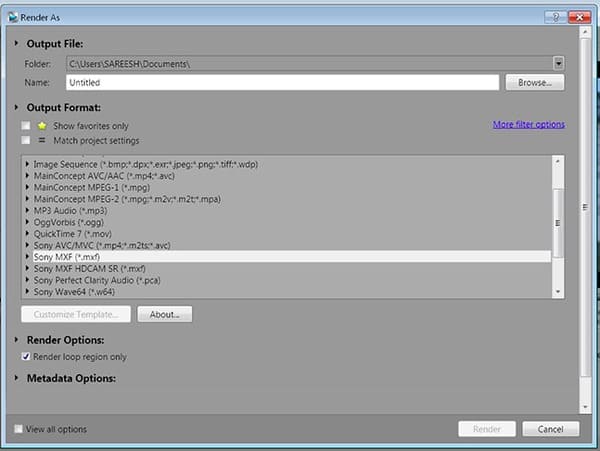
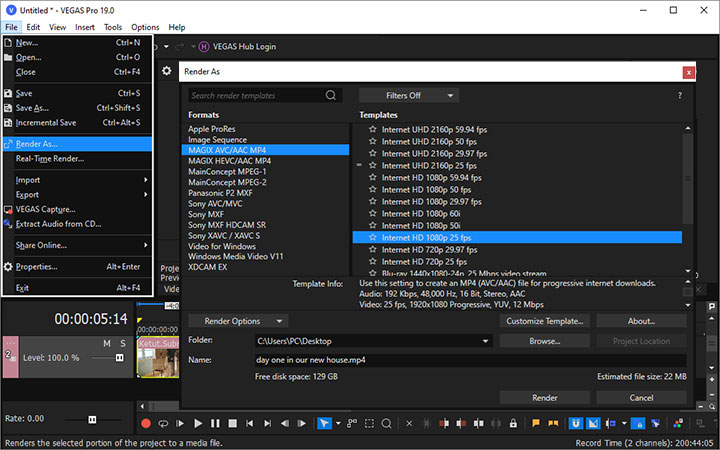
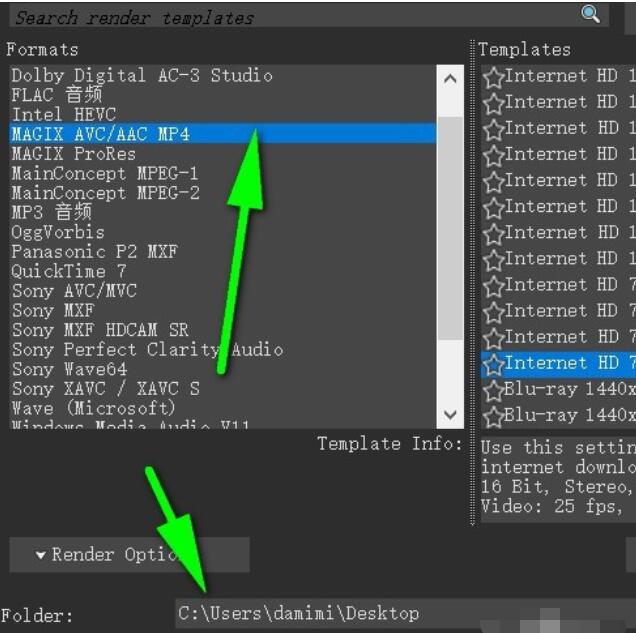
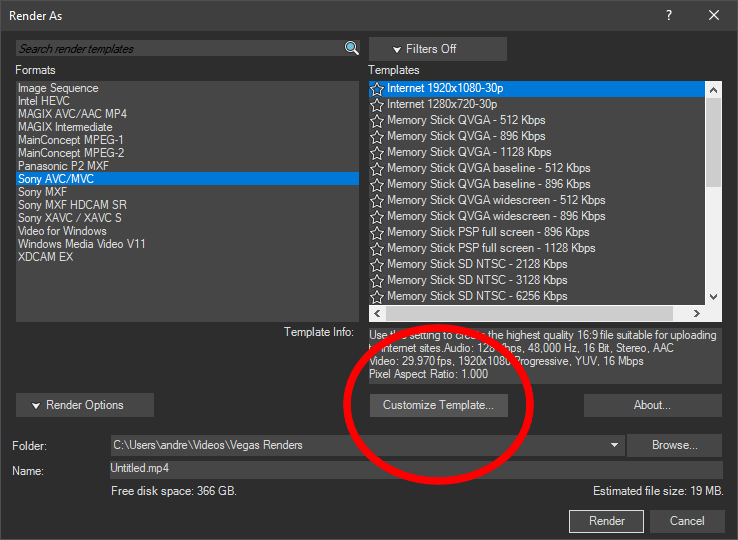
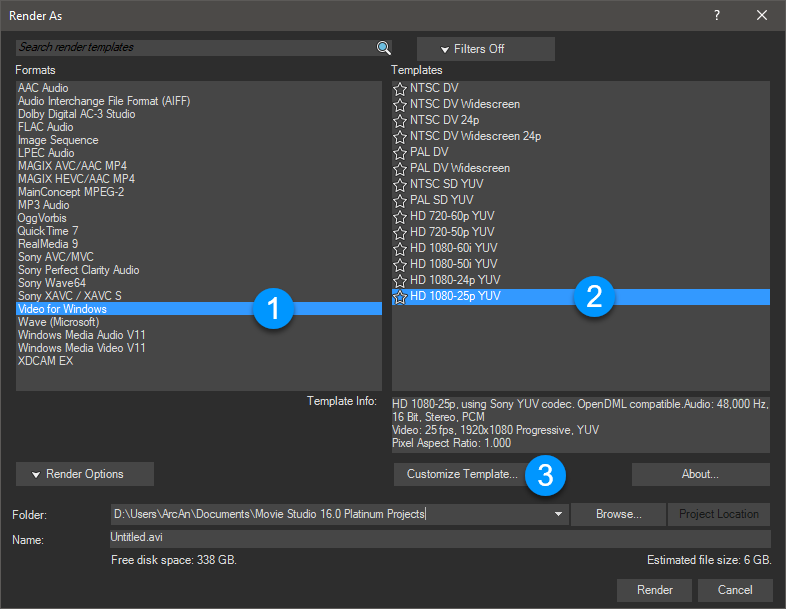
Think of "Render As" as the magic portal out of Vegas Pro 15. Find it in the "File" menu. Prepare to be greeted by a window that looks like it controls the Large Hadron Collider. But fear not, it’s friendlier than it seems!
This window is where you choose how your video will be packaged for its grand debut. It's like picking the right outfit for your movie – formal attire for a wedding, pajamas for YouTube at 3 AM.
The template section is your closet of pre-made options. It has ready-to-go settings for different platforms.
Decoding the Codecs: Not as Scary as They Sound
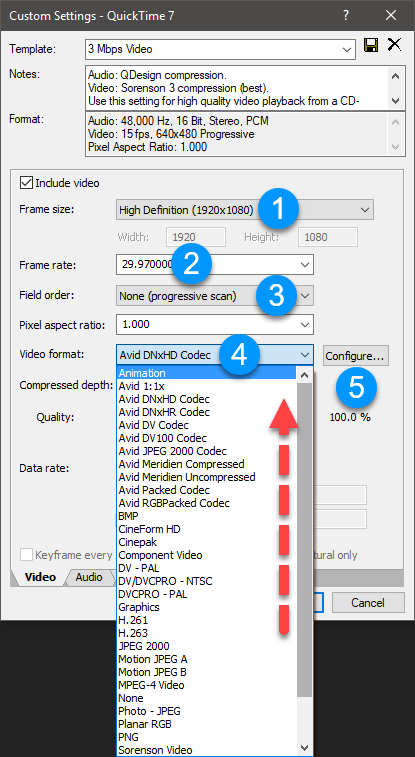
Okay, let's talk about codecs. They sound like robot overlords, right? In reality, they are just ways of compressing and decompressing your video.
Think of it like squeezing all your clothes into a suitcase. Some codecs are like vacuum sealing, while others are more like loosely folding. MP4 is your friendly neighborhood codec, known for its good quality and compatibility.
Choosing the right codec is a bit like choosing the right travel mug - it depends on where you're going. For YouTube, MP4 is generally your best bet.
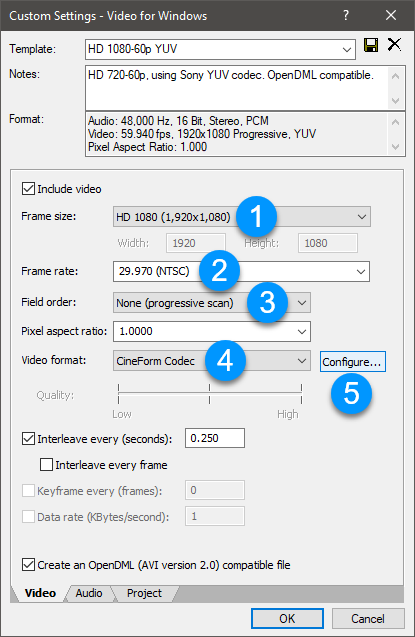
Picking Your Battles: Resolution and Frame Rate
Resolution is how sharp your video looks. Higher resolution means more detail. Like deciding if you want to see every single wrinkle in Uncle Bob's face in excruciating detail.
Frame rate is how many still images are flashed per second to create the illusion of motion. It influences the smoothness of the video. Think of it as the difference between a flipbook and a high-speed chase scene.
A standard frame rate is 24 or 30 frames per second (fps). For extra smooth motion, go for 60 fps.
Bitrate Bonanza: Finding the Sweet Spot
Bitrate is how much data is used per second of video. More data, better quality, bigger file size. It's like deciding how much luggage you want to drag through the airport.
Too little bitrate and your video will look blocky and pixelated. Too much, and you'll have a file the size of Texas. Aim for the sweet spot.
Most platforms like YouTube recommend a bitrate range. Check their guides, and don't be afraid to experiment.
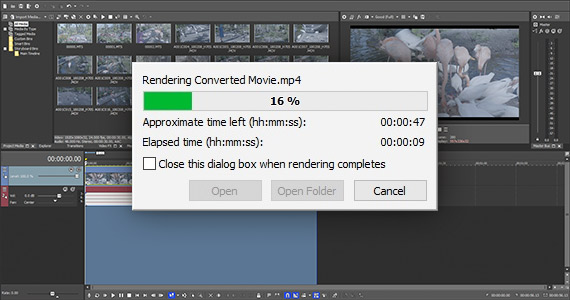
Hit "Render" and Pray (Just Kidding… Sort Of)
Once you've dialed in your settings, hit that "Render" button. Prepare to watch that little progress bar slowly crawl across the screen. This is where patience is a virtue.
Rendering is like baking a cake. You can't rush it, or it will come out looking sad and deflated. Grab a cup of tea, watch an episode of your favorite show, or maybe even start planning your next video masterpiece.
Congratulations, you've successfully exported your video! Now go forth and conquer the internet!
A Few Parting Words of Wisdom
Don't be afraid to experiment! The best way to learn is by doing. Play around with different settings and see what works best for you. Every video is a learning opportunity.
And remember, even the pros mess up sometimes. If your first export doesn't look perfect, don't beat yourself up. Just tweak your settings and try again.
Happy editing, and may your videos be forever free from pixelation and buffering!
![How To Export Video In Vegas Pro 15 How To: Export videos in HD in Sony Vegas (All Versions) [HD] - YouTube](https://i.ytimg.com/vi/ms_pI3uiZl0/maxresdefault.jpg)