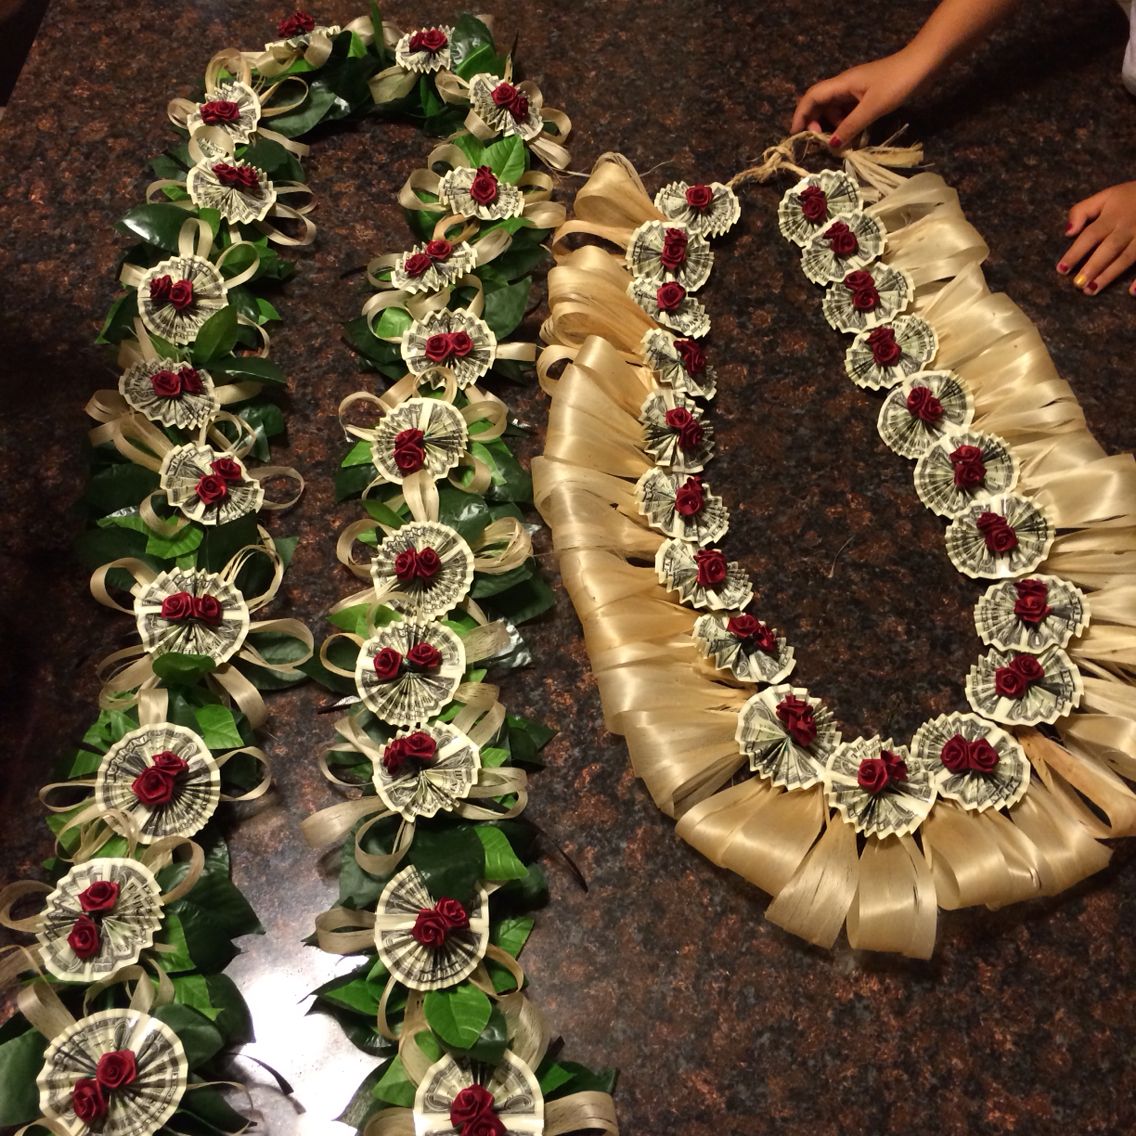
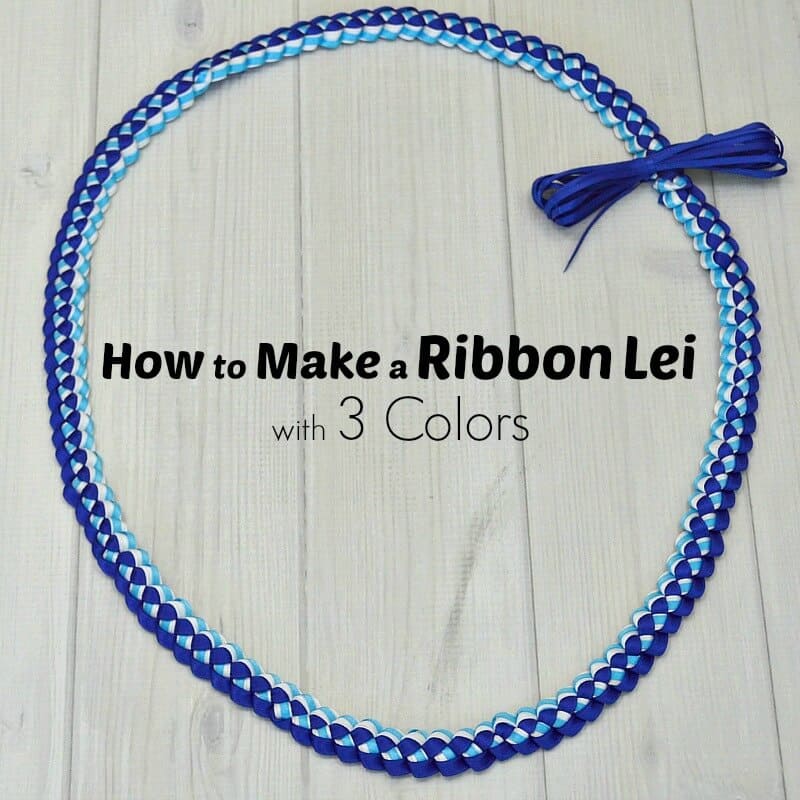
How To Make A 3 Ribbon Lei

Want to be the MVP of any party, graduation, or just Tuesday? Let's ditch the store-bought stuff and make our own awesome 3-ribbon lei! Trust me, it's easier than folding fitted sheets, and way more rewarding.
Gather Your Supplies (Think Rainbow!)
First, you'll need ribbon. Lots of it! Imagine a rainbow vomited awesomeness – that's the general idea. Get three different colors that make you happy, like sunshine yellow, ocean blue, and maybe a sassy hot pink.
You’ll need about 15-20 yards of each color. Don’t skimp! Unless you want a teeny-tiny lei fit for a hamster. A pair of scissors are crucial. Sharp ones. Unless you enjoy wrestling with ribbon, a ruler or measuring tape comes in handy.
Finally, you’ll need some strong thread or yarn. Embroidery floss works great. Don't even *think* about dental floss, unless you’re going for a minimalist, minty-fresh aesthetic.
Let the Braiding Begin! (It's Easier Than You Think)
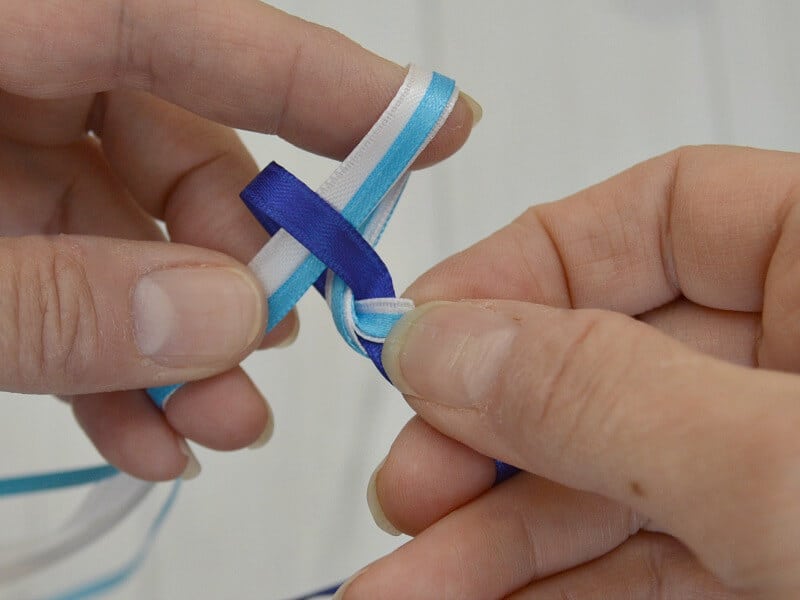
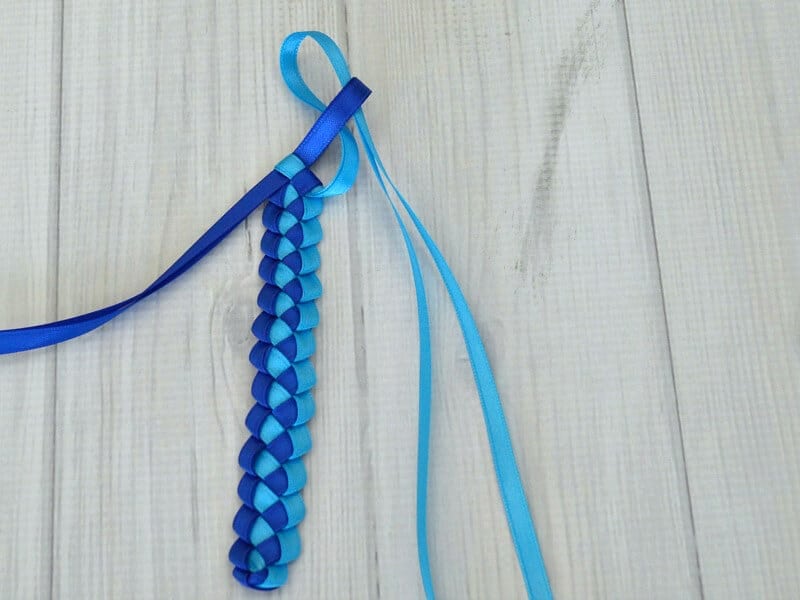
Cut each of your three ribbons into equal lengths, about 5-7 yards long. This prevents your lei from being too bulky. Line up the ends of your ribbons, holding them together like a colorful bouquet of dreams.
Tie a knot at one end, leaving a tail of about 4-6 inches. This is where the magic happens. The braiding! Think of it like braiding hair, but with slippery, shiny ribbons.
Cross the right ribbon over the middle one. Then cross the left ribbon over the new middle one. Repeat. Repeat. Repeat! Keep going until you've braided almost the entire length of the ribbons.
Try to keep your braid somewhat consistent in tightness. Not too loose, or it’ll look like a sad, droopy lei. Not too tight, or it’ll look like a constipated snake.
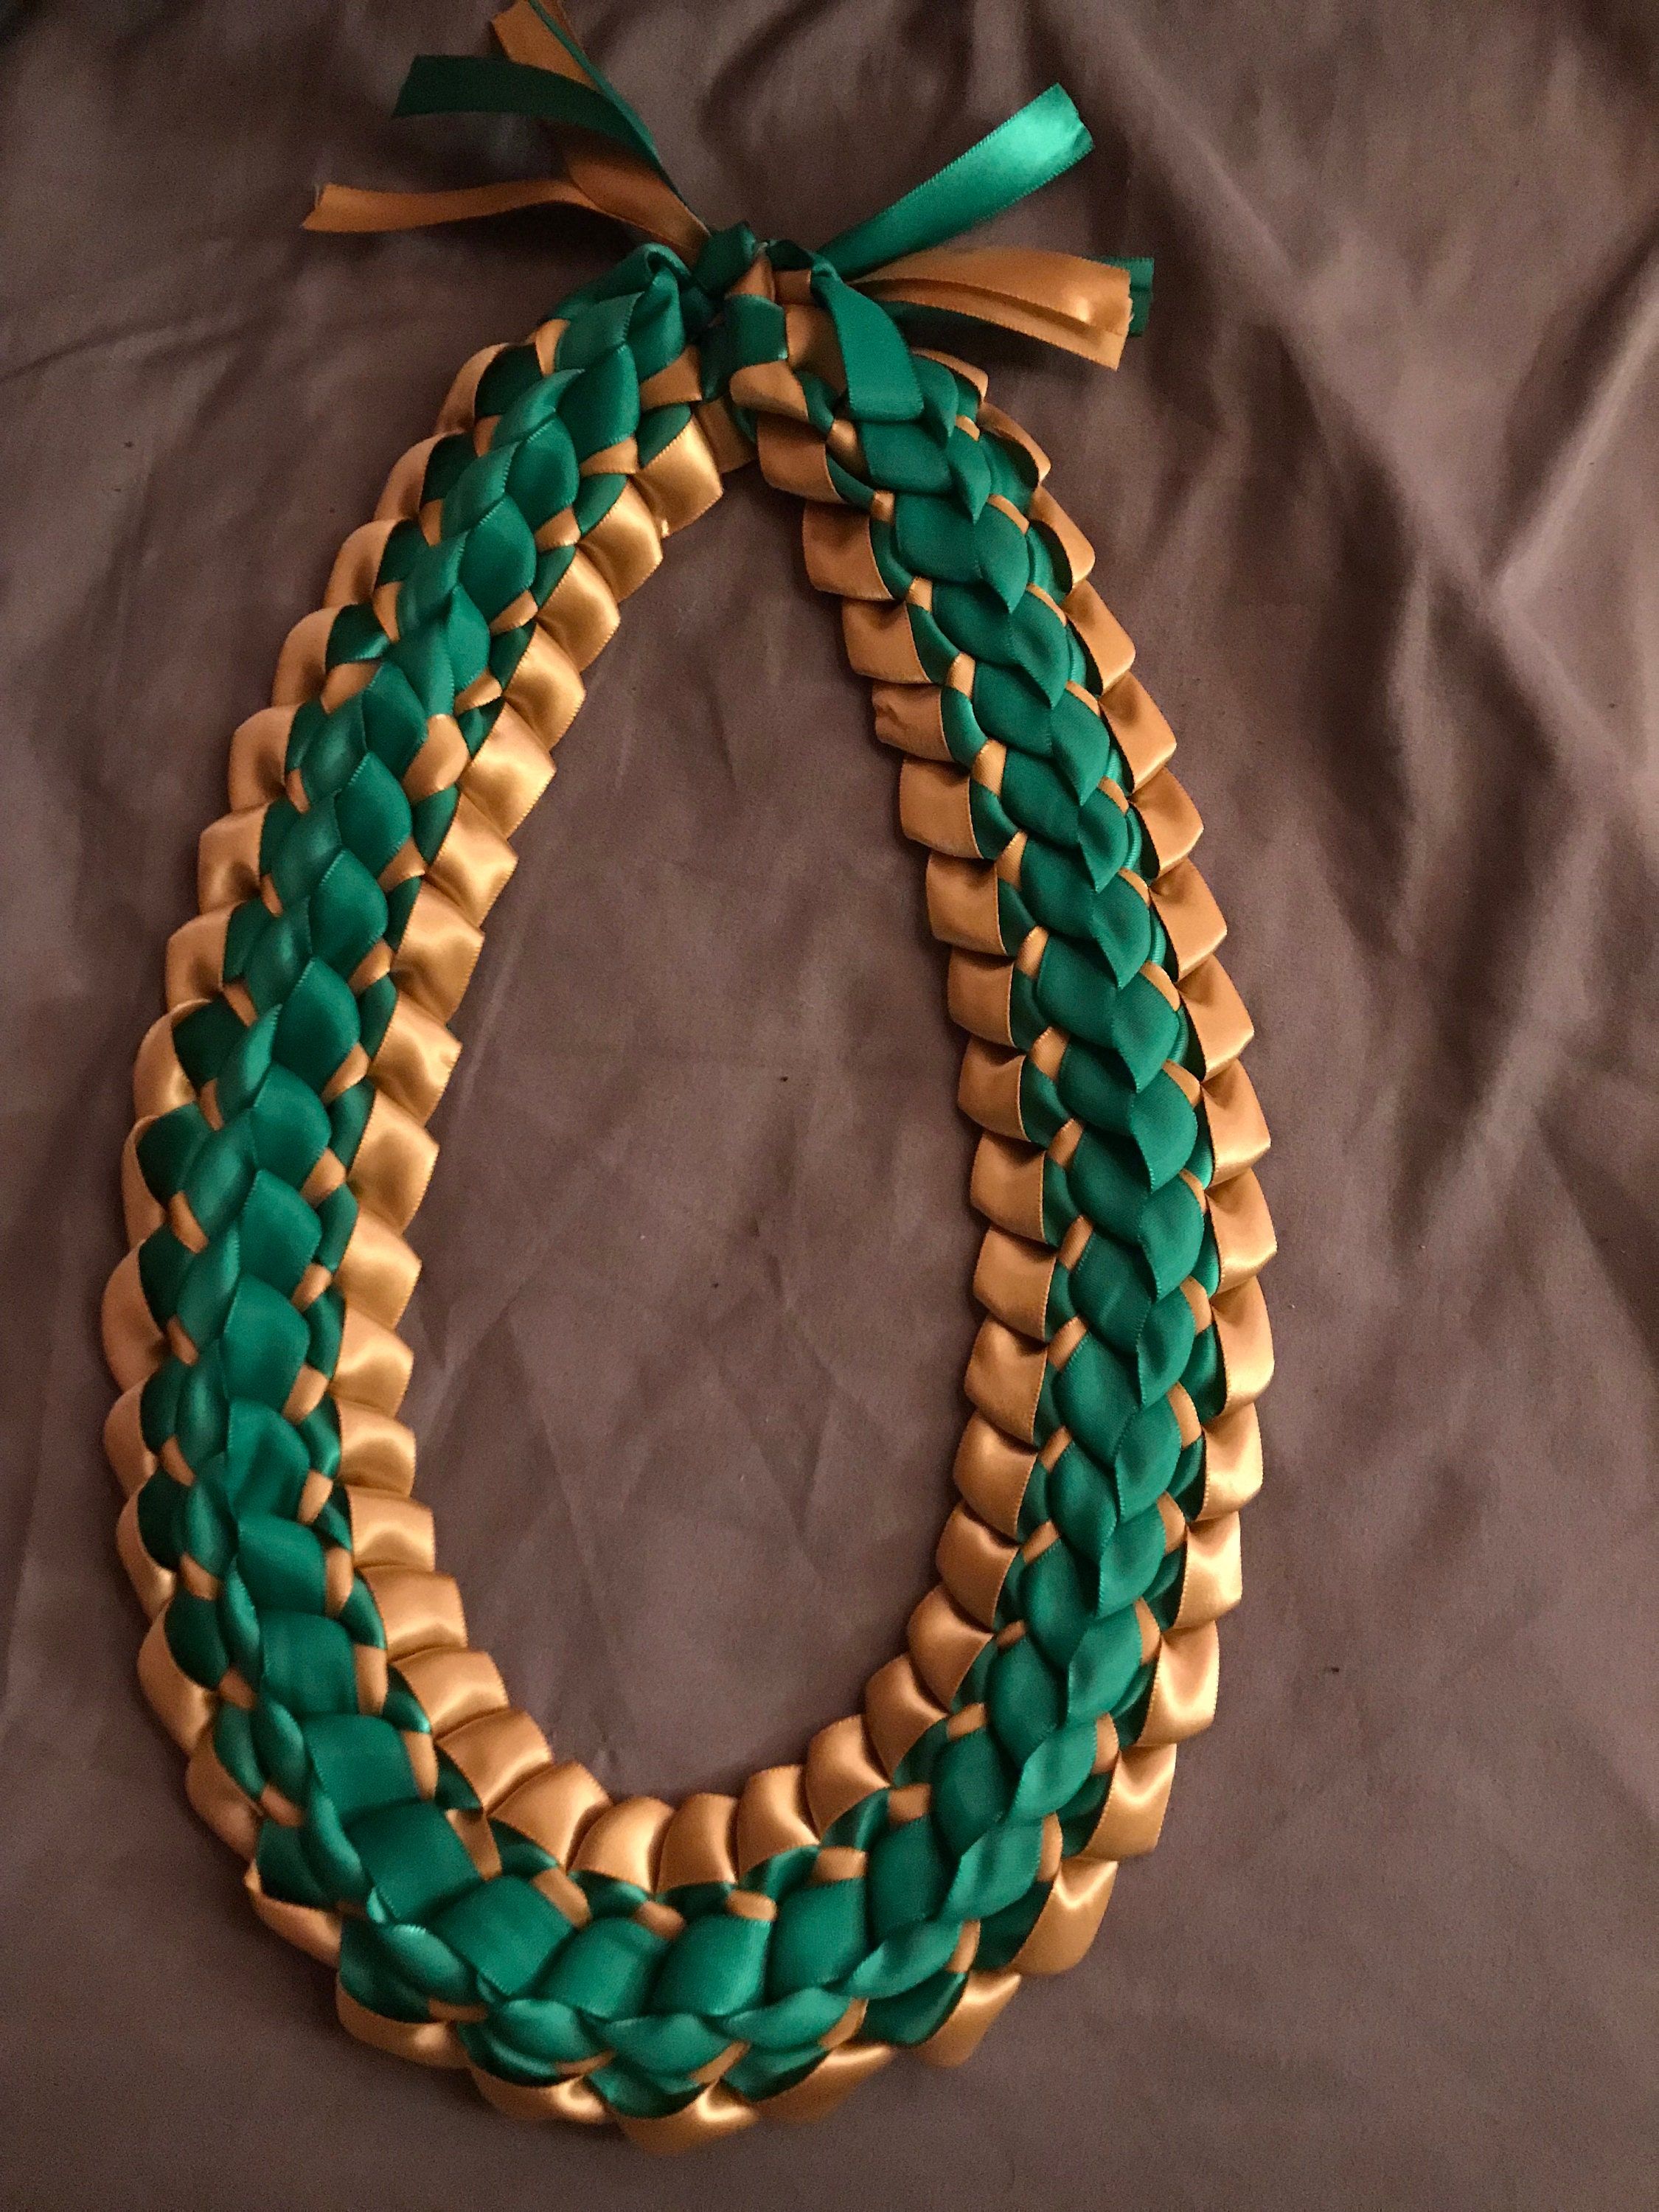
Finishing Touches (Making it Lei-gendary!)
When you get close to the end, tie another knot, mirroring the first one. Leave a similar tail of ribbon. That’s it! You’ve essentially braided a ribbon rope.
Now, find the thread or yarn and a needle. Thread it! We’re going to gather the ends of the braid to form the lei.
Carefully push the needle through the knot at one end of the braid. Then, gently gather the braid by threading the needle and yarn through the edge of the braid, moving towards the other end.
Keep gathering until the two ends meet. Adjust the gathers to create the desired fullness of the lei. It should look like a beautiful, colorful circle of awesome.
Tie the two ends together securely. Knot that yarn like your life depends on it! You don’t want your lei unraveling mid-party, scattering ribbon like confetti gone wrong.
Trim the yarn and the excess ribbon from the tails, leaving a neat fringe. These little tails add a touch of whimsy and charm. Plus, they're fun to twirl!
Lei It On! (You Deserve It!)
Congratulations! You've just crafted your very own 3-ribbon lei. Admire your handiwork! Isn't it beautiful?
Now, go forth and lei it on someone! Or yourself! You deserve it. Rock that lei like you're walking the red carpet. Because, in your own handmade lei-filled world, you totally are.
Remember to adjust the color to fit the occasion! Go team colors! If it is for graduations, or birthdays, don’t be afraid to experiment with different ribbon types and textures! Happy lei-making!