How To Make A Fake Cut With Pen

Alright, buckle up buttercups! We're diving headfirst into the dazzling world of DIY special effects – pen style! Get ready to wow your friends (and maybe mildly concern your parents, but hey, art, right?) with a super realistic fake cut. No actual blood, guts, or tears required. Just a dash of creativity and a steady hand. Let's do this!
The Arsenal of Awesome
First things first: gather your supplies. You'll need a few trusty companions for this mission. Think of them as your personal special effects crew!
The Pen (Obvi)
Grab a regular ballpoint pen. Black or blue works best. We're going for that slightly-under-the-skin, bruised look, not a rainbow unicorn explosion. Though, that's a tutorial for another day!
The Red Pen
Next, you need a red pen. Gel pens are *fantastic* for this, because they are vibrant and create depth, but use what you can find! We want the wound to be fresh and angry. This is our "ouch" factor.
Blending Buddy: Q-Tip
A Q-tip is your best friend for this project. It's the master of disguise, blending those harsh lines into a convincing illusion. Think of it as your artistic eraser.
Shiny Superstar: Lip Gloss (or Vaseline)
Lip gloss. Yes, you read that right. A little bit of shine adds that final touch of realism. Making it look like a freshly injured real cut is our main target here. Vaseline works wonders too.
The Masterpiece in the Making
Now, for the fun part! Find a spot on your arm (or hand, or wherever you're feeling adventurous). Make sure it's clean and dry. No one wants a fake cut with bonus germs.
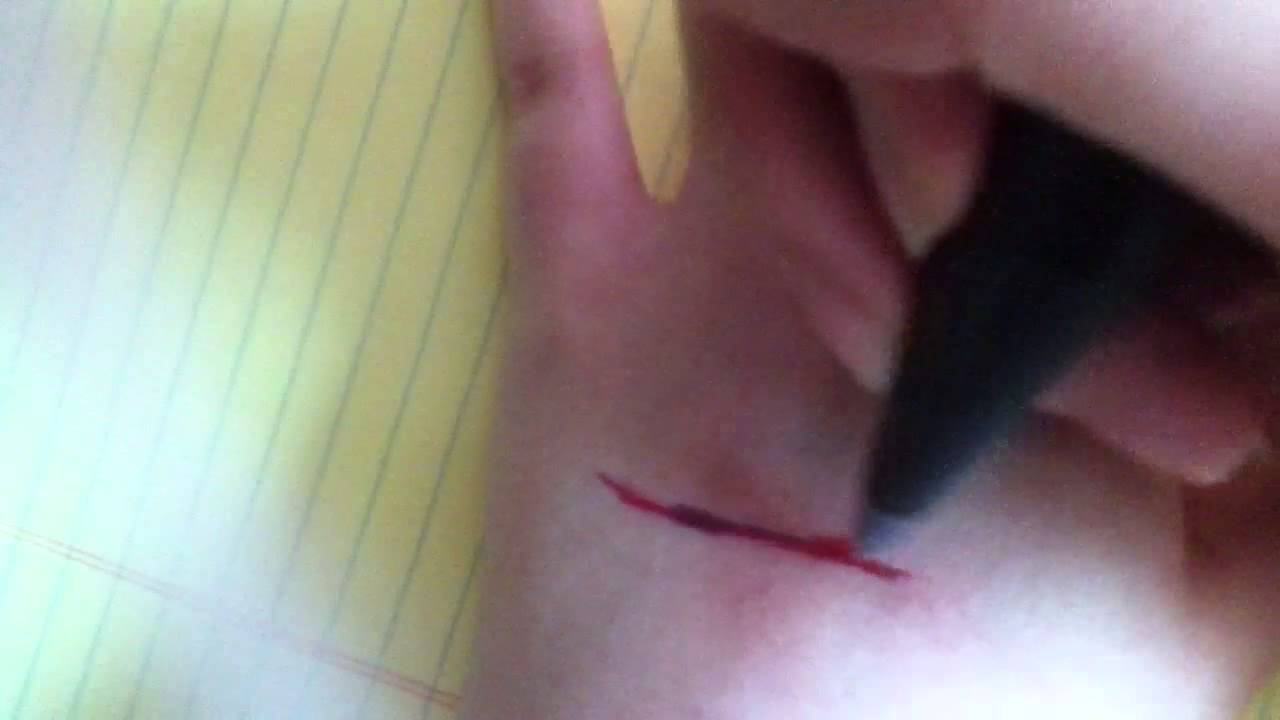
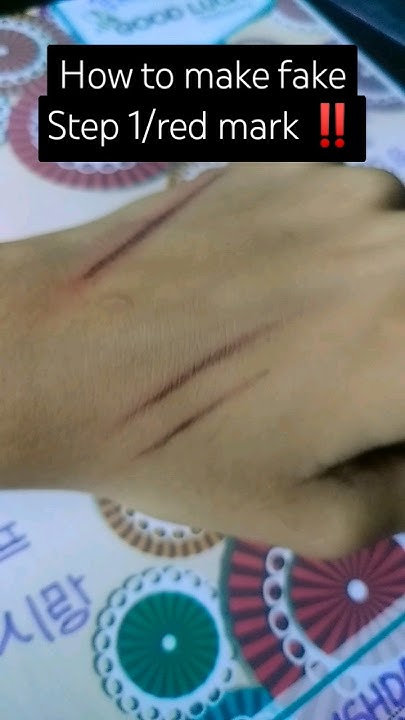
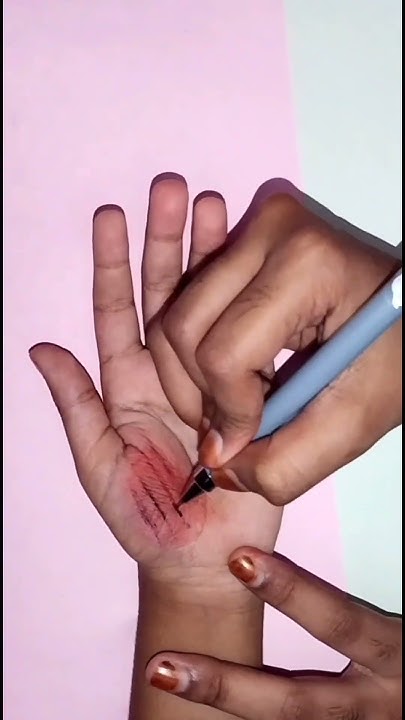
Lightly draw a line with the black or blue pen. Don’t press too hard. We're going for subtle, not a permanent tattoo. Think thin, slightly jagged.
Now, with the red pen, trace over the line. But here's the secret ingredient: don't trace it perfectly! Make it a little uneven, a little messy. A real cut isn't neat and tidy, is it?
This is where our Q-tip comes in to play. Gently smudge the red ink outwards from the line. The goal is to soften the edges. This makes it look like the surrounding skin is irritated and inflamed. No one wants to know its fake!
A little more red ink in the center. Just a touch. We want to create depth, like there's something going on underneath the skin. Think dimension, not a flat scribble.
Time for the magic touch: lip gloss. Dab a tiny amount over the red ink. The shine will make it look like the cut is still slightly wet, adding to the realism. It's like the cherry on top of our fake wound sundae!
Pro Tips for the Aspiring FX Artist
Don't overdo it! Less is often more. You can always add more, but it's harder to take away.
Practice makes perfect! Try it out a few times on a less visible area first. That way, you can hone your skills before unleashing your masterpiece on the world.
Consider the location. A cut on your hand might look different than a cut on your arm. Think about how the skin moves and stretches in that area.
Add a little surrounding redness. Use a slightly damp red pen or even a bit of red eyeshadow to create a subtle blush around the cut. This adds to the illusion of inflammation.
Most importantly: have fun! This is all about letting your creativity shine. Don't be afraid to experiment and try new things. After all, you're an artist now!
And there you have it! Your very own, incredibly realistic (yet totally fake) pen-created cut. Go forth and amaze! Just remember, use your powers for good (or at least mild amusement).


![How To Make A Fake Cut With Pen Fake cut😨😨, Fake Cut Tutorial | Only Using PEN [Short video] - YouTube](https://i.ytimg.com/vi/2XmkjD8uZzg/maxresdefault.jpg?sqp=-oaymwEoCIAKENAF8quKqQMcGADwAQH4AbYIgAKAD4oCDAgAEAEYZSBUKEEwDw==&rs=AOn4CLBGS8x3cFTocZE5YaGKyMnAwmjFXg)

![How To Make A Fake Cut With Pen Fake Cut Tutorial | Only Using PEN [Short video] - YouTube](https://i.ytimg.com/vi/yUbSnv9m-io/maxres2.jpg?sqp=-oaymwEoCIAKENAF8quKqQMcGADwAQH4AcYCgALgA4oCDAgAEAEYZSBcKFUwDw==&rs=AOn4CLBBME-vtRYzGPQjcSYkitD2F2vhBw)