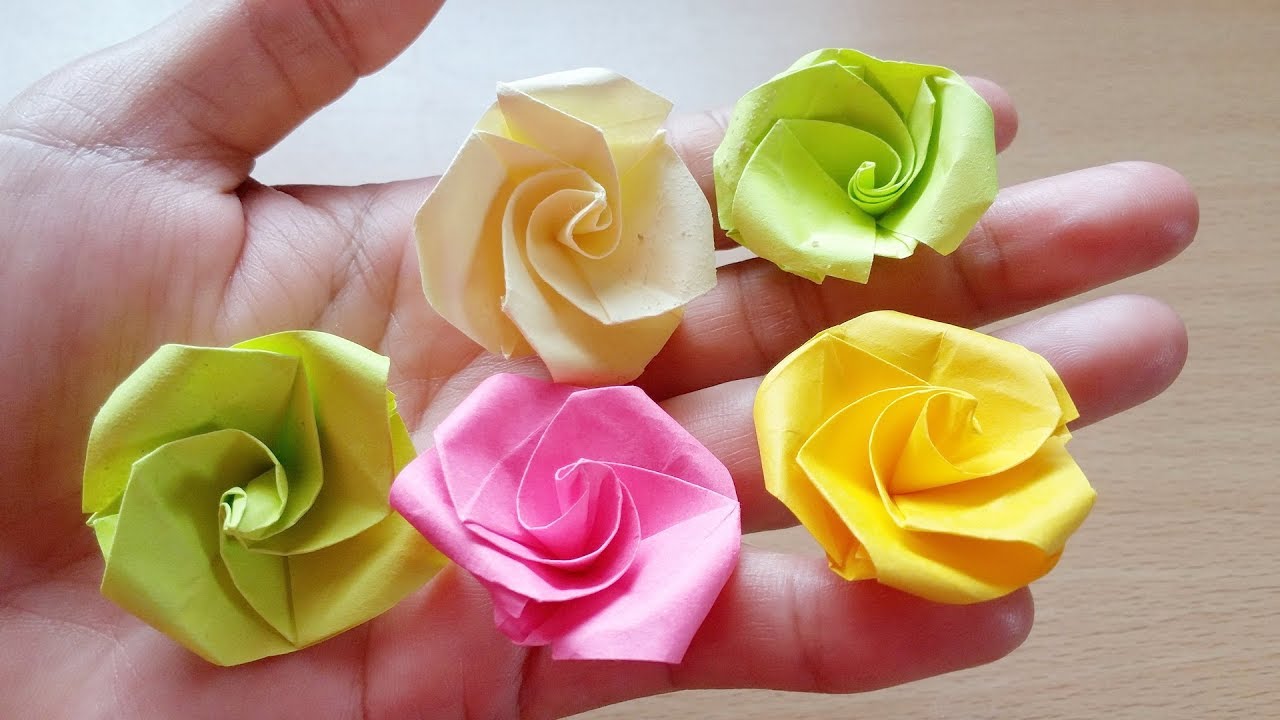
How To Make A Flower Out Of Sticky Notes

Okay, people, buckle up! We're about to embark on a journey, a sticky, colorful journey into the heart of crafting. Forget origami swans! We're diving headfirst into the wonderful world of sticky note flowers.
First, you'll need sticky notes. The more, the merrier! Think rainbow explosion, a symphony of pastels, or even a bold monochromatic masterpiece. Your call, Picasso!
Round 1: The Petals
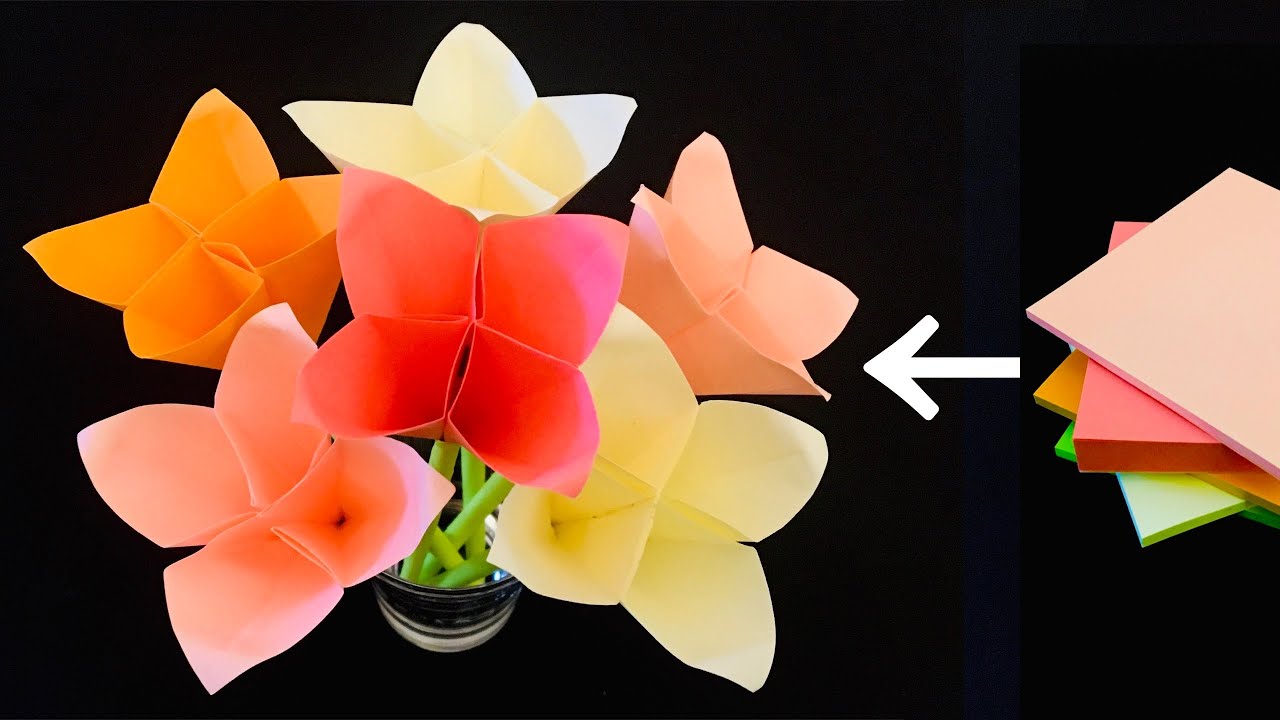
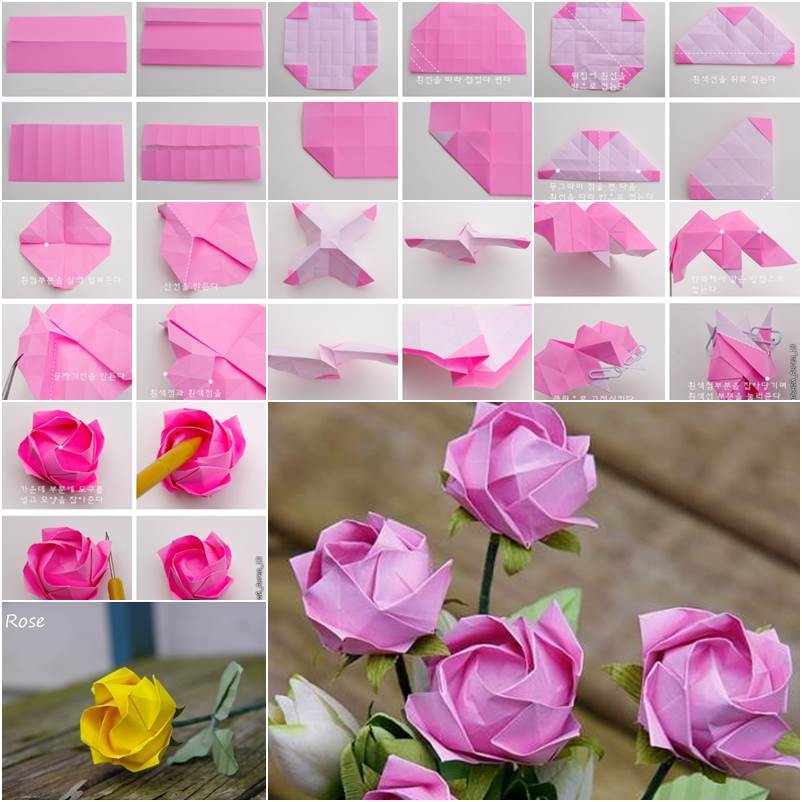
Grab a sticky note. Any color! We're going to fold it diagonally, corner to corner, making a cute little triangle. Imagine you're making tiny paper airplanes, but way less aerodynamic.
Now, fold those corners down to meet the bottom point of the triangle. Bam! It looks like a wonky kite. Don't worry, wonky is charming.
Repeat this a bunch of times. Like, a LOT. Think 8-10 petals for a small flower, maybe a whole sticky note pad for a super-bloom extravaganza! The more the better. Seriously, hoard those sticky notes.
Round 2: Sticking Around
Time to grab your glue stick. Don't skimp on the glue; we're aiming for floral integrity! You don’t want your hard work falling apart.
Apply a dab of glue to one of the folded down flaps on your petal. Then, stick another petal right next to it! Keep going, petal by petal, joining them together to create a circle.
It's like a floral daisy chain of sticky note goodness. Are you not entertained? This is where the magic happens, folks.
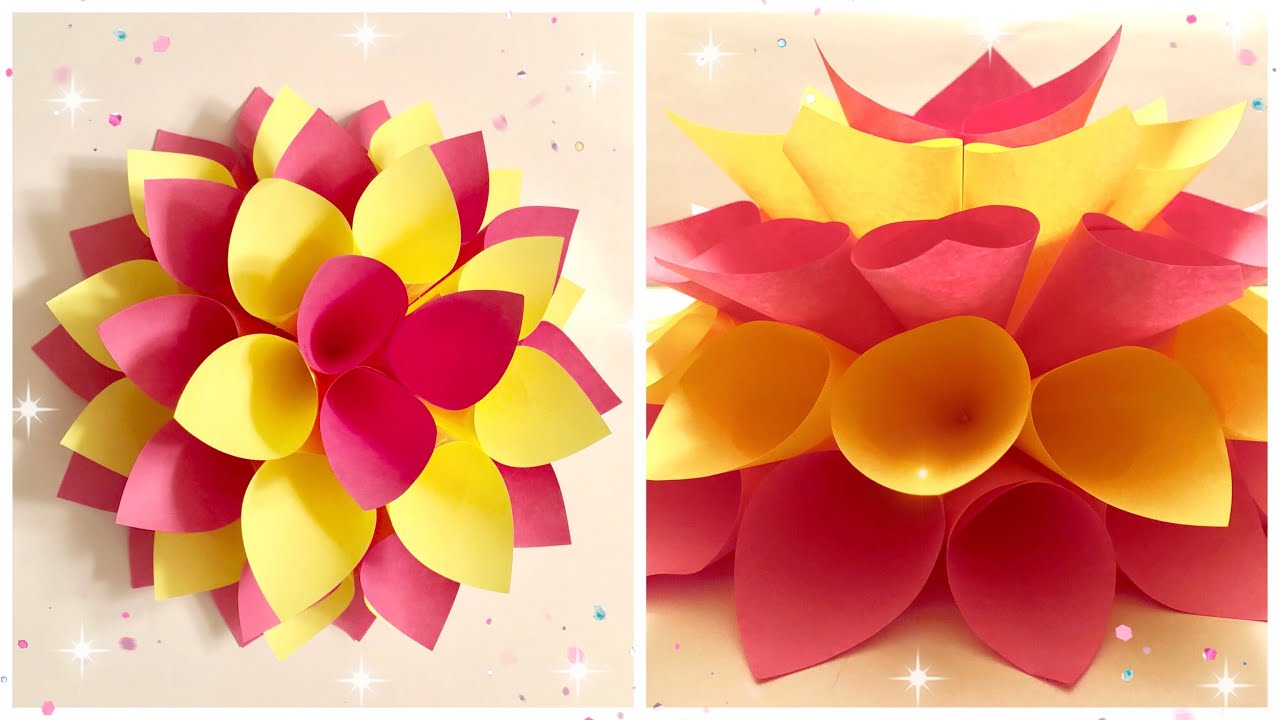
Round 3: Layering Like a Pro
Made your first layer of petals? Fantastic! Now, make another one! This second layer needs to be *slightly* smaller. Think of it as a flower evolution.
To make the petals smaller, just trim a tiny bit off the top of your sticky note before you start folding. Just a snip! Scissors are your friends.
Once you've glued together your second, slightly smaller layer, stick it on top of the first. Place it so that the petals in the top layer are nestled between the petals of the bottom layer. This staggered effect is key!
Pro Tip: Variety is the Spice of Flower-Making!
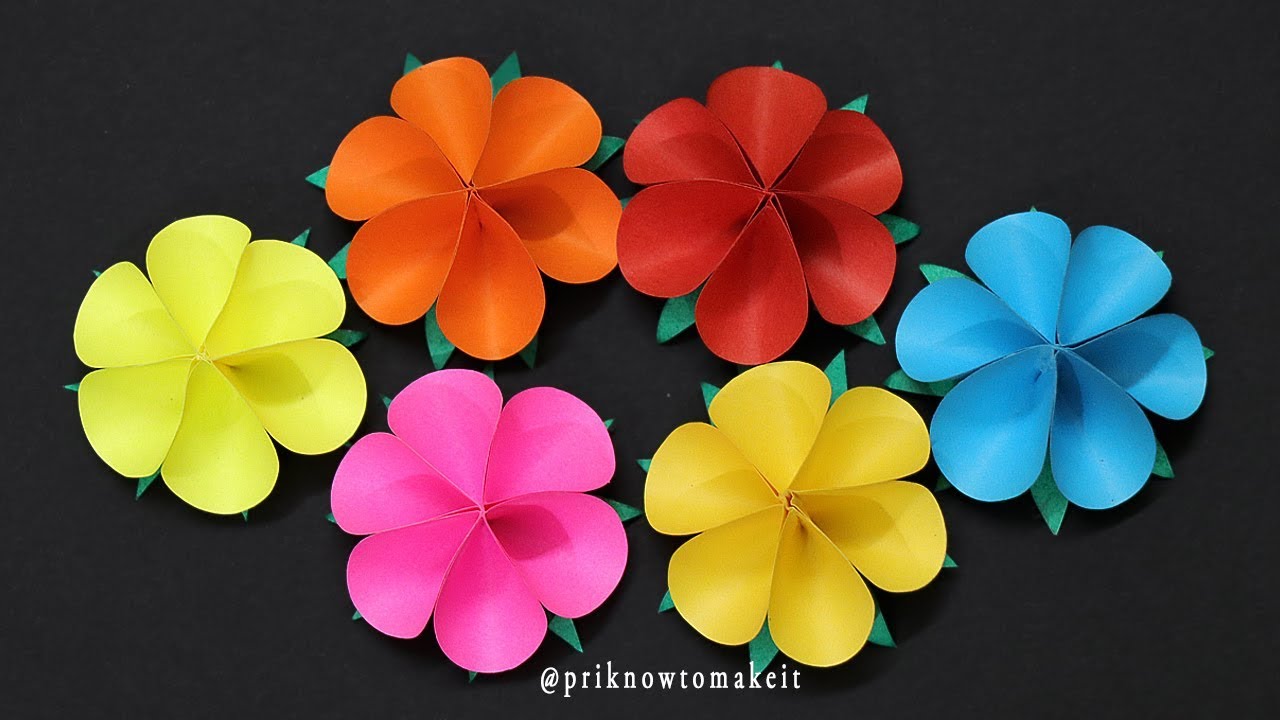
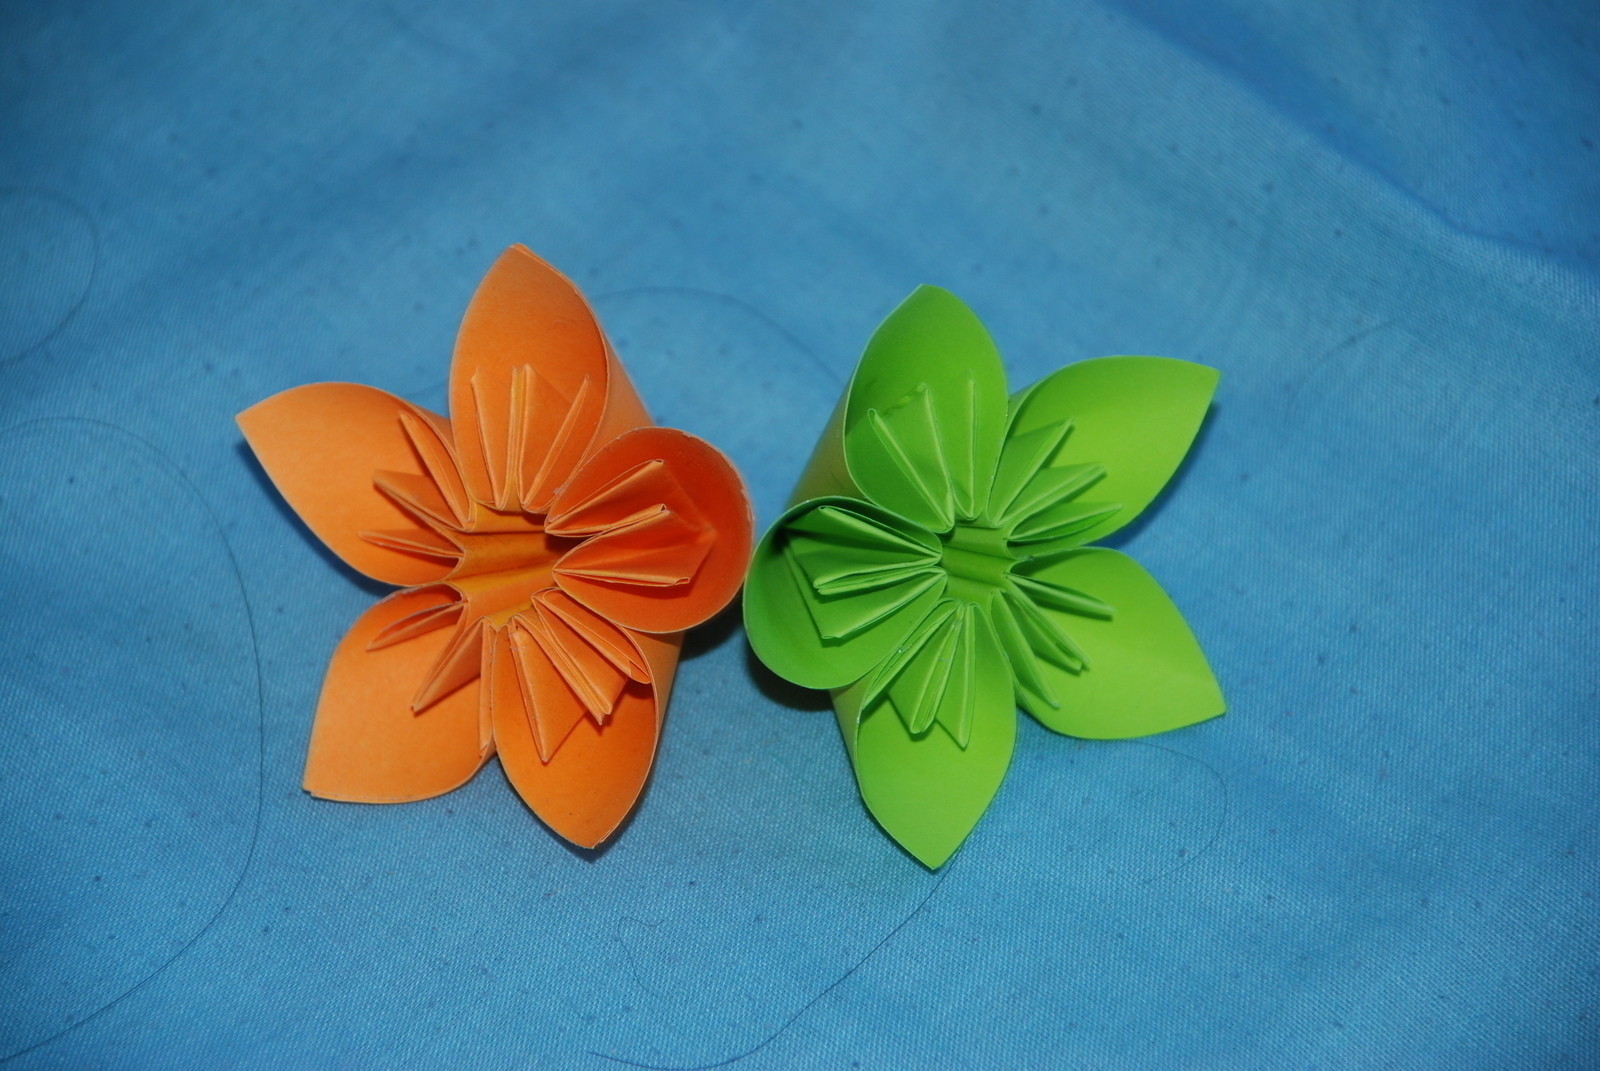
Experiment with different colors for your layers! Imagine a vibrant yellow center surrounded by soft pink petals. Swoon!
You can even use different sizes of sticky notes! Go wild! Unleash your inner florist!
Finishing Touches: The Grand Finale
For the center of your flower, consider using a small, tightly crumpled piece of yellow or brown paper. Or, even better, a sparkly pom-pom! Everything is better with glitter.
Stick that bad boy right in the middle. Ta-da! You've got a flower! A magnificent, sticky note flower!
You can stick these flowers to your monitor, your fridge, your unsuspecting cat (just kidding... mostly). The possibilities are endless!
And there you have it, folks! You've conquered the art of the sticky note flower. Now go forth and spread the floral cheer!
Let's be honest, who needs real flowers when you can have a bouquet of paper that screams "I'm crafty and slightly addicted to office supplies!" It’s time to embrace your inner Martha Stewart (but with a slightly more chaotic energy).
This little project is about more than just making a flower. It's about embracing the unexpected, finding joy in the simple things, and, most importantly, proving that you can make something beautiful out of something as mundane as a sticky note.
So, go on, gather your sticky notes, unleash your creativity, and let the flower-making frenzy begin! And remember, if your flowers turn out a little wonky, that just means they have character. Embrace the imperfections and celebrate your unique creations!