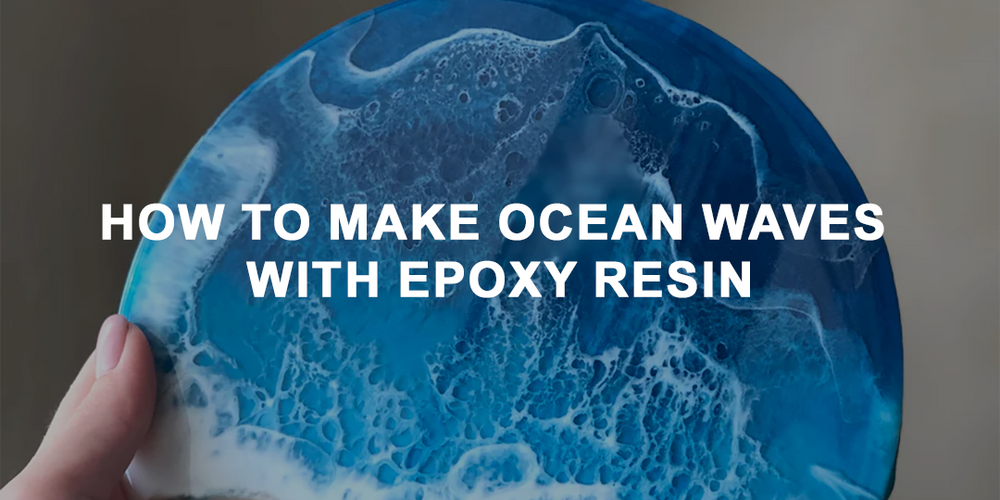
How To Make Ocean Waves With Resin
Ever wanted to capture the magic of the ocean? Imagine holding a piece of the sea right in your hand. You can! It's surprisingly simple to create stunning ocean waves with resin.
Why Resin Waves Are So Awesome
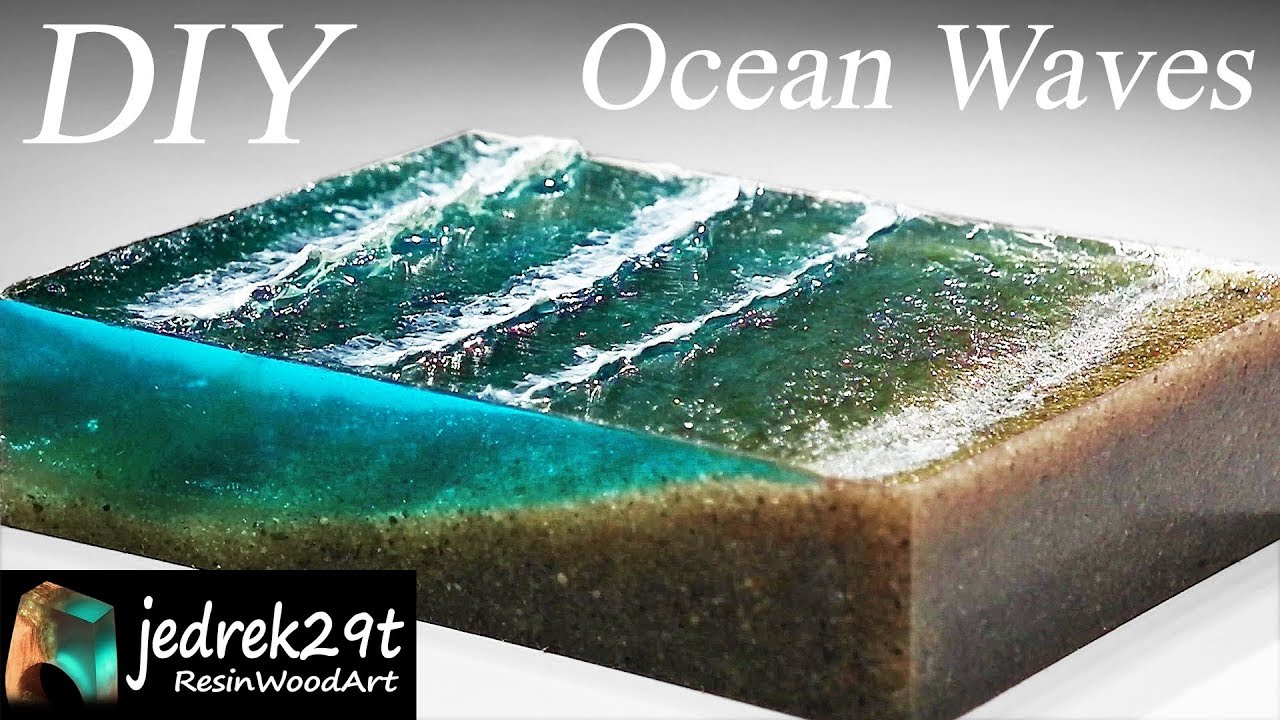
Let's face it, the ocean is mesmerizing. The way the water moves, the colors shift, it's pure art. You can recreate a miniature version of that art using epoxy resin. It's like having your own personal beach.
What's cool is that each piece is unique. No two waves are ever exactly the same. So, your resin ocean will be a one-of-a-kind masterpiece.
Getting Started with Resin
First, you'll need some basic supplies. Think of it like gathering ingredients for a delicious recipe. You'll need epoxy resin, hardener, pigments (blues, greens, whites), and a heat gun.
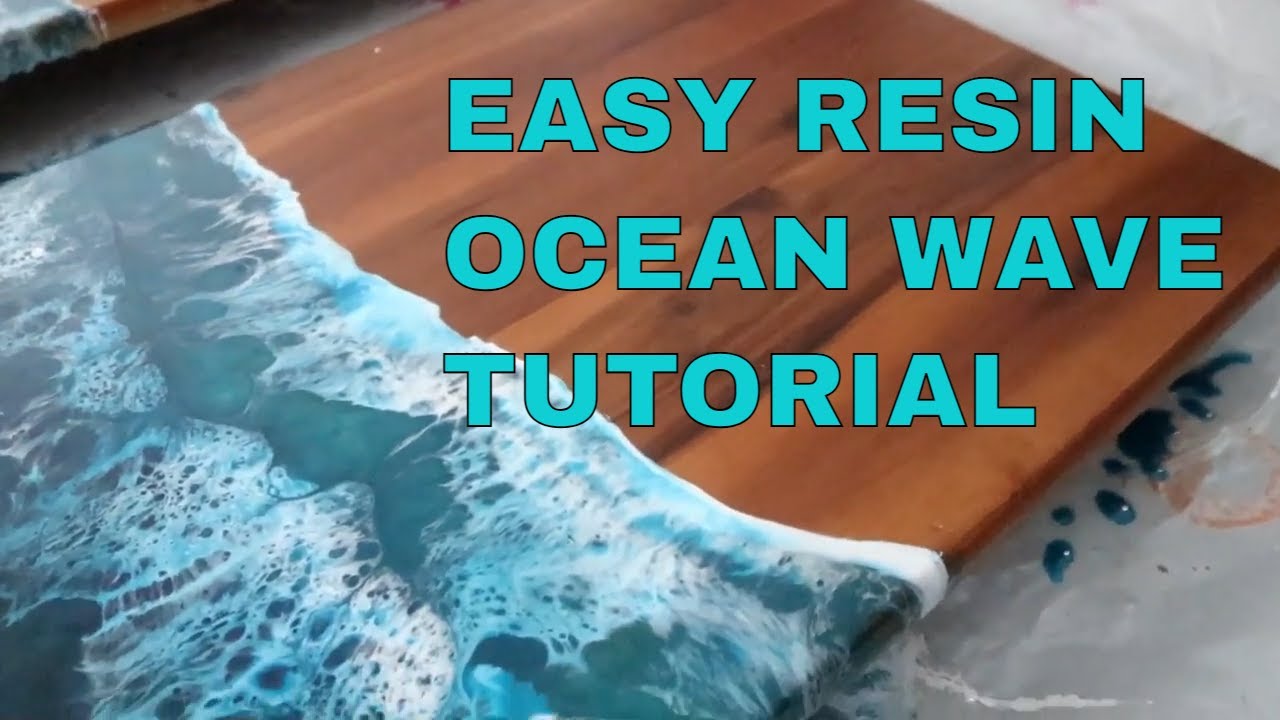
Also grab something to pour the resin into. A wooden board or even a petri dish works great. Don't forget safety gear like gloves and a mask!
Creating the Ocean Effect
Now, for the fun part! Mix your resin and hardener according to the instructions. It's like mixing paint for your canvas.
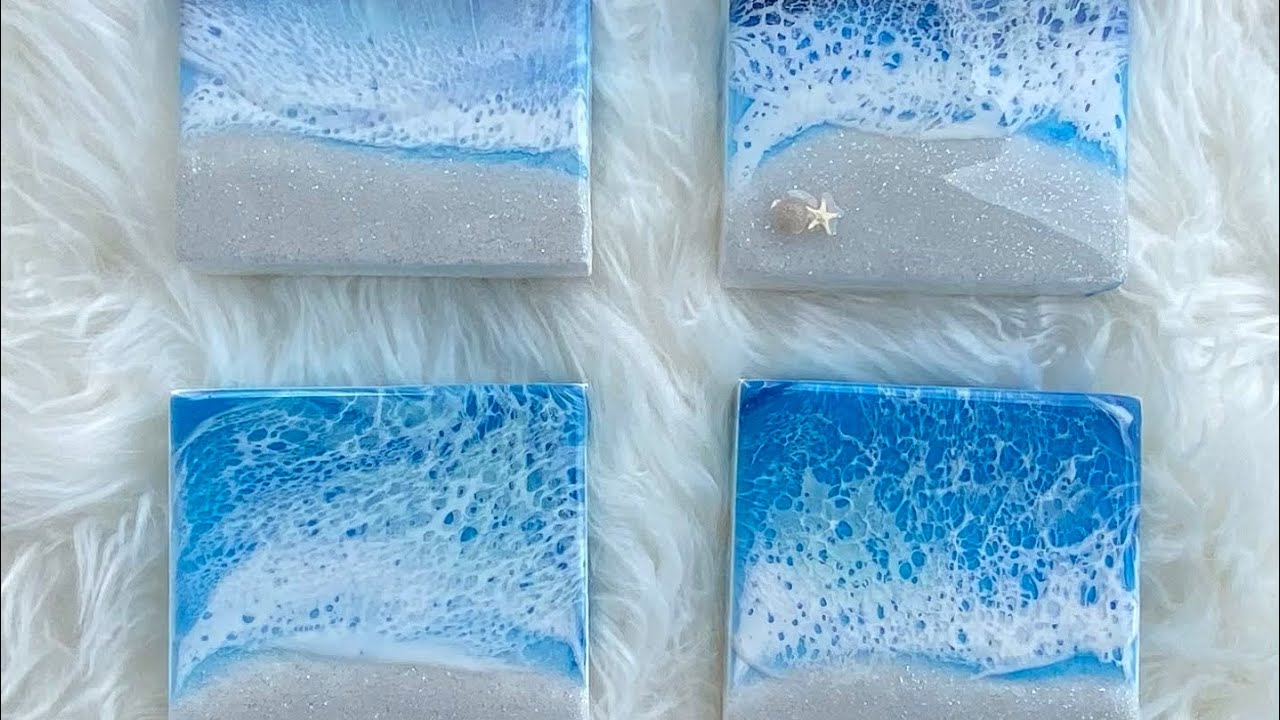
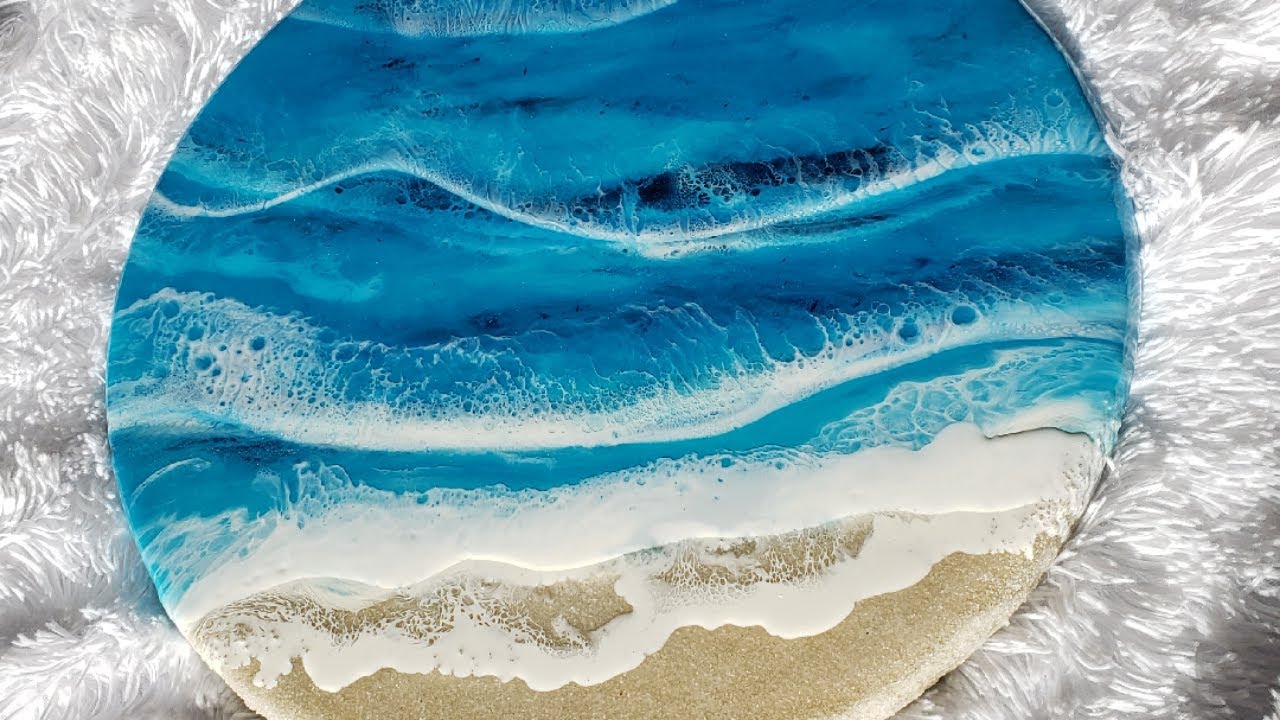
Add your blue and green pigments. Start with darker shades for the deeper ocean. Lighter shades will create the shallow water effect.
Pour your colored resin onto your surface. Layer the different shades to create depth. This is where your artistic vision comes alive.
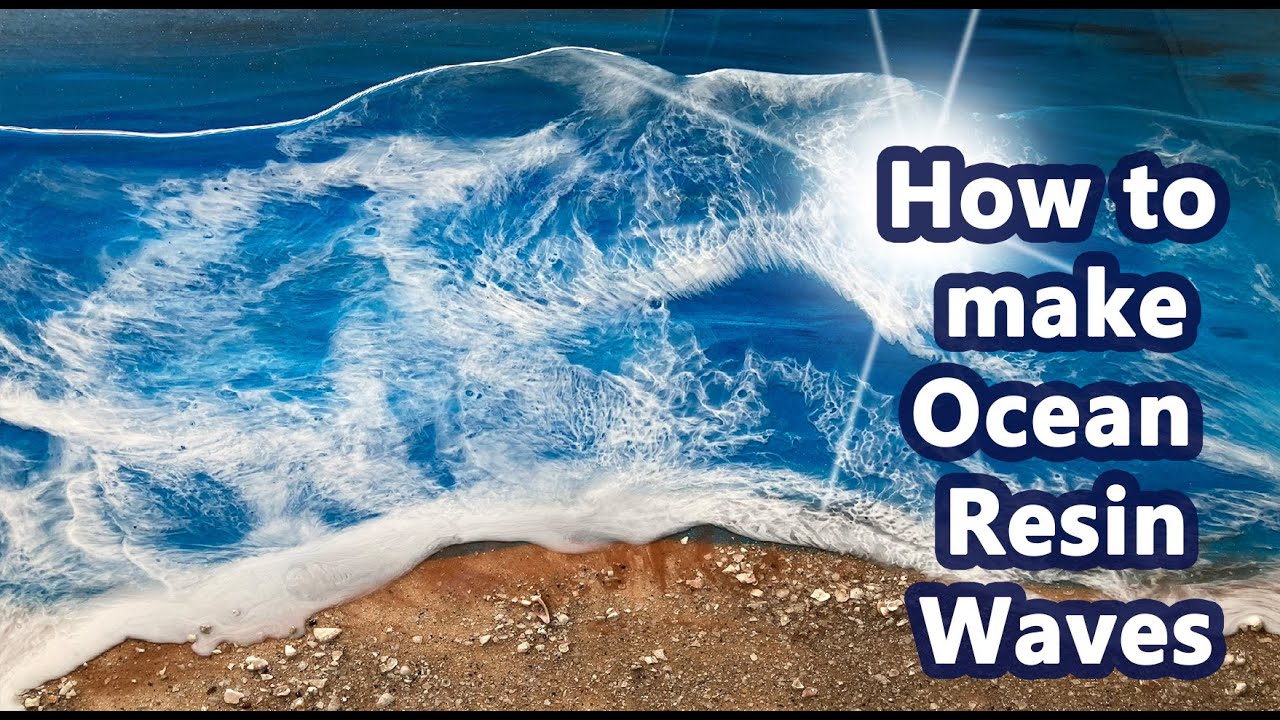
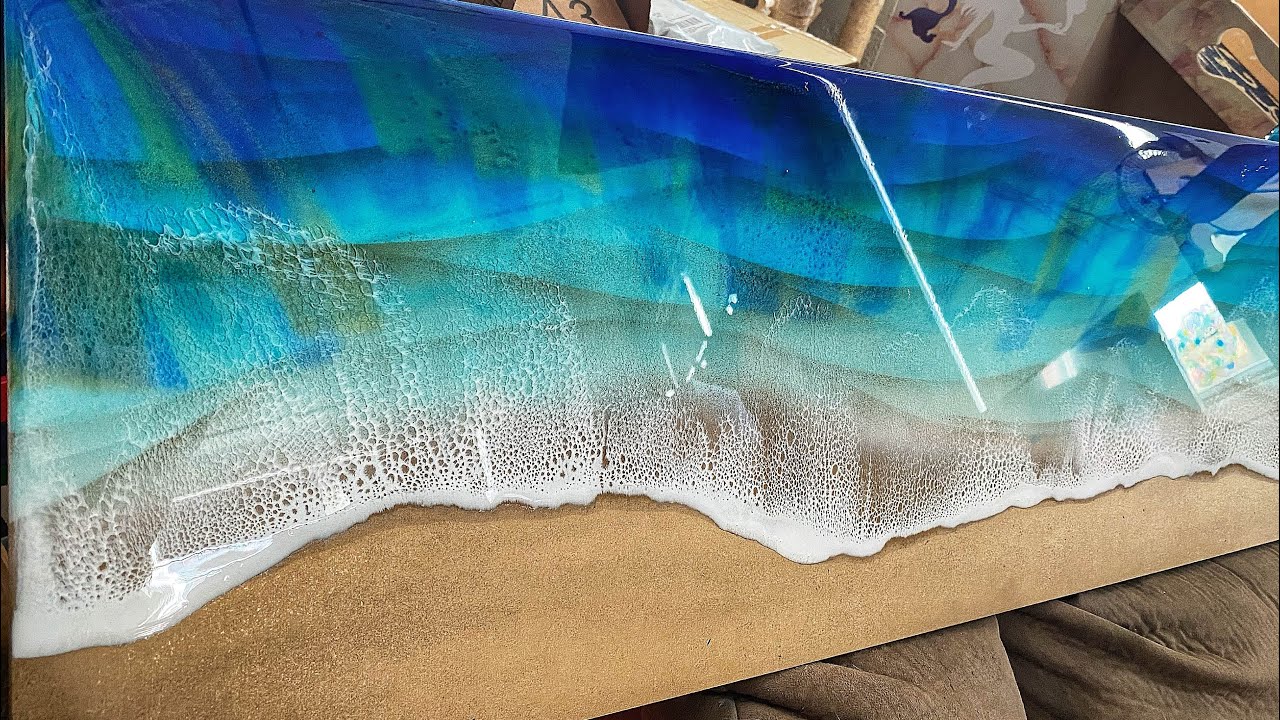
The Magic of White Resin
The secret to realistic waves is the white resin. This is where the "sea foam" comes in.
Mix a small batch of resin with white pigment. Then, drizzle it strategically over the blue and green layers. Use a toothpick or skewer to manipulate the white resin.
This is what makes it look like the ocean is actively moving. Remember to let it naturally flow.
Heat Gun Power!
Now grab your heat gun. Don't get too close! Gently apply heat to the white resin. Watch as it spreads and creates cell-like patterns.
This technique is crucial for the wave effect. The heat makes the resin move and blend. It's pure magic watching the waves come to life. Be careful not to burn the resin!
This is what really sets resin art apart! Each artist has their own technique for manipulating the resin. You will learn and refine yours over time.
Adding Finishing Touches
Once you're happy with your waves, let the resin cure completely. This usually takes 24-72 hours. Patience is key!
Once cured, your resin ocean is ready to be admired. Add a frame to your wooden board. Or display your petri dish creation on a shelf.
Why It's So Addictive
Creating resin ocean waves is incredibly therapeutic. The process is mesmerizing and relaxing. It's like a mini-vacation to the beach, without leaving your home.
Plus, the results are stunning. People will be amazed by your artistic talent. Get ready for compliments!
Resin art is a gateway to creativity. It opens up endless possibilities. So, dive in and start creating your own resin ocean today!
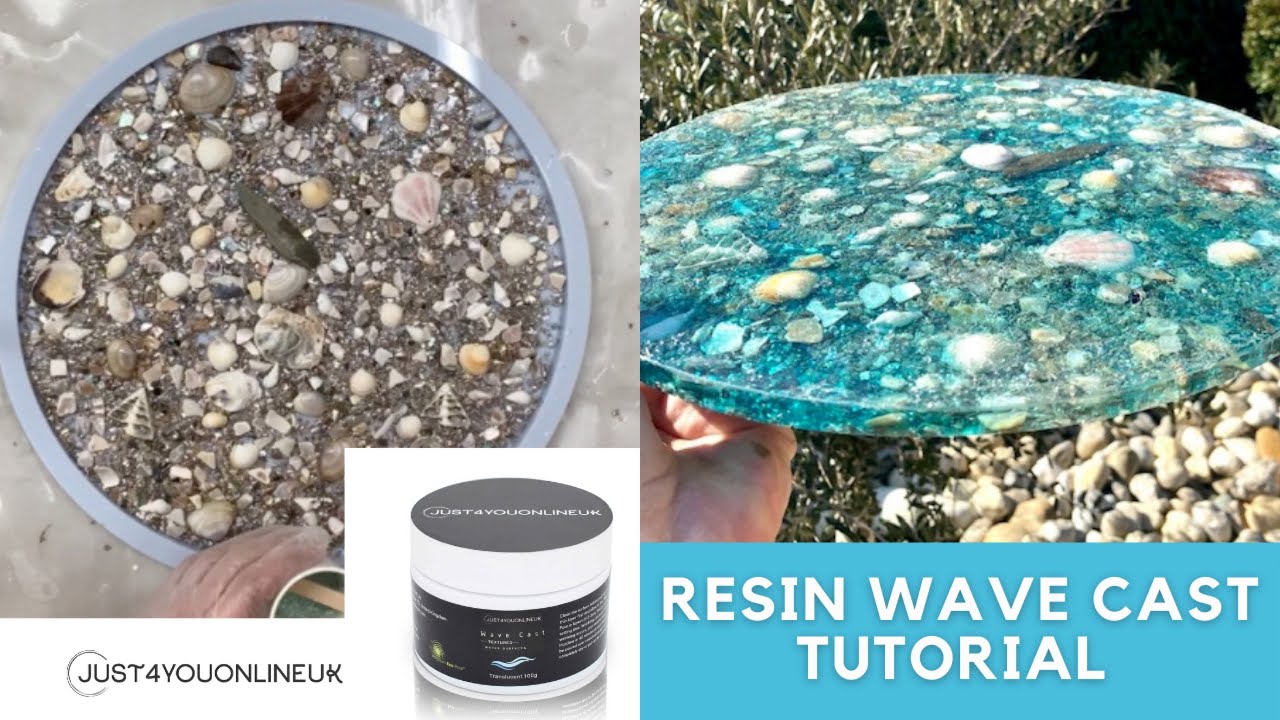
Think about other things you could incorporate. You can also add sand, shells, and even tiny sea creatures to your resin ocean. The possibilities are limitless.
This isn't just about making art. It's about capturing the essence of the ocean and bringing it into your life. This can become your new favorite pastime.
So grab your supplies, unleash your creativity, and make some waves! Have fun and be creative!