How To Pluck A Wig For Beginners

Welcome to Wig Plucking Paradise!
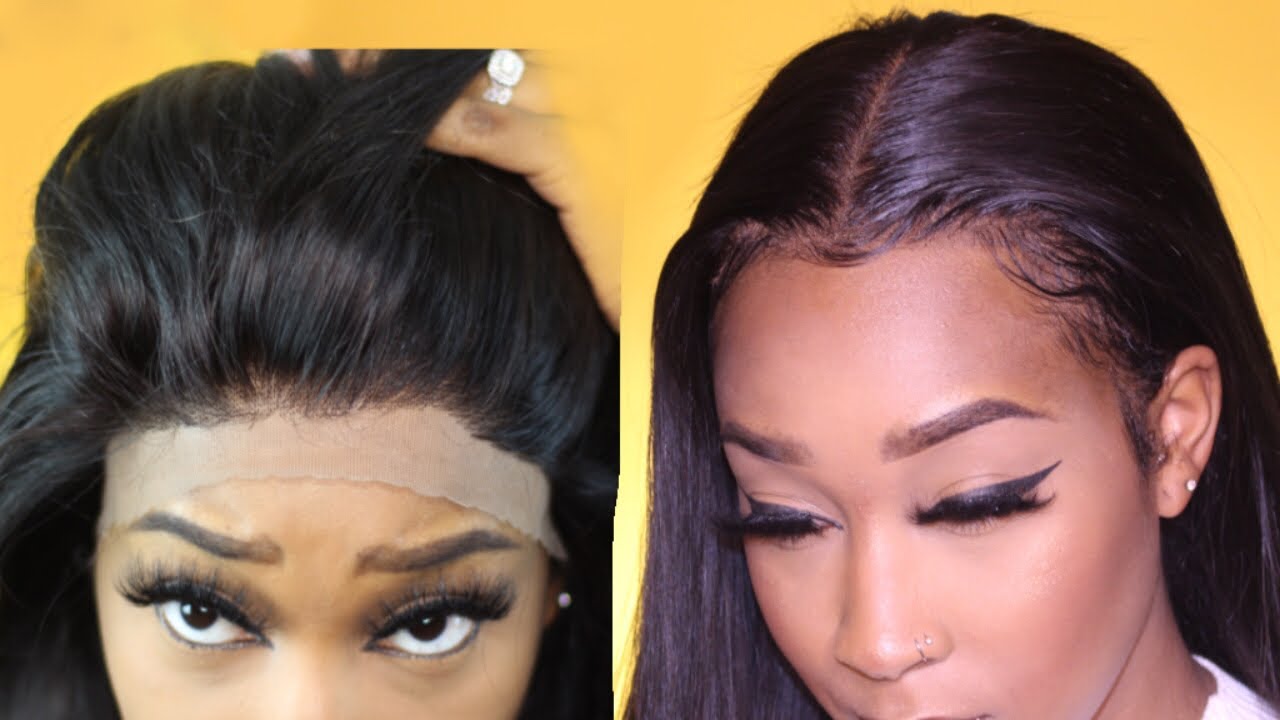
Okay, you've got a wig. It's gorgeous, it's fierce, but... something's not quite right. Maybe the hairline looks a little too...perfect? Like a Lego man's perfectly straight hairdo?
Fear not, my friend! We're about to embark on a wig-plucking adventure. Think of it as giving your wig a little spa day, a mini-makeover.
Gather Your Supplies (and Your Courage!)
All you need is a good pair of tweezers. Those eyebrow tweezers you've had since college? Perfect! A wig stand is helpful, but a sturdy box or even a willing volunteer (maybe not the cat) will do in a pinch.
You'll also want some good lighting. Natural light is your friend, but a bright lamp works too. We need to see those tiny hairs, people!
The Art of the Pluck
Now, put your wig on the stand (or box, or very patient friend). Take a deep breath. We're going in!.
The goal is to create a more natural-looking hairline. We want it to mimic the subtle imperfections of a real hairline. Think baby hairs, not a brick wall.
Start by focusing on the hairline, those first few rows of knots. Pluck a few hairs, then step back and assess. Don't get carried away!
The key is to pluck randomly. Think "natural variation." We're not going for a perfectly even line.
Less is always more. You can always pluck more hairs, but you can't unpluck them (trust me, I've tried). It's like a bad haircut, only with more hair involved.
Angle your tweezers away from the lace. You don't want to accidentally pluck the lace itself. That's a wig-tastrophe waiting to happen!
Spotting the Stragglers
After your initial plucking session, take a break. Walk away. Make a cup of tea. Watch some reality TV. You need to clear your head.
Then, come back with fresh eyes and see if there are any obvious "stragglers." These are the hairs that are sticking straight up or are noticeably darker than the others.
Gently pluck those stragglers. Remember, randomness is your friend. Don't create a pattern!
Baby Hairs: The Secret Weapon
Now for the fun part: baby hairs! These wispy little hairs can make a huge difference in the realism of your wig.
You can create baby hairs by carefully trimming some of the hairs along the hairline with scissors. Be very careful, and start small. You can always trim more, but you can't untrim!
Use a comb or a toothbrush to style those baby hairs. A little bit of hairspray or mousse can help them stay in place. Get creative!
The Big Reveal
Okay, you've plucked, you've trimmed, you've styled. It's time for the big reveal! Put on your wig and take a look in the mirror.
Doesn't it look more natural? More you? Like you just woke up like this (even though we know you didn't).
Congratulations, you've successfully plucked your wig! You're a wig-plucking master! Go forth and conquer the world with your fabulous new hairline. Just remember, practice makes perfect, and a little bit of humor goes a long way when dealing with stubborn wig hairs!
If you want to take it to the next level, consider watching tutorials from professional wig stylists. They have all the tips and tricks for achieving that flawless, red-carpet-ready look. But honestly, for most of us, a little plucking and a little confidence are all we need to rock our wigs with style!
Now go pluck that wig!