How To Reprint Bank Reconciliation In Quickbooks

Okay, so you've reconciled your bank account in QuickBooks. Hooray for you! But now, like a mischievous gremlin, the report has vanished. Don't panic! Finding it again is easier than finding a matching pair of socks in the laundry abyss.
The "Reports" Route: Your Treasure Map
Think of QuickBooks as a vast, exciting land. The "Reports" menu is your trusty map! This is usually on the left-hand side of your screen, but QuickBooks loves to keep us on our toes, so poke around if you don't see it right away.
Click on "Reports." Now, brace yourself, because you're about to enter a wonderland of financial data!
Dive into Banking
Look for something that screams "Banking." It might be under "Banking," or it might be lurking under a subcategory like "Reconciliation Reports."
Click it! You're getting closer to the prize, I can feel it!
The Reconciliation Report Promised Land
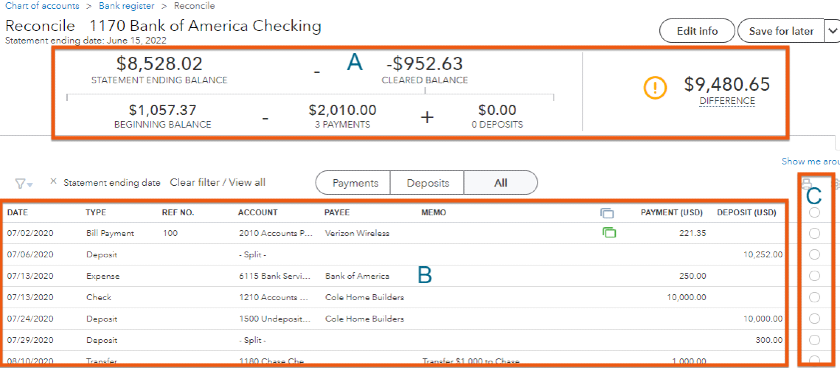
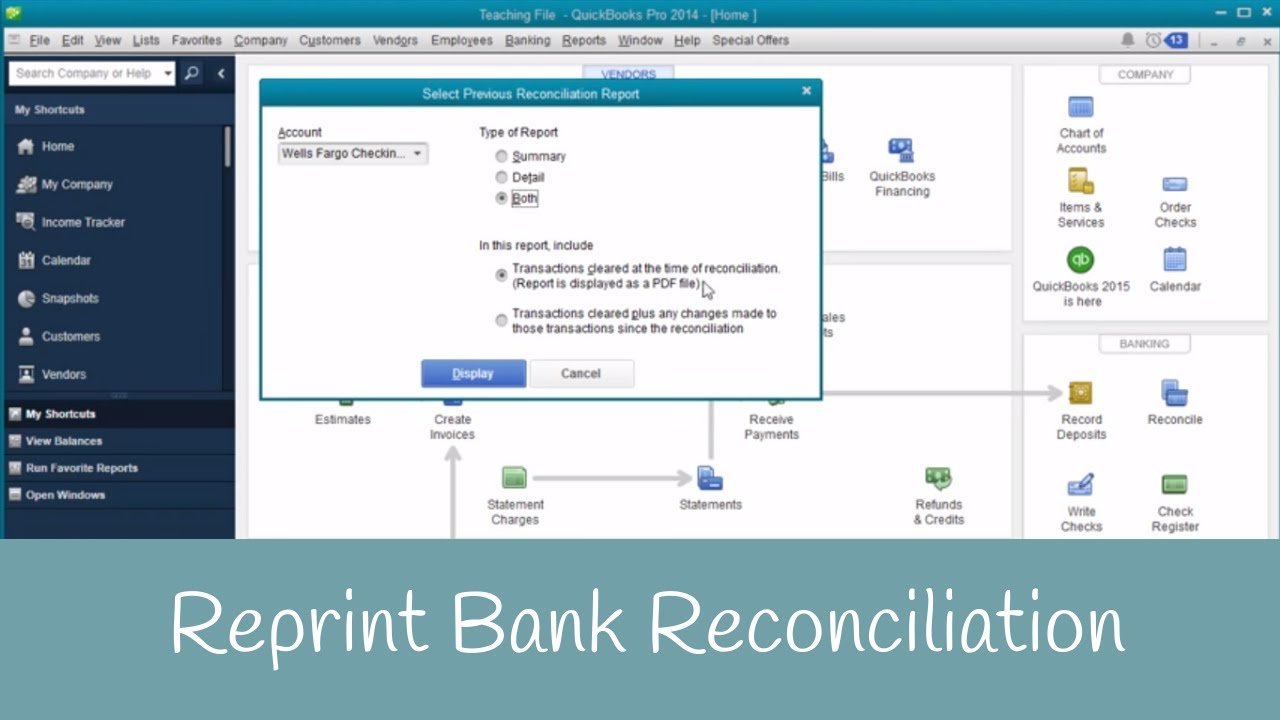
You should see a beautiful option like "Previous Reconciliation" or "Reconciliation Report." This is the one! It's like finding the last slice of pizza in the fridge – pure joy!
Click on it, oh brave adventurer!
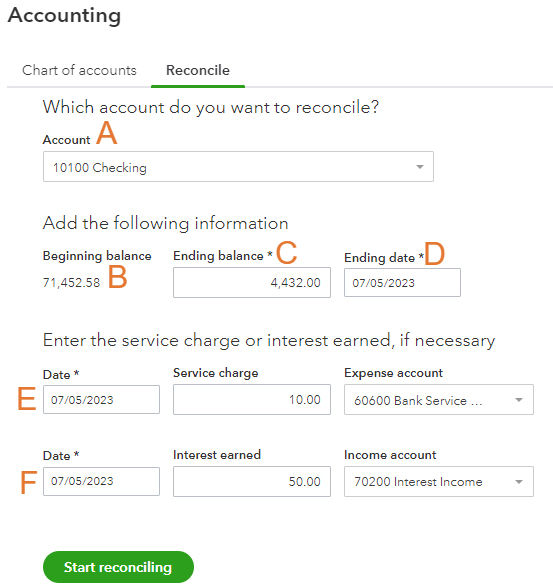
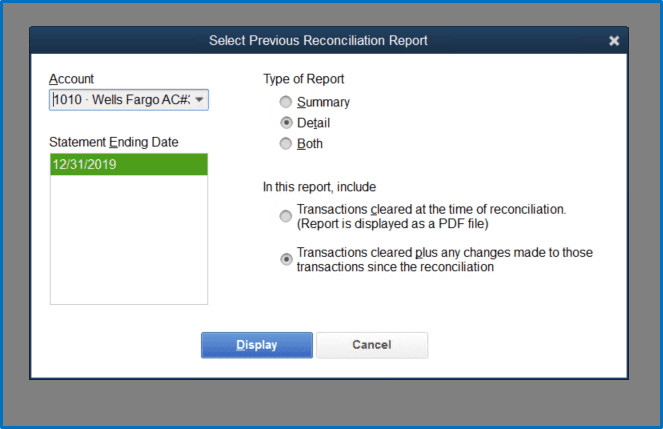
Choose Your Account and Date
A window pops up. This is where QuickBooks quizzes you (but gently, I promise!).
Select the correct bank account from the dropdown menu. You know, the one you actually reconciled? Also, choose the date of the reconciliation you want to see. Be precise!
Click "Display" or "OK." It might say something else equally encouraging. Just click the button that looks like it's going to show you the report. QuickBooks is friendly, not cryptic.
The "Gear" Icon: A Shortcut for the Savvy
Feeling like a QuickBooks ninja? Try this shortcut! Look for the "Gear" icon, usually in the upper right corner. It looks like a little cog, diligently turning the wheels of your financial empire.
Click it! Prepare for a dropdown of epic proportions!
Audit Log: The Financial Time Machine
Find the magic words "Audit Log." This is where QuickBooks keeps track of EVERYTHING. It's like a financial time machine!
Click "Audit Log." Get ready to witness history!
Filter Like a Pro
Now, don't get overwhelmed. The Audit Log can be a bit much to take in at first. Time to use your filtering powers!
Click on "Filter." A window appears, begging for instructions.
In the "Show" dropdown, select "Reconciliations." This is QuickBooks narrowing its focus, like a hawk zeroing in on its prey.
Find Your Reconciliation!
You should now see a list of your reconciliations. Scan the list, looking for the one you need, like searching for your keys in a messy bag. It's there, I promise!
Under the "History" column, click "View." This is it! The moment of truth!
If All Else Fails...
Okay, deep breaths. Sometimes, technology has a mind of its own. If you've tried everything and still can't find your report, it might be time to contact QuickBooks support.
They are the tech wizards who can guide you through the digital forest.
Remember, you've got this! You conquered the reconciliation in the first place, reprinting the report is a piece of cake compared to that. Happy reconciling, and may your numbers always be in your favor!


![How To Reprint Bank Reconciliation In Quickbooks How To Print Bank Reconciliation in QuickBooks? [Updated Steps]](https://asquarecloudhosting.com/wp-content/uploads/2021/08/How-To-Print-Bank-Reconciliation-in-QuickBooks-Updated-Steps-768x292.png)