Leviton 3 Way Dimmer Switch Wiring Diagram

Okay, let's talk about Leviton 3-Way Dimmer Switch Wiring Diagrams! Sounds scary, right? Like something only a wizard electrician with a PhD in Volts could understand? Nope!
Deciphering the Diagram: It's Easier Than Assembling IKEA Furniture (Probably)
First things first, imagine your light switch is a tiny, electrical brain. This brain needs instructions, and that's where the diagram comes in! Think of it as a treasure map, leading you to perfectly dimmed lighting bliss.
Before you even think about touching a wire, turn off the power! Seriously, pretend you're dealing with a grumpy dragon that breathes electricity. A shocked electrician is a sad electrician.
Now, find your diagram. It will be a small piece of paper in the switch box or you might have to search for it online. It probably looks like a bunch of lines and symbols. Don't panic!
Spotting the Key Players: Wires and Terminals
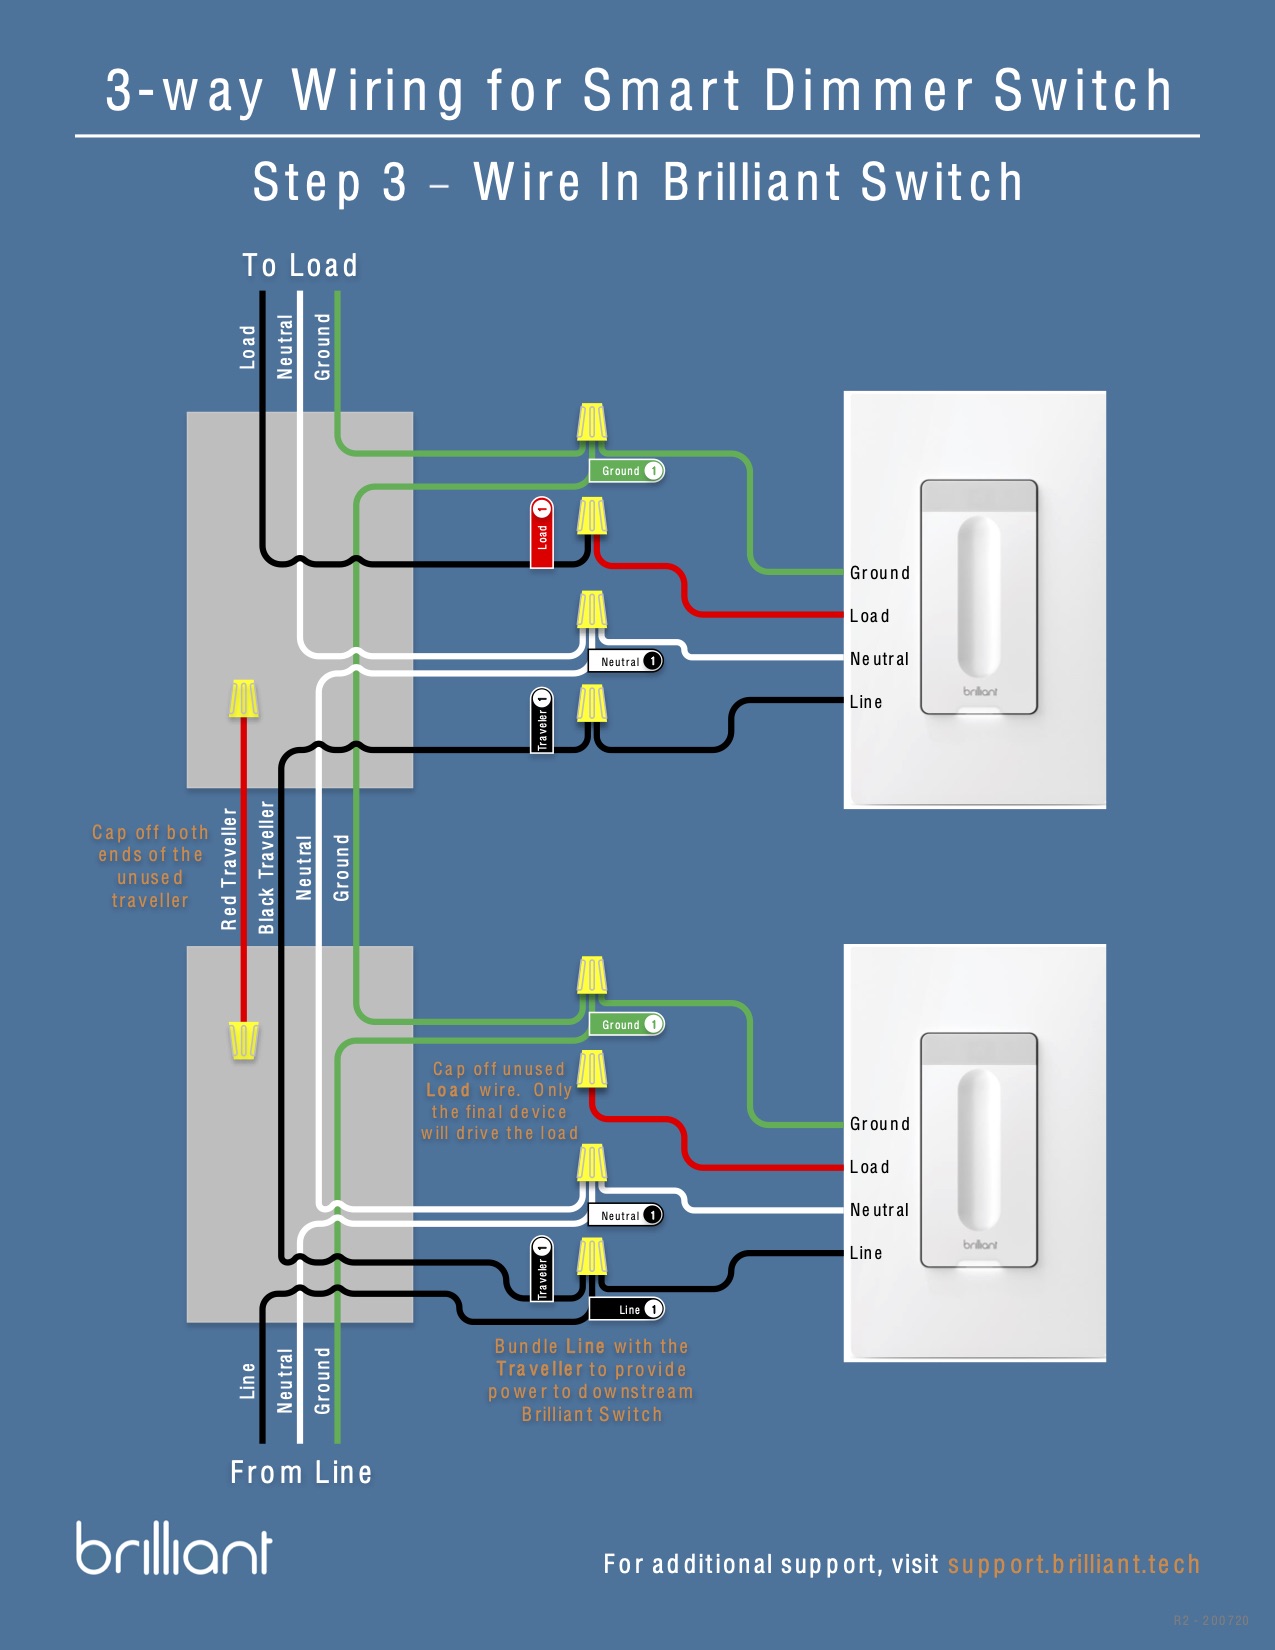
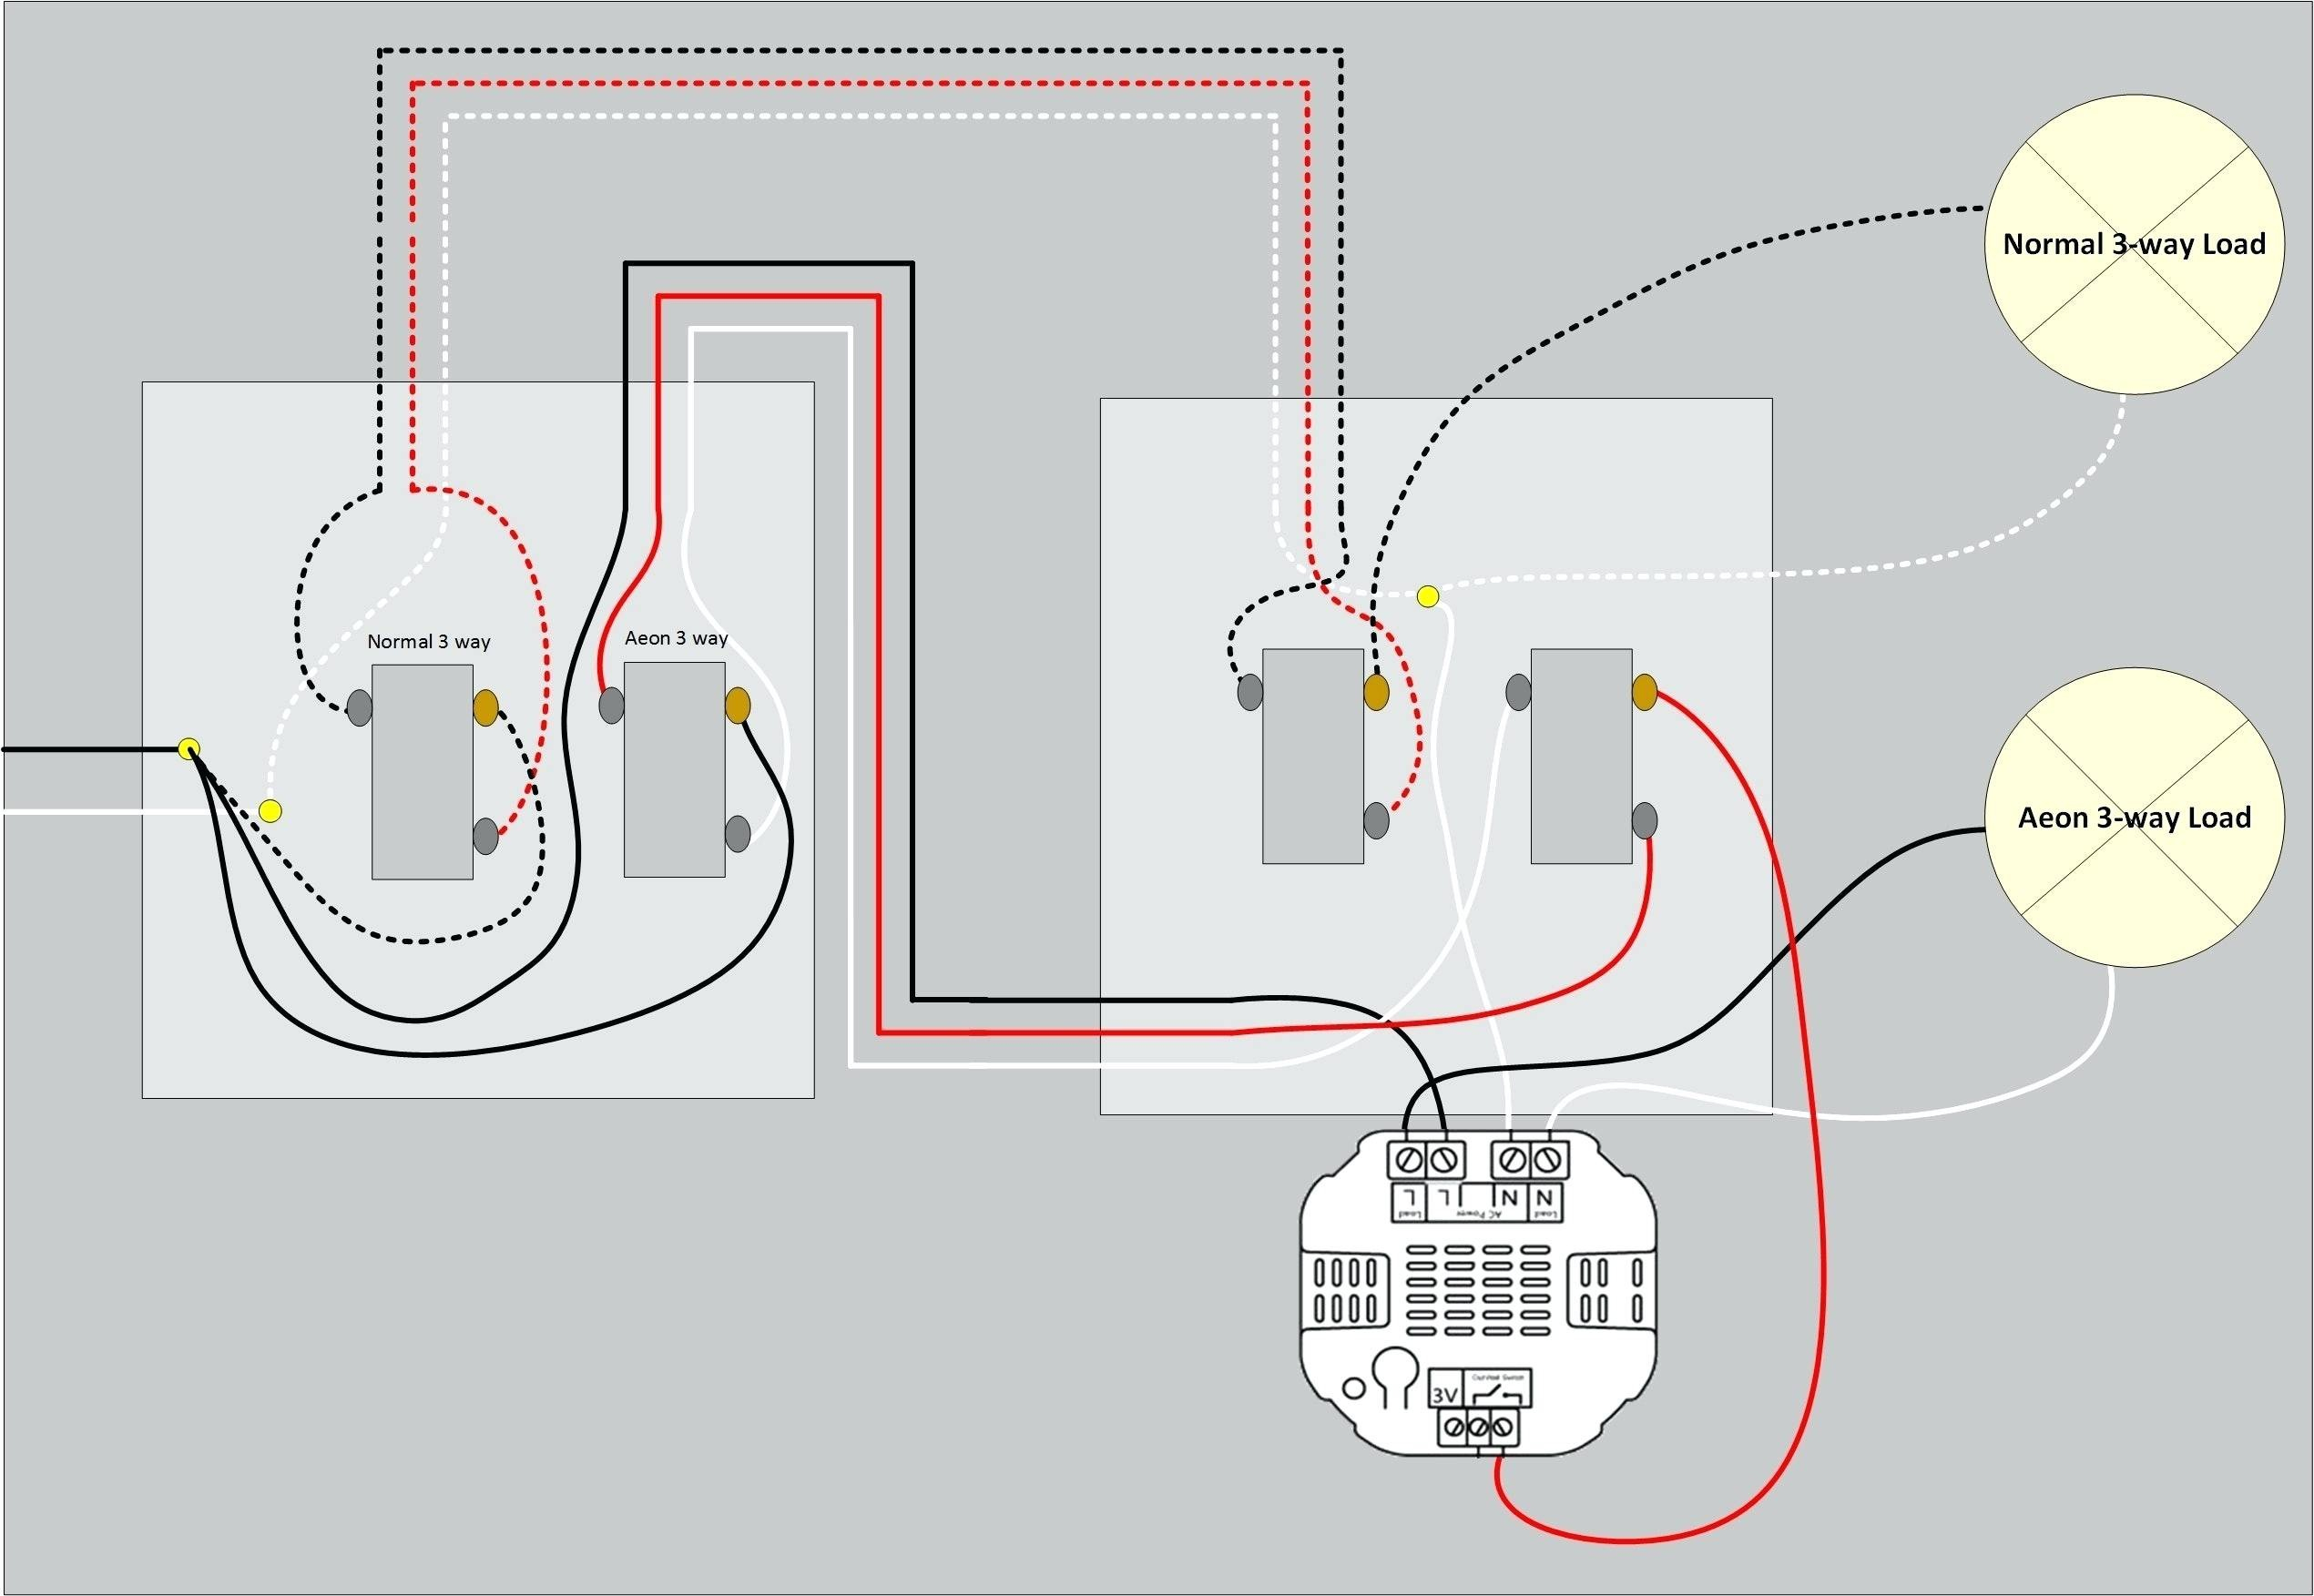
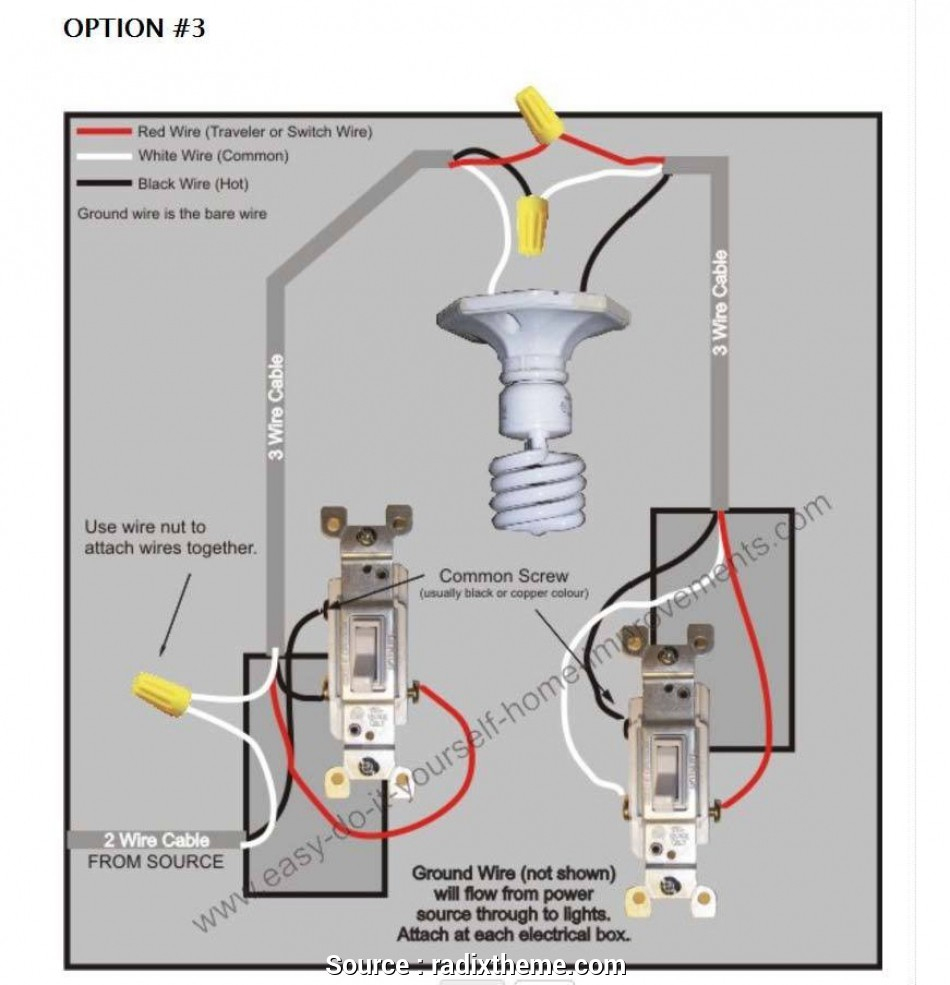
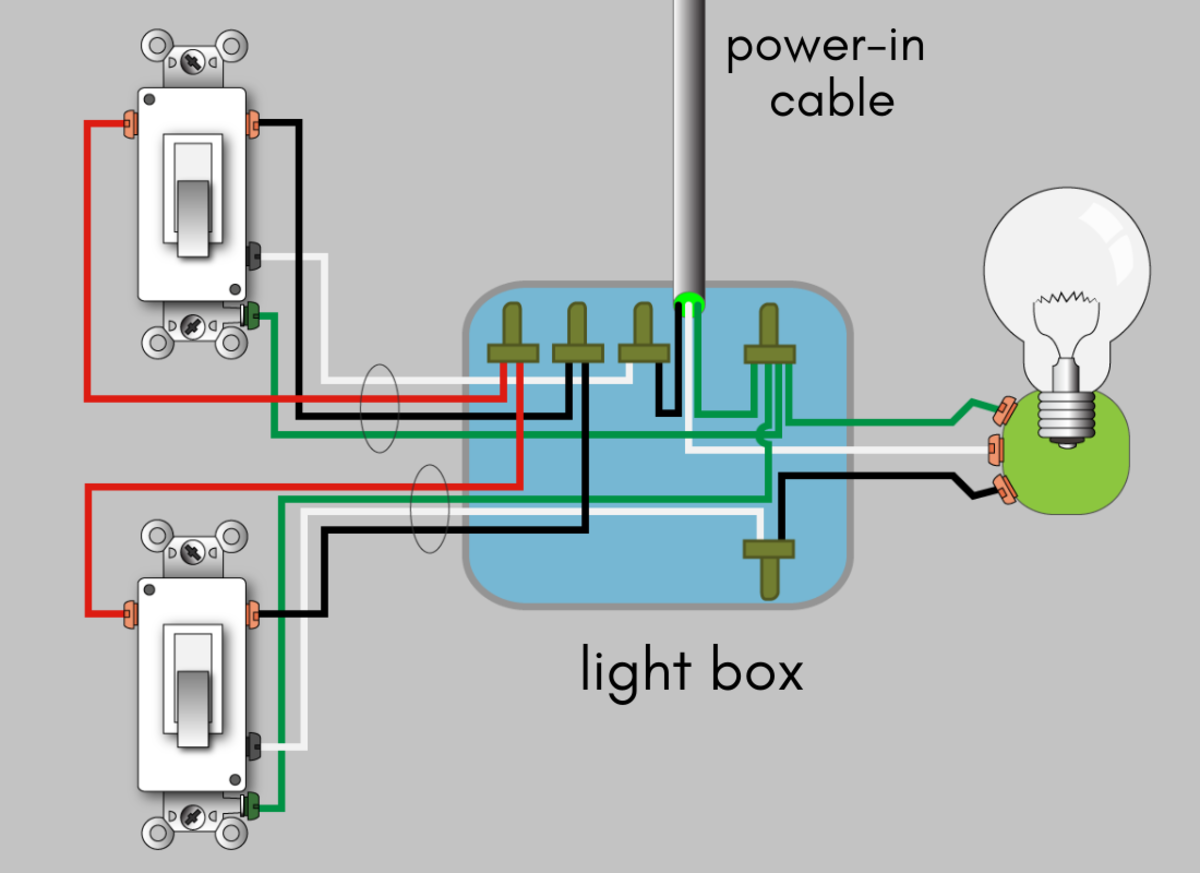
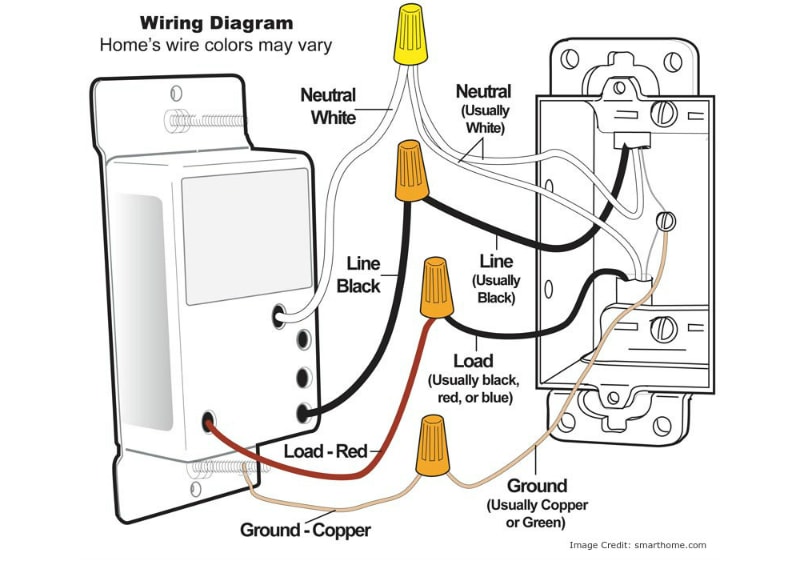
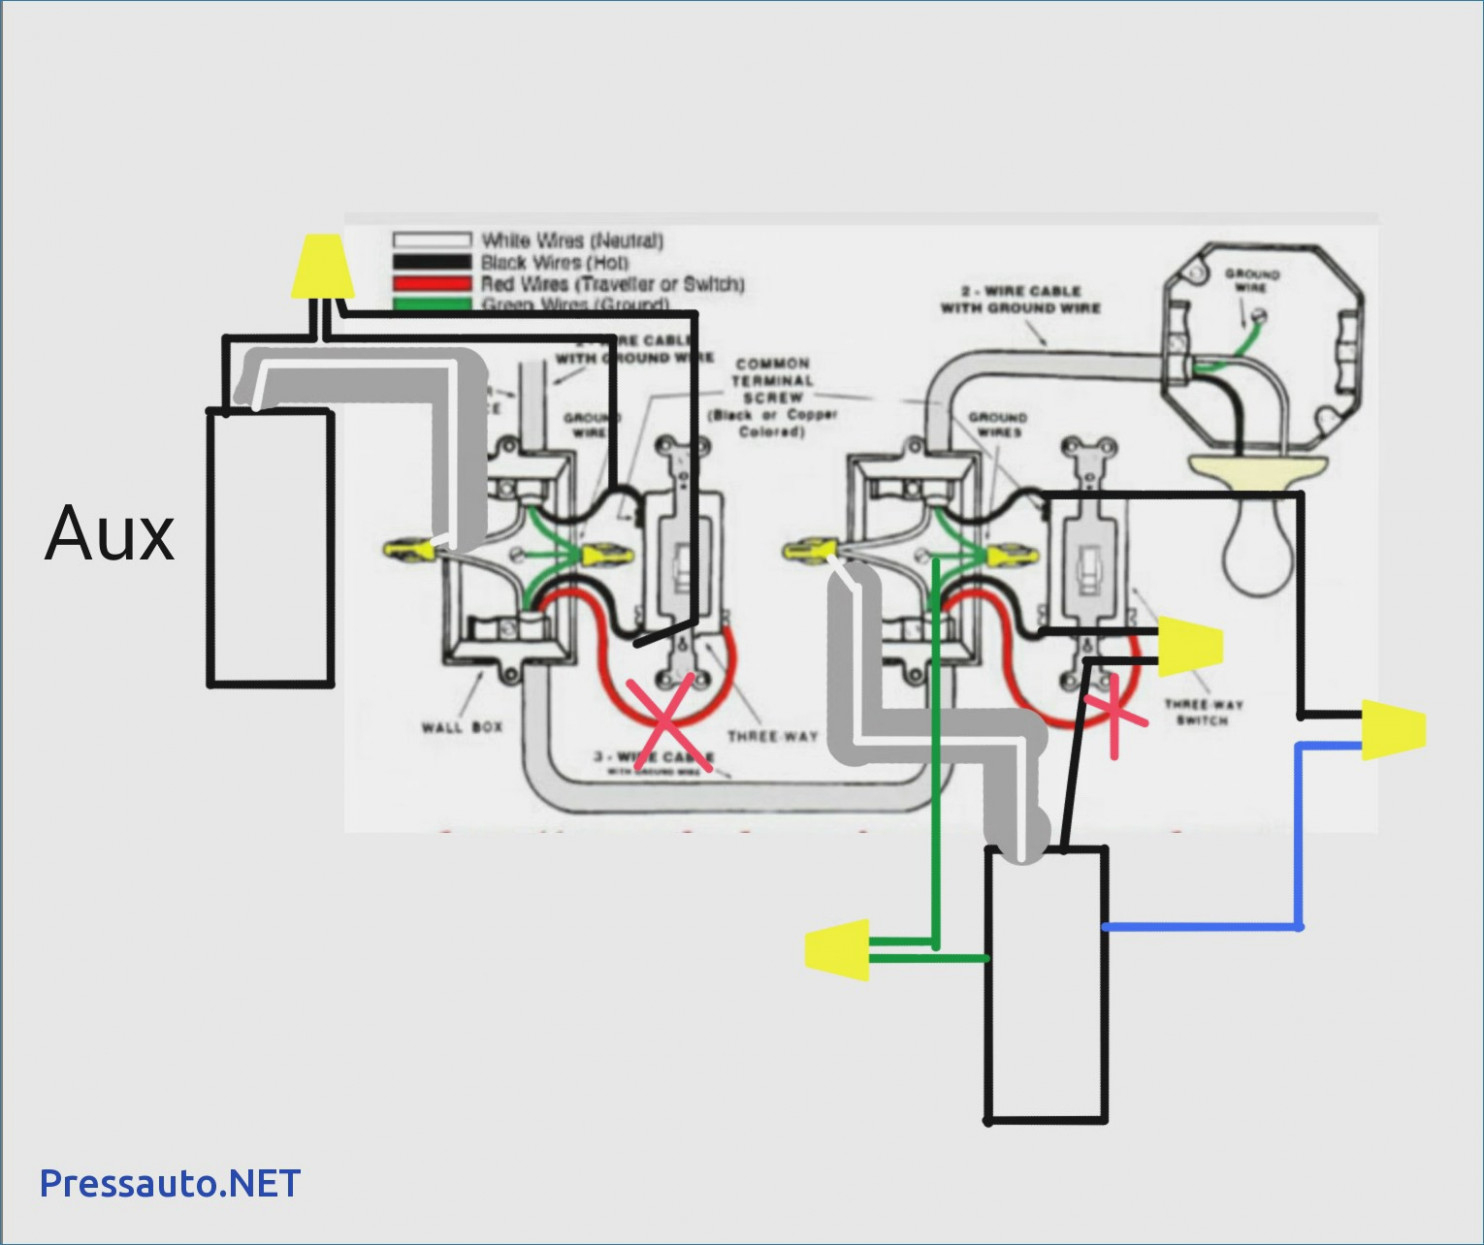
The diagram usually involves a few key characters: wires. Hot wires, neutral wires, ground wires, and the mysterious traveler wires! Each has its own role to play in this electrical drama.
The switches themselves have terminals, little screws where the wires attach. Color-coding is your friend. Usually, black is hot, white is neutral, and green (or bare copper) is ground. The travelers are often red or some other exciting color.
The common terminal is where the power either comes in or goes out to the light. It's usually a different color from the others. You'll see it in the wiring diagram.
Following the Yellow Brick Road (Or the Wiring Diagram)
Now, the fun part! Start matching the wires in your box to the ones in the diagram. The diagram is your guide, your North Star in this electrifying journey.
Here's a very simplified example. One switch will have the hot wire coming in, connected to its common terminal. The two traveler wires run between the two switches and connected to each switch. And the other switch has the common terminal connected to the light.
Tighten those screws! Make sure each wire is snug and secure. We don't want any loose connections causing sparks or flickering lights, unless you're going for a haunted house vibe.
A Word of Caution (Because Electricity Isn't a Toy)
If you're feeling even a tiny bit unsure, call a licensed electrician. It's better to be safe than sorry (and possibly electrocuted). They're the pros, the Jedi Masters of electrical wiring.
Think of it this way: you wouldn't perform open-heart surgery on yourself based on a YouTube tutorial, would you? Probably not. Electricity deserves the same respect.
Victory! (Hopefully)
Once everything is wired up according to the diagram, carefully tuck the wires back into the box. Reattach the switch, put on the cover plate, and... drumroll please... turn the power back on!
If the light dims smoothly and elegantly, you've done it! You've conquered the Leviton 3-Way Dimmer Switch Wiring Diagram. Celebrate with a well-deserved snack.
If the lights don't work. Turn off the power immediately and recheck the wiring. Do not keep switching on and off if it does not work.
Remember, this is a simplified overview. Always consult the specific wiring diagram that comes with your switch and follow all safety precautions. Now go forth and dim the world (responsibly)!
Disclaimer: This is not intended as a substitute for professional electrical advice. Always consult with a qualified electrician for any electrical work. I am just a large language model.