How Do I Connect My Fronius Inverter To Wifi

Frustrated with your Fronius inverter not connecting to Wi-Fi? Get connected now to monitor your solar energy production and optimize your system's performance.
This guide provides a step-by-step approach to successfully connecting your Fronius inverter to your home Wi-Fi network, unlocking real-time data and remote control capabilities.
Connecting Your Fronius Inverter to Wi-Fi: A Step-by-Step Guide
Before starting, ensure you have your Wi-Fi network name (SSID) and password readily available. Also, make sure your Fronius inverter is powered on and within range of your Wi-Fi router.
Step 1: Accessing the Inverter's Web Interface
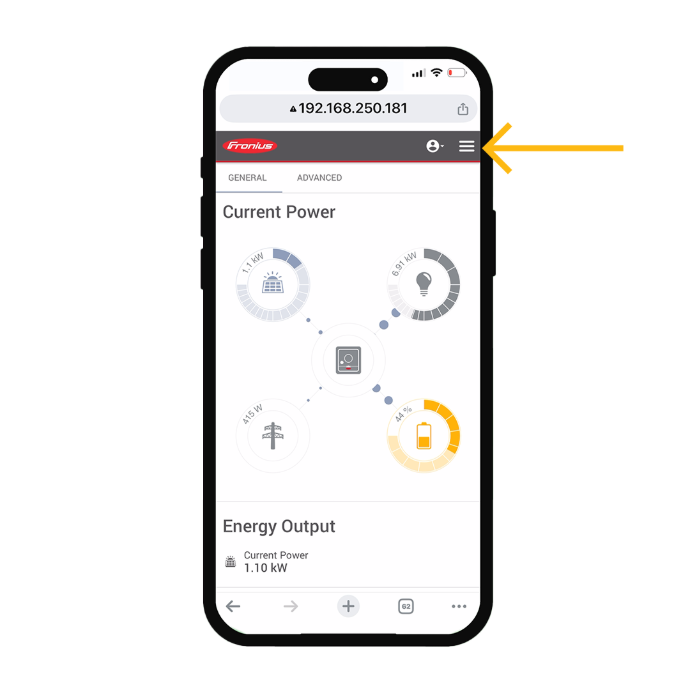
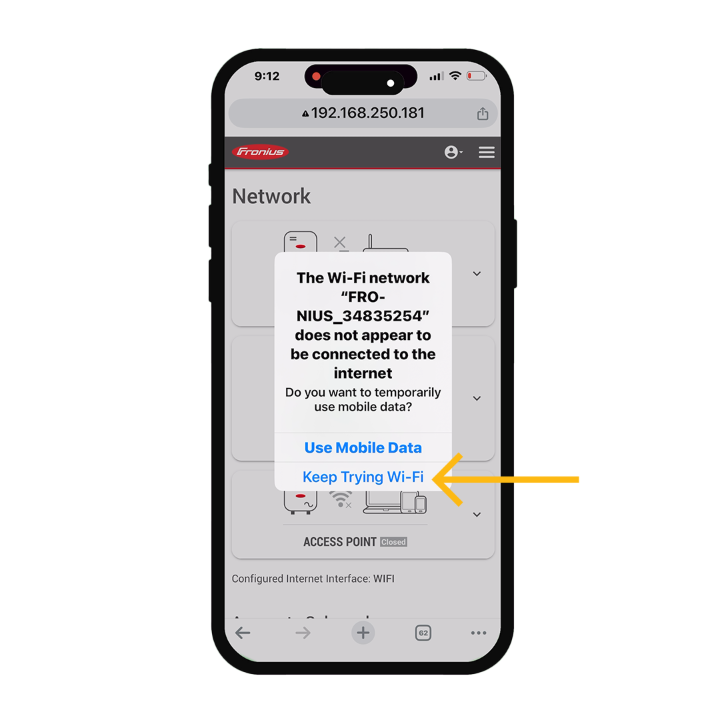
The first step involves accessing your Fronius inverter's web interface. This is typically done via a computer or mobile device connected to the same network as the inverter.
You can connect to the inverter's Wi-Fi network, typically named "Fronius" followed by the inverter's serial number. The default password is often "12345678" or "fronius".
Once connected, open a web browser and enter the inverter's IP address. This is commonly 192.168.250.181. If that doesn't work, consult your inverter's manual or the Fronius Solar.web platform for the correct IP address.
Step 2: Navigating to the Network Configuration
After accessing the web interface, log in using the installer password. If you don't know the installer password, you'll need to contact a certified Fronius installer. Never attempt to guess the password.
Navigate to the "Network" or "Communication" settings. The exact wording may vary depending on your inverter model.
Look for the "WLAN" or "Wi-Fi" configuration section.
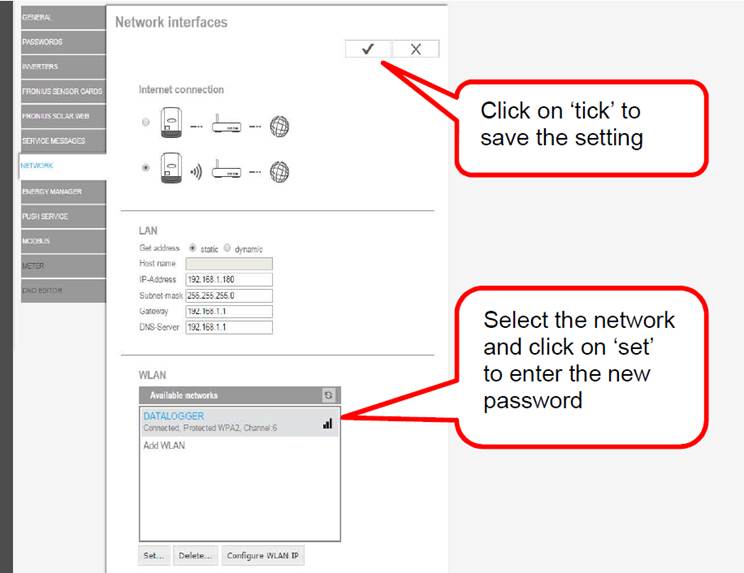
Step 3: Configuring the Wi-Fi Connection
Within the WLAN settings, select your Wi-Fi network from the list of available networks. Enter your Wi-Fi password when prompted.
Ensure the connection type is set to "DHCP" so that the inverter automatically obtains an IP address from your router. This is generally the recommended setting.
Save the changes and allow the inverter to connect to your Wi-Fi network. This might take a few minutes.
Step 4: Verifying the Connection
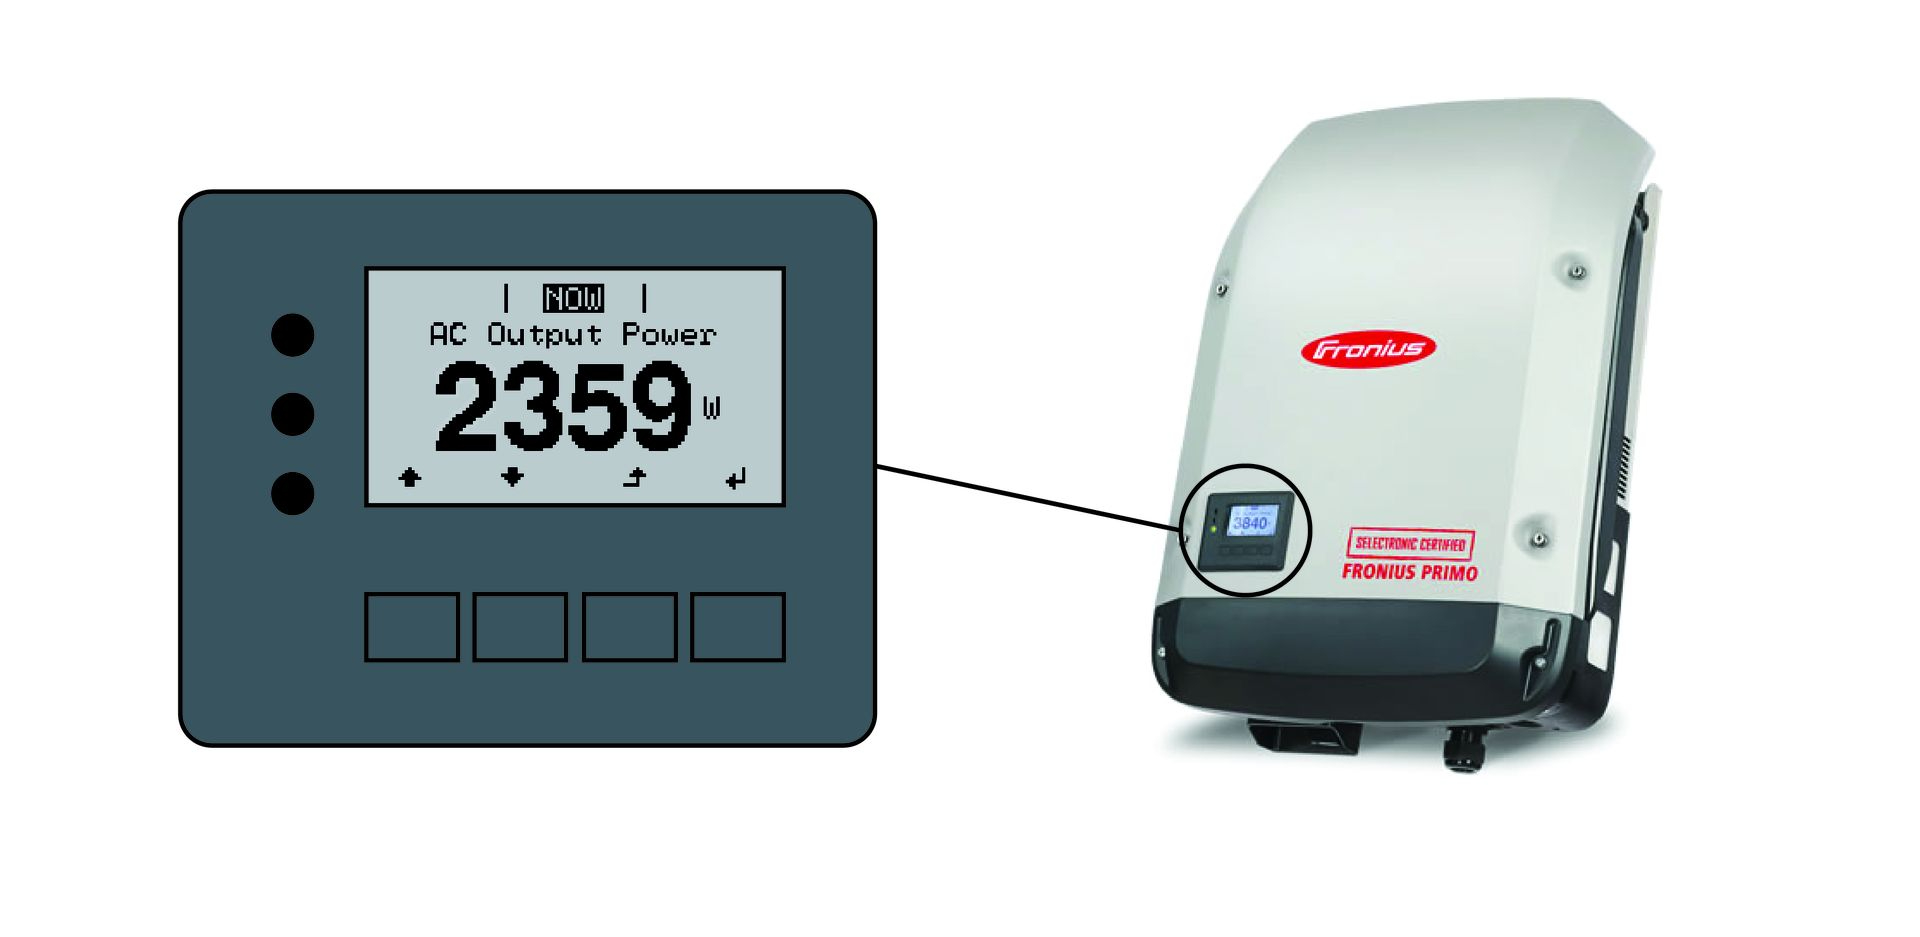
Once the inverter has connected, check the inverter's display or the Fronius Solar.web platform to confirm the connection status. Look for an indication that the inverter is successfully connected to the internet.
You can also verify the connection by accessing the inverter's web interface via your home network's IP address assigned by your router.
If the connection is unsuccessful, double-check your Wi-Fi password and ensure your router is functioning correctly. Restart the inverter if necessary.
Troubleshooting Common Issues
A common issue is an incorrect Wi-Fi password. Double-check that you've entered the password correctly, paying attention to capitalization and special characters.
Another issue could be a weak Wi-Fi signal. Consider moving your router closer to the inverter or using a Wi-Fi extender to improve the signal strength. Fronius recommends a stable internet connection for optimal performance.
If you still encounter problems, consult the Fronius support website or contact a qualified Fronius installer for assistance.
Connecting your Fronius inverter to Wi-Fi enables you to monitor your solar system's performance remotely via the Fronius Solar.web platform. It also allows for remote software updates and troubleshooting.
Regular monitoring is crucial for ensuring your system is operating at peak efficiency and identifying any potential issues early on.
If you continue to experience difficulties, the Fronius support team offers comprehensive assistance via their website and phone support. Don't hesitate to reach out for expert help.