How To Add Boning To A Dress

Adding boning to a dress can elevate its structure and fit, providing support and enhancing the garment's silhouette. Whether for a special occasion gown or a tailored bodice, boning offers a professional touch to home sewing projects. This guide will walk you through the process, ensuring a successful and well-supported outcome.
The process involves careful selection of boning materials, precise measurements, and strategic placement within the dress. Mastering these techniques allows sewists to create custom-fitted garments with enhanced structure and a refined appearance.
Choosing the Right Boning
The first step is selecting the appropriate type of boning. Several options are available, each with its own strengths and weaknesses depending on the desired level of support and the fabric being used.
Types of Boning
Plastic boning, also known as rigilene, is a flexible and lightweight option. It is best suited for garments requiring moderate support, such as bodices or dresses with softer fabrics. Plastic boning is also washable, making it a practical choice for garments that require frequent cleaning.
Steel boning comes in two main varieties: spiral steel and flat steel. Spiral steel boning offers greater flexibility and is ideal for curved areas like princess seams, allowing for comfortable movement. Flat steel boning provides rigid support and is best used for straight seams where strong structure is needed.
According to sewing supply retailer SewTrue Fabrics, the choice between plastic and steel boning often depends on the weight and structure of the garment being created. Heavier fabrics and garments requiring significant support benefit from steel boning, while lighter fabrics and more flexible designs can use plastic boning effectively.
Preparing the Fabric and Boning Channels
Before inserting the boning, it is crucial to prepare the fabric and create channels to hold the boning in place. Accurate measurements and careful construction are essential for achieving the desired fit and support.
Creating Boning Channels
Boning channels are typically created using fabric strips sewn onto the lining or the wrong side of the dress fabric. These strips should be wide enough to accommodate the boning with a little extra room for movement.
According to pattern designer Evelyn Mae Designs, it is vital to use a sturdy fabric for the boning channels to prevent them from tearing or stretching under the pressure of the boning. Twill tape or heavy cotton are commonly used for this purpose.
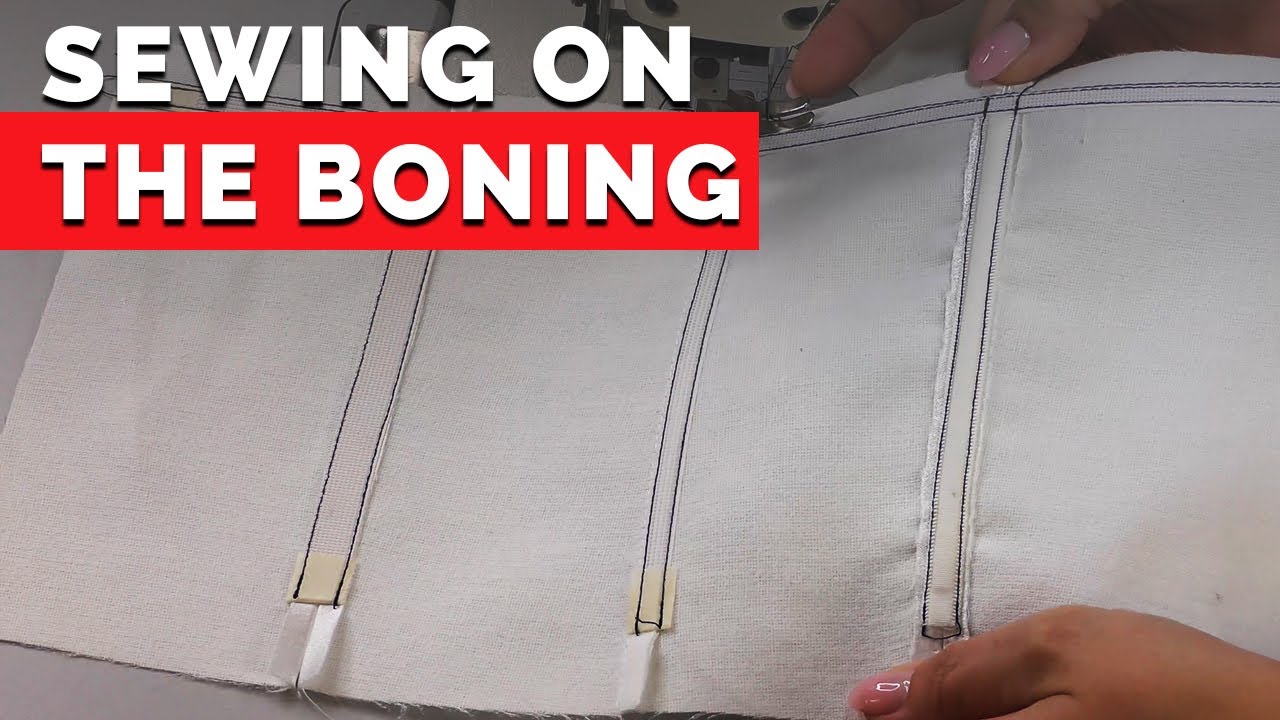
Sewing the Channels
Pin the fabric strips to the dress fabric, aligning them with the desired boning placement. Stitch along both edges of the strip, creating a channel that is closed at both ends but open at the top and bottom for inserting the boning.
Reinforce the ends of the channels by backstitching several times to prevent the stitching from unraveling. The strength of these channels is crucial for maintaining the integrity of the boning and the overall structure of the garment.
Inserting and Securing the Boning
With the boning channels prepared, the next step is to insert and secure the boning. This process requires careful attention to detail to ensure the boning sits comfortably and provides the necessary support without poking or causing discomfort.
Cutting the Boning
Measure the length of each boning channel and cut the boning slightly shorter (about 1/2 inch) to allow for movement and prevent it from poking through the ends of the channel. Use heavy-duty scissors or wire cutters, depending on the type of boning.
According to Professional Tailors Association guidelines, the ends of steel boning should be capped with metal tips or wrapped with fabric to prevent them from cutting through the fabric. Plastic boning can be filed smooth to remove any sharp edges.
Inserting the Boning
Slide the boning into the prepared channels, ensuring it sits comfortably within the fabric. If necessary, use a point turner or similar tool to guide the boning into place.
Once the boning is in place, secure the ends of the channels by stitching across the top and bottom. This step prevents the boning from shifting or falling out of the channel during wear.
Finishing Touches and Considerations
After inserting and securing the boning, there are several finishing touches and considerations to ensure the garment is comfortable and durable.
Checking for Comfort and Fit
Try on the garment to check for any discomfort or areas where the boning is poking or rubbing. Make adjustments as needed by padding the boning channels or repositioning the boning.
According to experienced costumer Maria Sanchez, it is important to move around and sit down while wearing the garment to ensure the boning does not restrict movement or cause discomfort in different positions.
Reinforcing Seams
Reinforce any seams that are close to the boning channels to prevent them from pulling or tearing under the pressure of the boning. This can be done by adding extra stitching or using seam tape.
By following these steps, you can successfully add boning to a dress, enhancing its structure, fit, and overall appearance. With practice and attention to detail, you can create custom-fitted garments that are both beautiful and supportive.