How To Make A Transparent Background In Gimp 2.10
For graphic designers, hobbyists, and anyone looking to isolate an object in an image, creating a transparent background is a fundamental skill. GIMP (GNU Image Manipulation Program), a free and open-source image editor, offers several methods to achieve this, providing flexibility and control over the process.
This article details the step-by-step instructions on how to effectively make a transparent background in GIMP 2.10, ensuring a clean and professional result. These methods are widely applicable for various projects, including creating logos, product images, and social media graphics.
Enabling Transparency
Before starting the process, it's crucial to ensure that the image supports transparency. By default, some image formats, like JPG, do not. To enable transparency, first, open your image in GIMP by navigating to "File" > "Open".
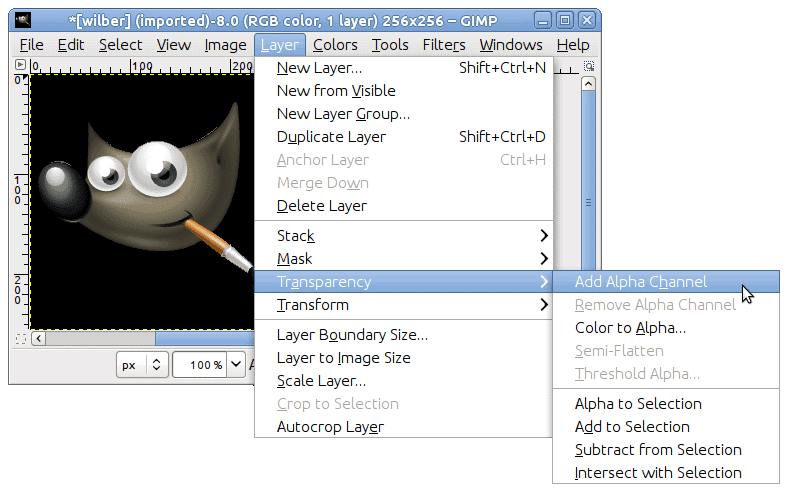
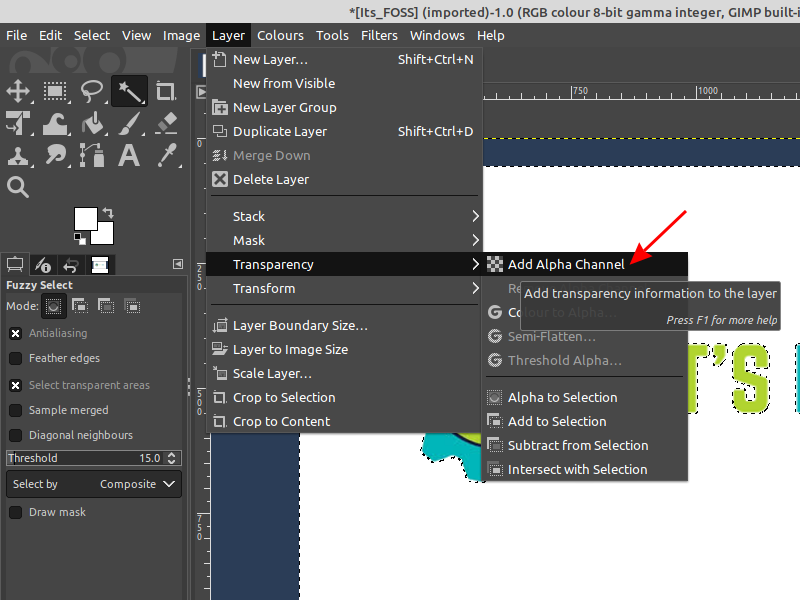
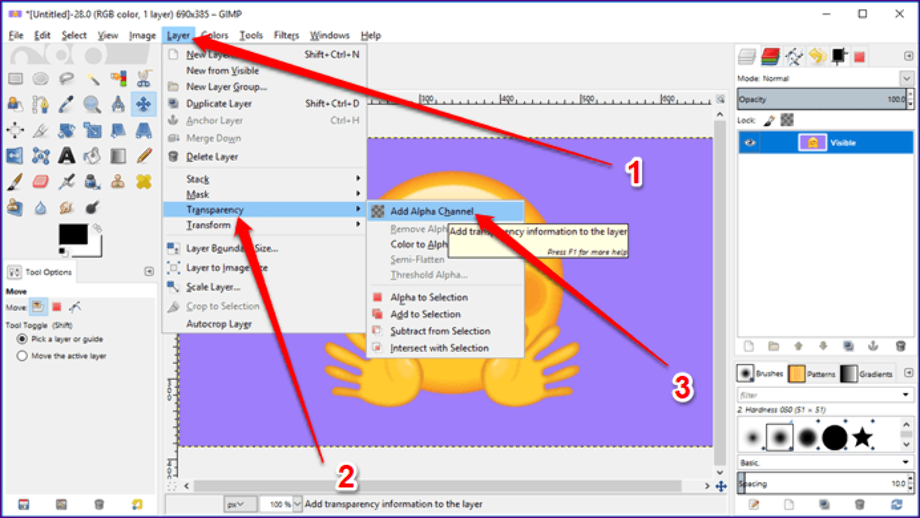
Next, check if your layer has an alpha channel. In the "Layers" panel, if the layer name isn't bold, it likely lacks transparency support. To add an alpha channel, right-click on the layer and select "Add Alpha Channel".
Method 1: Using the Fuzzy Select Tool
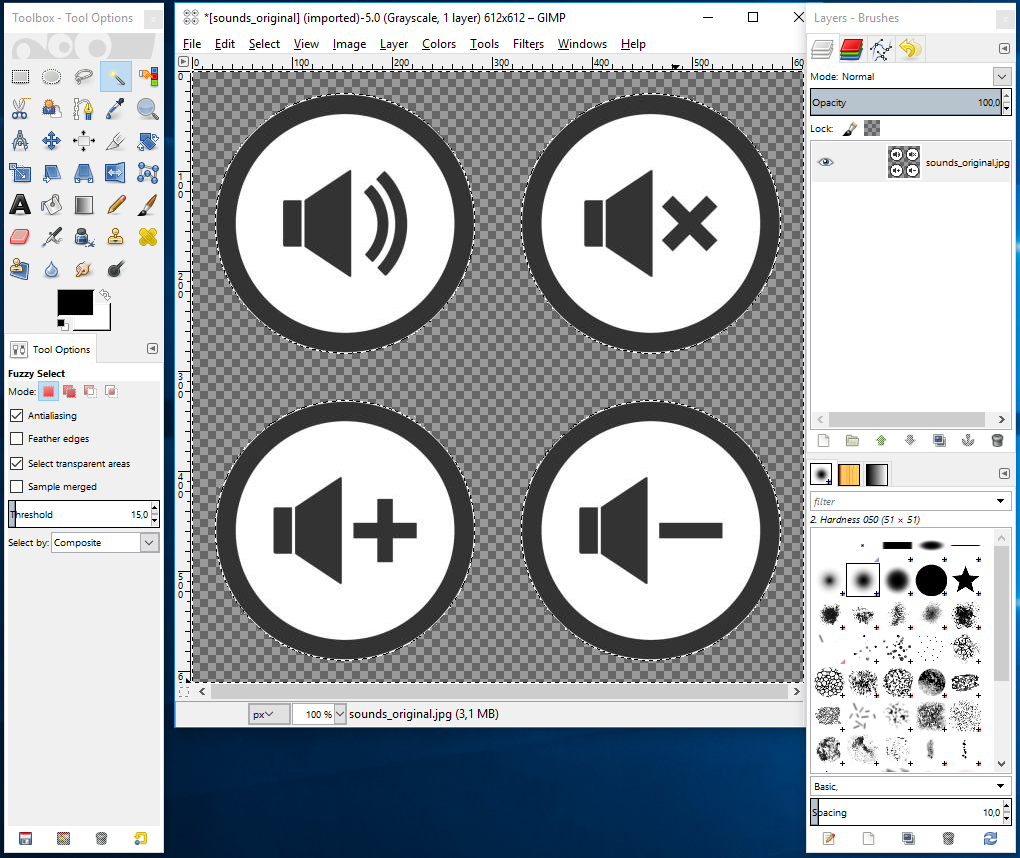
The Fuzzy Select Tool, also known as the Magic Wand Tool, is ideal for selecting areas with similar colors. Find the Fuzzy Select Tool in the toolbox, or press "U" on your keyboard. Adjust the threshold value in the tool options to control the sensitivity of the selection.
Click on the background area you want to remove. If the selection isn't perfect, adjust the threshold and try again. You can add to your selection by holding down the Shift key and clicking on additional areas.
Once the background is selected, press the "Delete" key to make it transparent. You should now see a checkerboard pattern, indicating transparency. Finally, go to "Select" > "None" to deselect the area.
Method 2: Using the Select By Color Tool
Similar to the Fuzzy Select Tool, the Select By Color Tool selects areas based on color similarity. Access it from the toolbox or by pressing "Shift + O".
Click on the background color you want to remove. The tool selects all pixels in the image with a similar color. Press the "Delete" key to remove the selection.
Again, a checkerboard pattern will appear, signifying transparency. Deselect the area by going to "Select" > "None".
Method 3: Using the Paths Tool
The Paths Tool offers the most precision but requires more time and effort. Select the Paths Tool from the toolbox or press "B". Click around the object you want to isolate, creating a path that outlines it.
For curved sections, click and drag to create Bézier curves. Once you've closed the path, right-click inside the path and select "Selection from Path". This converts the path into a selection.
Go to "Select" > "Invert" to select the background instead of the object. Press the "Delete" key to make the background transparent. Deselect by going to "Select" > "None".
Method 4: Using the Foreground Select Tool
The Foreground Select Tool helps separate the foreground object from the background. Select the tool (typically found beneath the paths tool) and draw a rough selection around the foreground object.
GIMP will attempt to identify the foreground. Then, paint over the object's details to refine the selection. After refining, press "Enter" to confirm the selection. Invert the selection ("Select" > "Invert") and delete the background.
Saving the Image
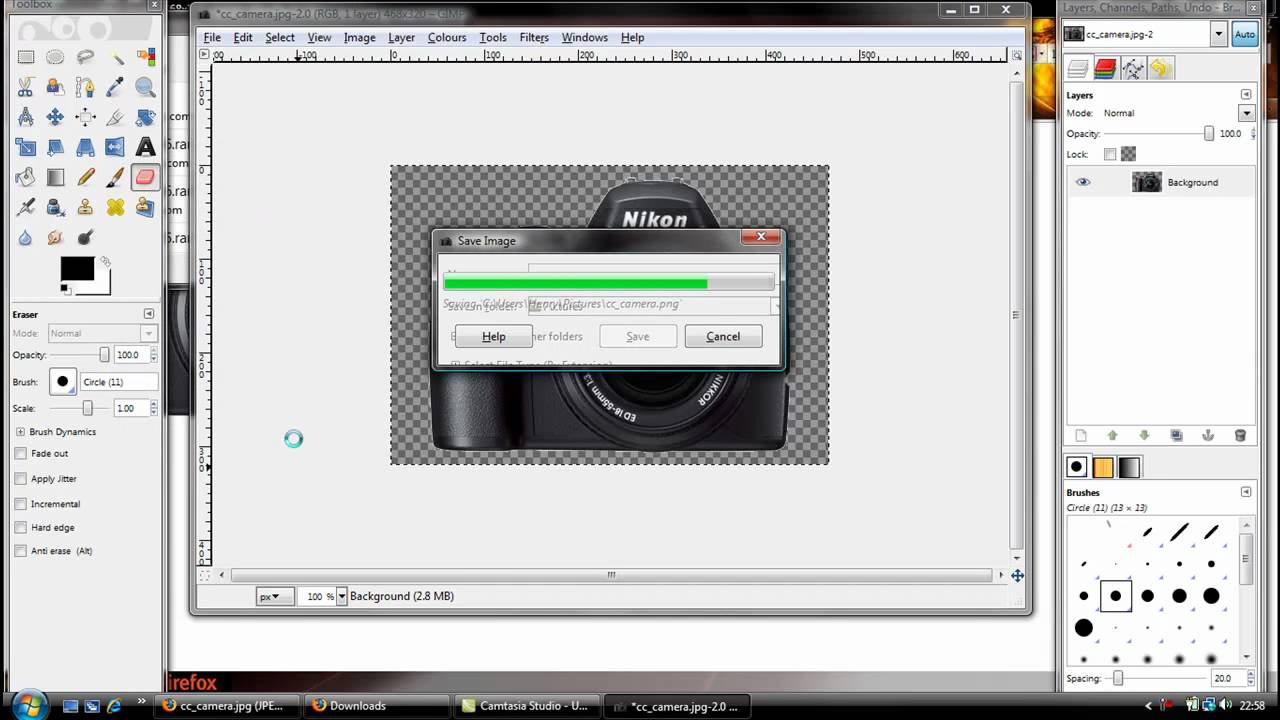
After achieving the desired transparency, save the image in a format that supports transparency, such as PNG or GIF. Go to "File" > "Export As...". Choose PNG from the file type options.
Name your file with a ".png" extension and click "Export". In the PNG export dialog, ensure that the "Save background color" option is unchecked to preserve transparency. Click "Export" again to save the file.
Mastering transparent backgrounds in GIMP provides users with the power to create compelling visuals for a wide array of applications. By utilizing these techniques, anyone can seamlessly integrate images into different contexts, enhancing their creative projects.


.jpg)

