How To Uninstall And Reinstall Canon Printer Windows 10

Canon printer malfunctioning after a Windows 10 update? Don't panic. Reinstalling the printer driver often resolves common issues.
This guide provides immediate, step-by-step instructions for uninstalling and reinstalling your Canon printer on a Windows 10 system, ensuring minimal disruption to your workflow.
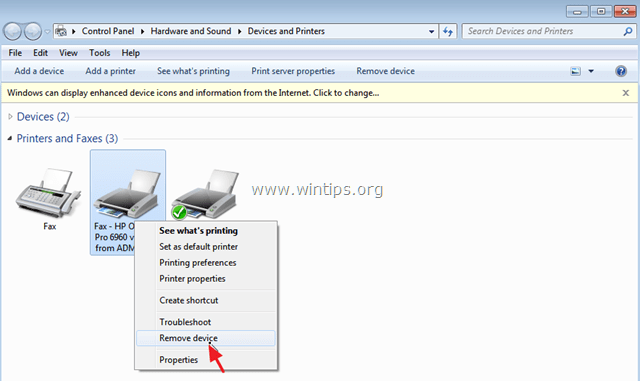
Uninstalling Your Canon Printer
First, disconnect the printer from your computer. This prevents any interference during the uninstallation process.
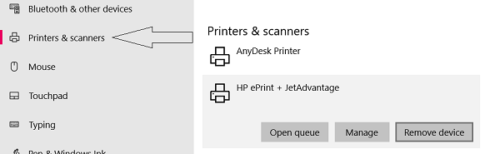
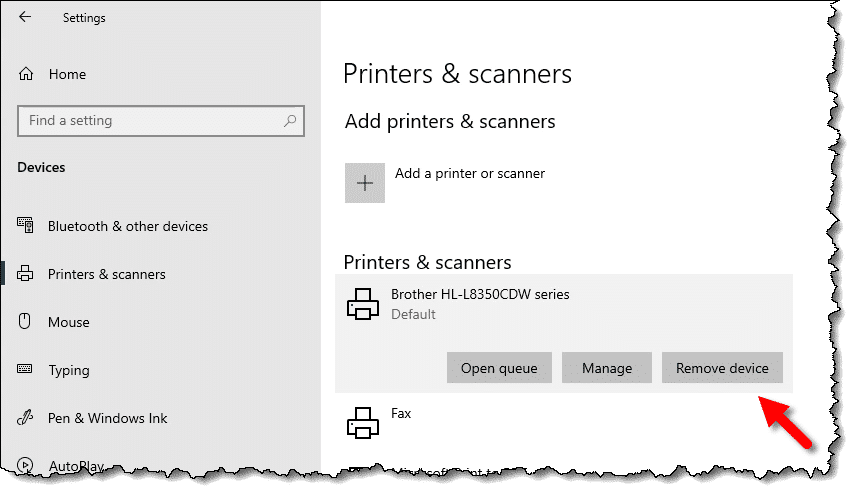
Method 1: Using the Settings App
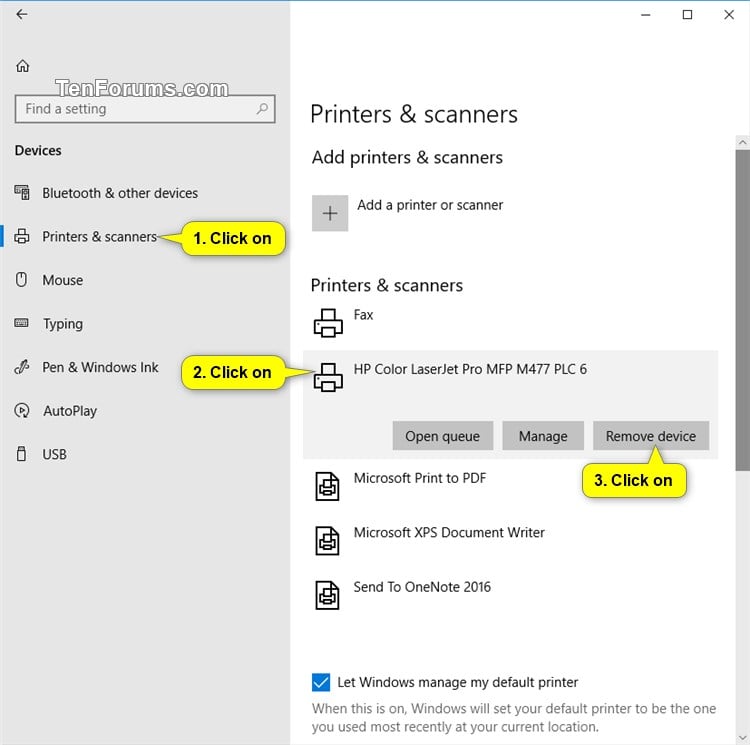
Navigate to the Settings app. You can find it by clicking the Windows icon and then the gear icon.
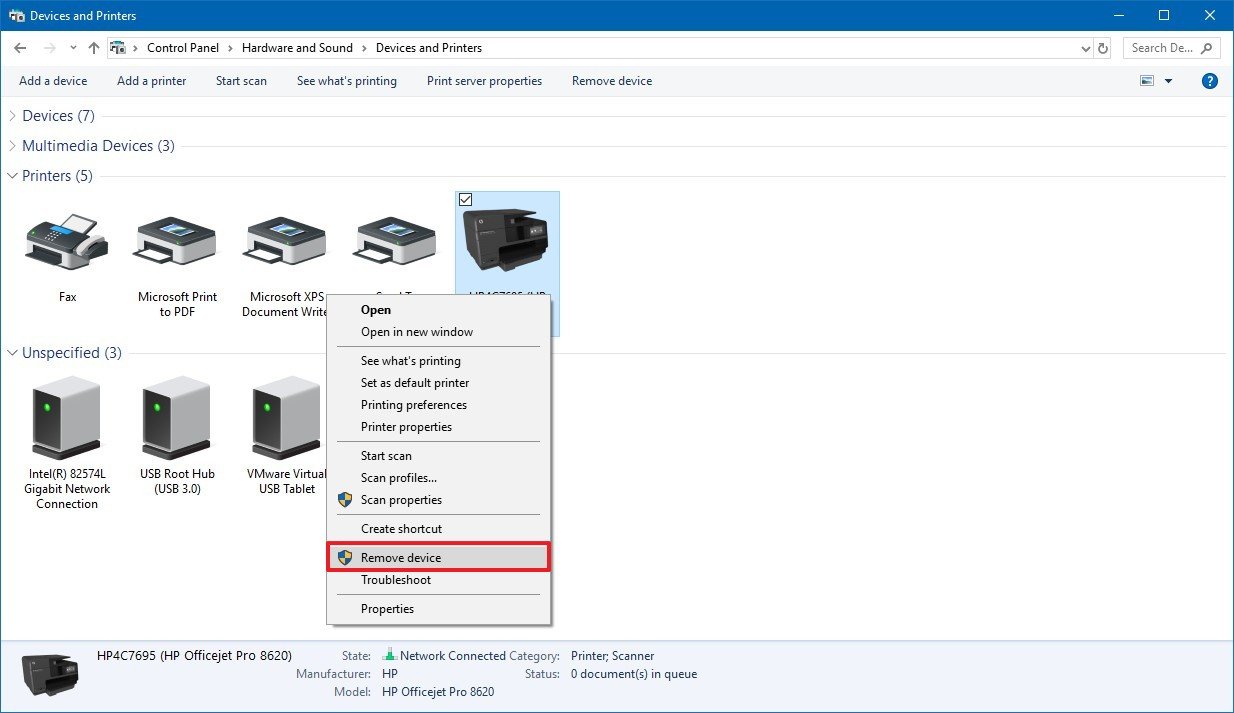
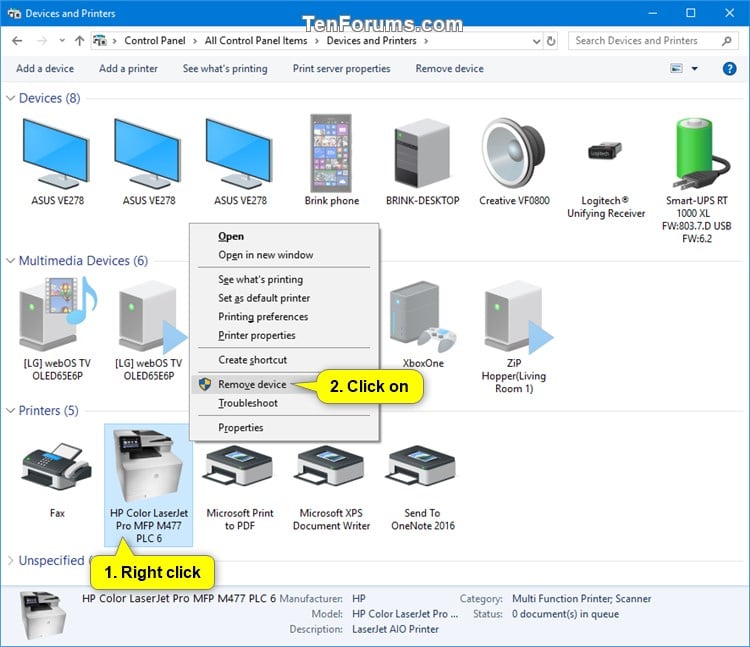
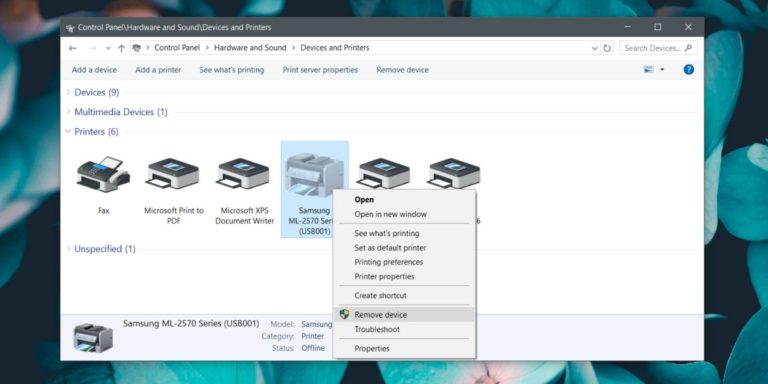
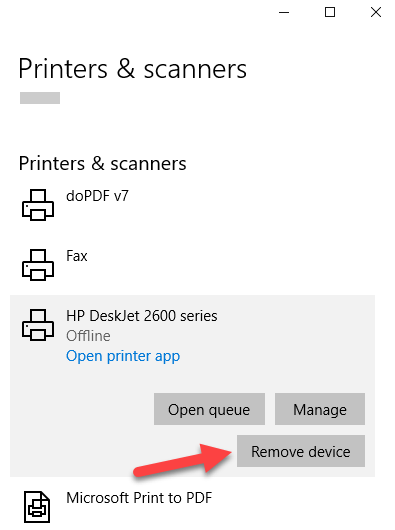
Click on "Devices" and then "Printers & scanners." Locate your Canon printer in the list.
Select your printer and click the "Remove device" button. Confirm your decision if prompted.
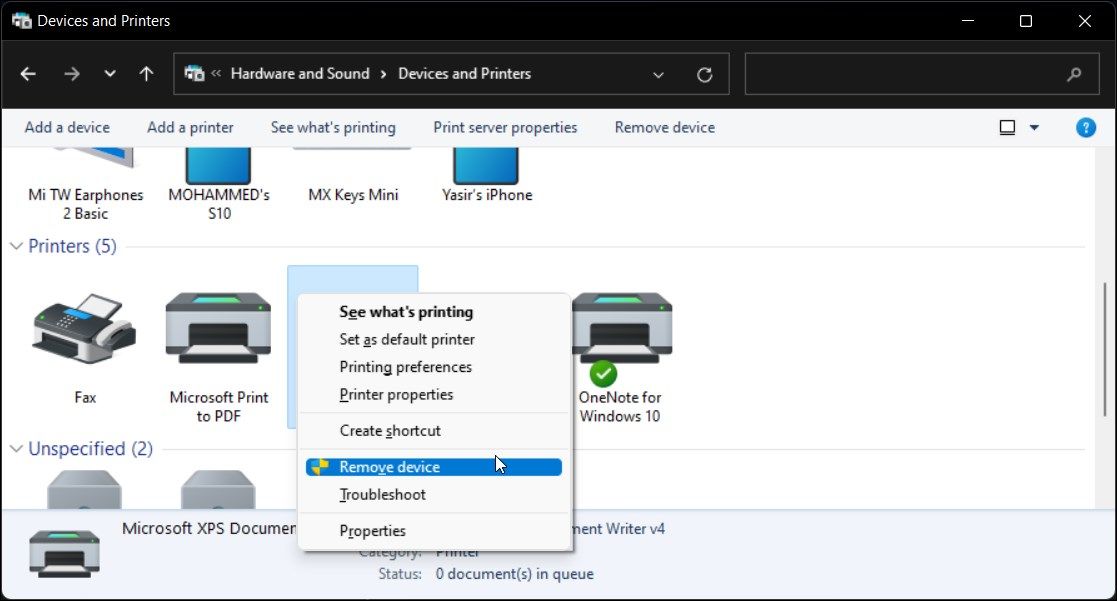
Method 2: Using Device Manager
Open Device Manager. You can search for it in the Windows search bar.
Expand the "Printers" or "Print queues" section. Right-click on your Canon printer.
Select "Uninstall device." Check the box that says "Delete the driver software for this device" if available, then click "Uninstall."
Method 3: Using Programs and Features
Open the Control Panel. Search for it via the Windows search bar.
Click “Programs and Features” and locate any Canon related software. Uninstall them.
Reinstalling Your Canon Printer
After completely uninstalling the printer, restart your computer. This ensures all remnants of the old driver are removed.
Automatic Installation (Recommended)
Reconnect your Canon printer to your computer. Windows 10 should automatically detect the printer and begin installing the drivers.
Follow any on-screen prompts. If the installation doesn't start automatically, proceed to the manual installation method.
Manual Installation
Visit the Canon website. Navigate to the support section for your specific printer model.
Download the latest drivers for Windows 10. Ensure you download the correct driver for your system's architecture (32-bit or 64-bit).
Run the downloaded installer. Follow the on-screen instructions to complete the installation.
Important: During the installation process, you may be prompted to connect your printer. Only connect it when instructed by the installer.
Once the installation is complete, print a test page. This confirms the printer is functioning correctly.
Troubleshooting
If the printer still isn't working, double-check the connection. Make sure the USB cable is securely plugged in or that the printer is properly connected to your Wi-Fi network.
Ensure the printer is set as the default printer. You can do this in the "Printers & scanners" section of the Settings app.
Consider updating your Windows 10 operating system. Outdated system files can sometimes cause compatibility issues.
If problems persist, consult the Canon support website for further assistance. Look for model-specific troubleshooting guides.
Regularly check for driver updates. Keeping your drivers current can prevent future issues. Stay tuned for updates on ongoing driver compatibility and potential issues with Windows 10 compatibility.