How Long To Boil Mouth Guard

Ensuring a properly fitted mouth guard is crucial for athletes of all levels, offering protection against potential dental injuries during sports and other activities. A common method for achieving a custom fit involves boiling the mouth guard, but the question remains: how long should it be boiled to achieve optimal results without damaging the material?
The boiling time is a critical factor in this process. Getting it right ensures the mouth guard is pliable enough to mold to the teeth while maintaining its structural integrity. Incorrectly boiling it, however, can lead to a poorly fitting, ineffective, or even unusable mouth guard.
The Importance of Proper Boiling Time
Achieving the correct boiling time is not a matter of personal preference. It's a necessary step that directly affects the effectiveness of the mouth guard in preventing injuries. Too little time, and the mouth guard will be too stiff to mold. Too much time, and it could melt or warp, making it unusable.
This report will delve into the recommended boiling times provided by various manufacturers and dental professionals. It will also address the potential consequences of deviating from these instructions and offer practical tips for ensuring a safe and effective molding process.
Recommended Boiling Times: A Comparative Look
The ideal boiling time for a mouth guard typically falls within a narrow range. This range depends on the specific material used in its construction. Most manufacturers recommend boiling times between 15 and 30 seconds.
Shock Doctor, a leading brand in sports protective gear, generally advises a 20-30 second immersion in boiling water for their boil-and-bite mouth guards. Similarly, SISU Guard, known for their thinner, more customizable mouth guards, suggests a shorter boiling time of around 15-20 seconds.
It is critical to always consult the manufacturer's instructions that come with your specific mouth guard model. These instructions are tailored to the specific materials and design, ensuring the best possible fit and protection.
Potential Consequences of Incorrect Boiling Times
Under-boiling a mouth guard prevents it from becoming sufficiently pliable. This results in a rigid, uncomfortable fit. Furthermore, it makes molding difficult and potentially painful.
Over-boiling can be even more detrimental. The mouth guard can warp, shrink, or even melt, rendering it completely useless. Excessively heating can also compromise the material's integrity, making it more prone to tearing or cracking upon impact.
"Following the manufacturer's instructions precisely is paramount," advises Dr. Emily Carter, a sports dentist with years of experience fitting mouth guards for athletes. "Deviating from these guidelines can significantly reduce the mouth guard's ability to protect the teeth and jaw."
Step-by-Step Guide to Boiling and Molding a Mouth Guard
The process of boiling and molding a mouth guard, while seemingly simple, requires careful attention to detail. Following each step ensures optimal fit and protection.
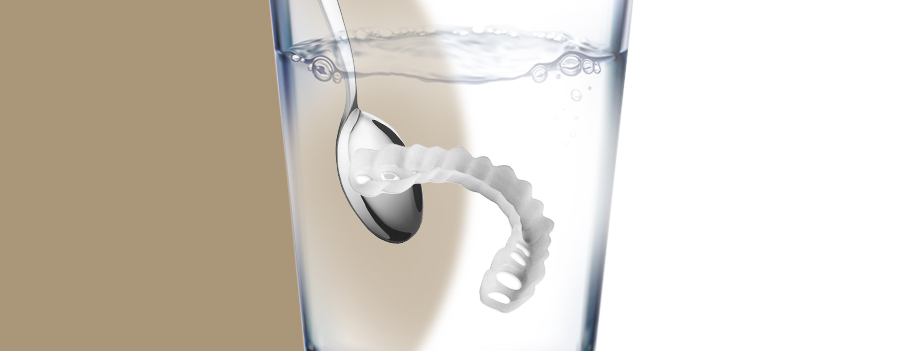
First, bring a pot of water to a rolling boil. Remove the pot from the heat source immediately. This crucial step helps prevent the mouth guard from overheating and potentially melting against the hot pot.
Then, using tongs, carefully immerse the mouth guard in the hot water for the manufacturer-recommended time. After removing the mouth guard from the water, allow it to cool for a few seconds until it is comfortable to handle. Center the mouth guard on your upper teeth and bite down firmly. Use your fingers to mold the guard tightly against your teeth and gums.
Finally, keep the mouth guard in place for several minutes while it cools and hardens. Rinse it with cold water to set the shape. If the fit is not satisfactory, the process can usually be repeated once or twice, depending on the specific mouth guard model.
Additional Tips for a Successful Molding Process
Besides adhering to the correct boiling time, several other tips can enhance the molding process. These tips help to ensure a secure and comfortable fit.
Ensure that your hands are clean before handling the mouth guard. This will prevent the transfer of bacteria. Use a mirror to properly align the mouth guard before biting down.
If you have braces or other dental appliances, consult your dentist before boiling and molding a mouth guard. They can provide specific instructions and ensure that the mouth guard does not interfere with your orthodontic treatment.
Regular cleaning is crucial for maintaining the hygiene and effectiveness of your mouth guard. Rinse it thoroughly with cold water after each use and store it in a well-ventilated case.
The Long-Term Impact of a Well-Fitted Mouth Guard
Investing the time and effort to properly boil and mold a mouth guard pays dividends in the long run. A well-fitted mouth guard significantly reduces the risk of dental injuries. This protection can save athletes from costly and painful dental procedures.
Moreover, a comfortable mouth guard encourages consistent use, which is essential for optimal protection during sports and other activities. A properly fitted mouth guard contributes to the overall well-being and confidence of the athlete.
Ultimately, boiling a mouth guard is a crucial step in ensuring its effectiveness. Following the manufacturer's instructions for boiling time, coupled with proper molding techniques, is essential for achieving a comfortable and protective fit. Prioritizing this process safeguards the wearer from potential dental injuries and promotes long-term oral health.