How To Add Students To Blocksi

Adding students to Blocksi, a widely-used internet filtering and classroom management tool in educational institutions, is a crucial step in ensuring a safe and focused learning environment. This process, while generally straightforward, can vary slightly depending on the specific implementation of Blocksi within a school district. Schools typically employ a variety of methods to streamline this process, ensuring that all students are properly enrolled in the system.
This article will outline the common methods used to add students to Blocksi, providing a comprehensive guide for educators and IT administrators. Understanding these methods is essential for maintaining effective classroom management and ensuring student safety online.
Understanding the Blocksi Ecosystem
Before diving into the specifics, it’s important to understand the basic architecture of Blocksi. It often integrates directly with a school's existing Student Information System (SIS) and/or directory services such as Google Workspace for Education or Microsoft Azure Active Directory.
This integration allows for automated student enrollment and management, significantly reducing the manual workload for IT staff. The specific method for adding students to Blocksi often depends on the presence and type of this integration.
Methods for Adding Students
Automated Synchronization via SIS or Directory Services
The most efficient and widely recommended method is to leverage the automated synchronization capabilities offered through SIS or directory service integration. This typically involves configuring Blocksi to regularly sync with systems like PowerSchool, Infinite Campus, Google Workspace, or Microsoft Azure AD.
When a new student is added to the SIS or directory service, the information is automatically transferred to Blocksi. This automated approach minimizes the risk of errors and ensures that student rosters are always up-to-date.
To implement this, the IT administrator needs to configure the integration within the Blocksi admin console. This often involves providing the necessary credentials and specifying the synchronization schedule.
Manual Import via CSV File
In situations where automated synchronization is not feasible or as a supplement to it, a manual import via a Comma Separated Values (CSV) file can be utilized. This method is often used for smaller schools or for adding students in bulk outside the regular synchronization schedule.
The CSV file typically requires specific columns such as student name, email address, and grade level. Blocksi's documentation will specify the required format for the CSV file to ensure successful importing.
Within the Blocksi admin console, there will be an option to upload the CSV file and map the columns to the corresponding fields in the system. Accuracy is paramount when preparing the CSV file, as errors can lead to incorrect student assignments and filtering policies.
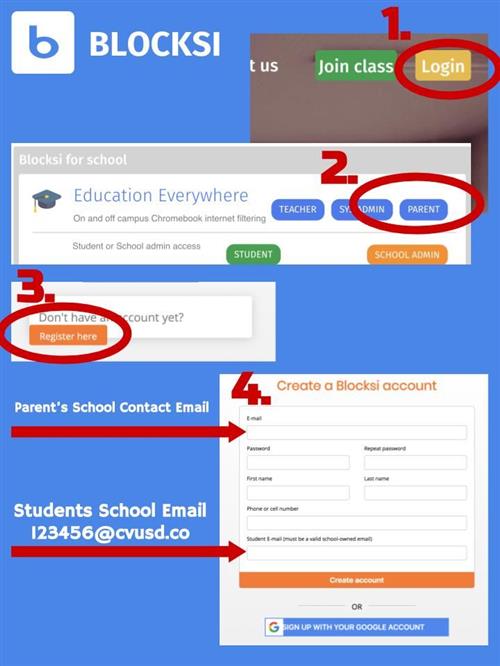
Individual Student Addition through the Admin Console
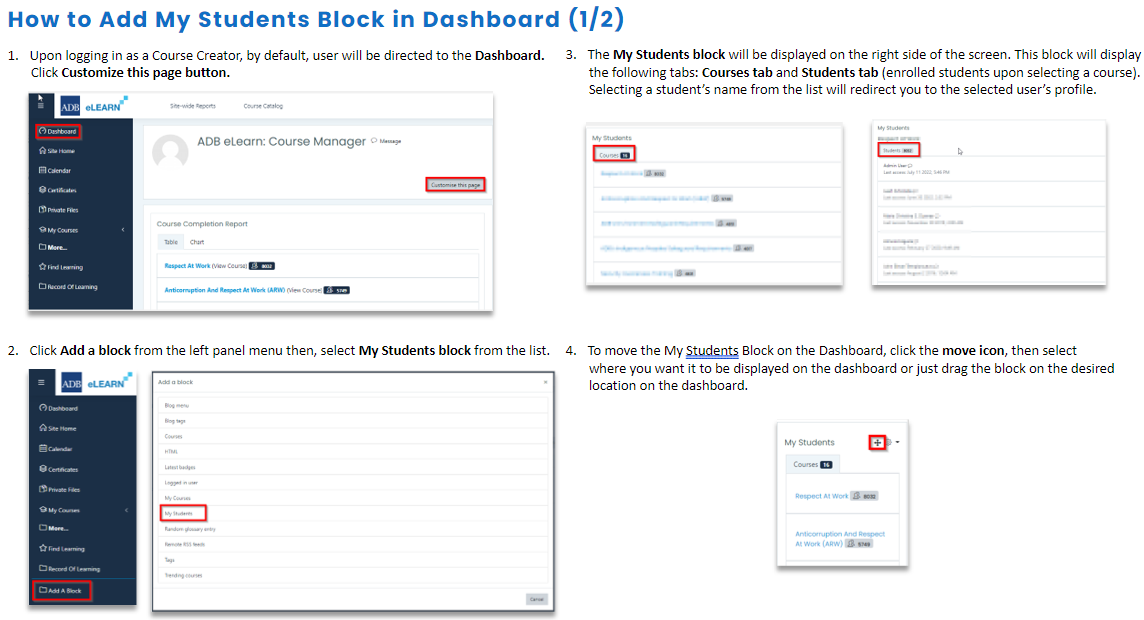
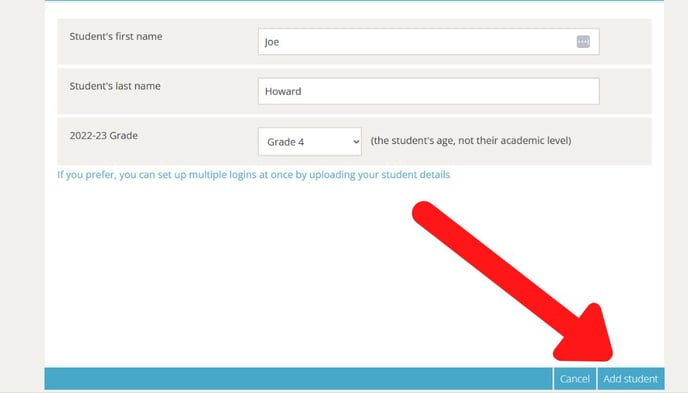
For adding individual students, Blocksi provides a manual entry option within the admin console. This is useful for adding students who may have enrolled outside of the regular bulk enrollment process.
Administrators can manually input the student's details, including name, email address, grade level, and any other relevant information. This method, while simple for individual entries, is not practical for adding a large number of students.
Proper role assignment is also crucial. New students need to be assigned to the correct organizational unit (OU) or group to ensure they inherit the appropriate filtering and classroom management policies.
Important Considerations
Data Privacy and Security: Ensure compliance with data privacy regulations such as FERPA (Family Educational Rights and Privacy Act) and COPPA (Children's Online Privacy Protection Act) when handling student data. Implementing strong password policies and access controls is essential.
User Training: Provide adequate training to teachers and IT staff on how to use Blocksi effectively. This includes understanding how to monitor student activity, manage filters, and troubleshoot common issues.
Regular Audits: Conduct regular audits of student enrollment and filtering policies to ensure accuracy and effectiveness. This helps identify and correct any discrepancies or gaps in coverage.
Troubleshooting Common Issues
Synchronization Errors: If encountering synchronization errors, verify the credentials and configuration settings for the SIS or directory service integration. Check the Blocksi logs for detailed error messages that can help pinpoint the issue.
CSV Import Failures: If the CSV import fails, double-check the file format and ensure that all required columns are present and correctly formatted. Validate the data in the CSV file to eliminate any invalid characters or missing information.
Student Not Showing Up: If a student is not appearing in Blocksi after being added to the SIS or directory service, initiate a manual synchronization to force an update. Verify that the student is assigned to the correct organizational unit or group.
The Impact of Effective Student Management
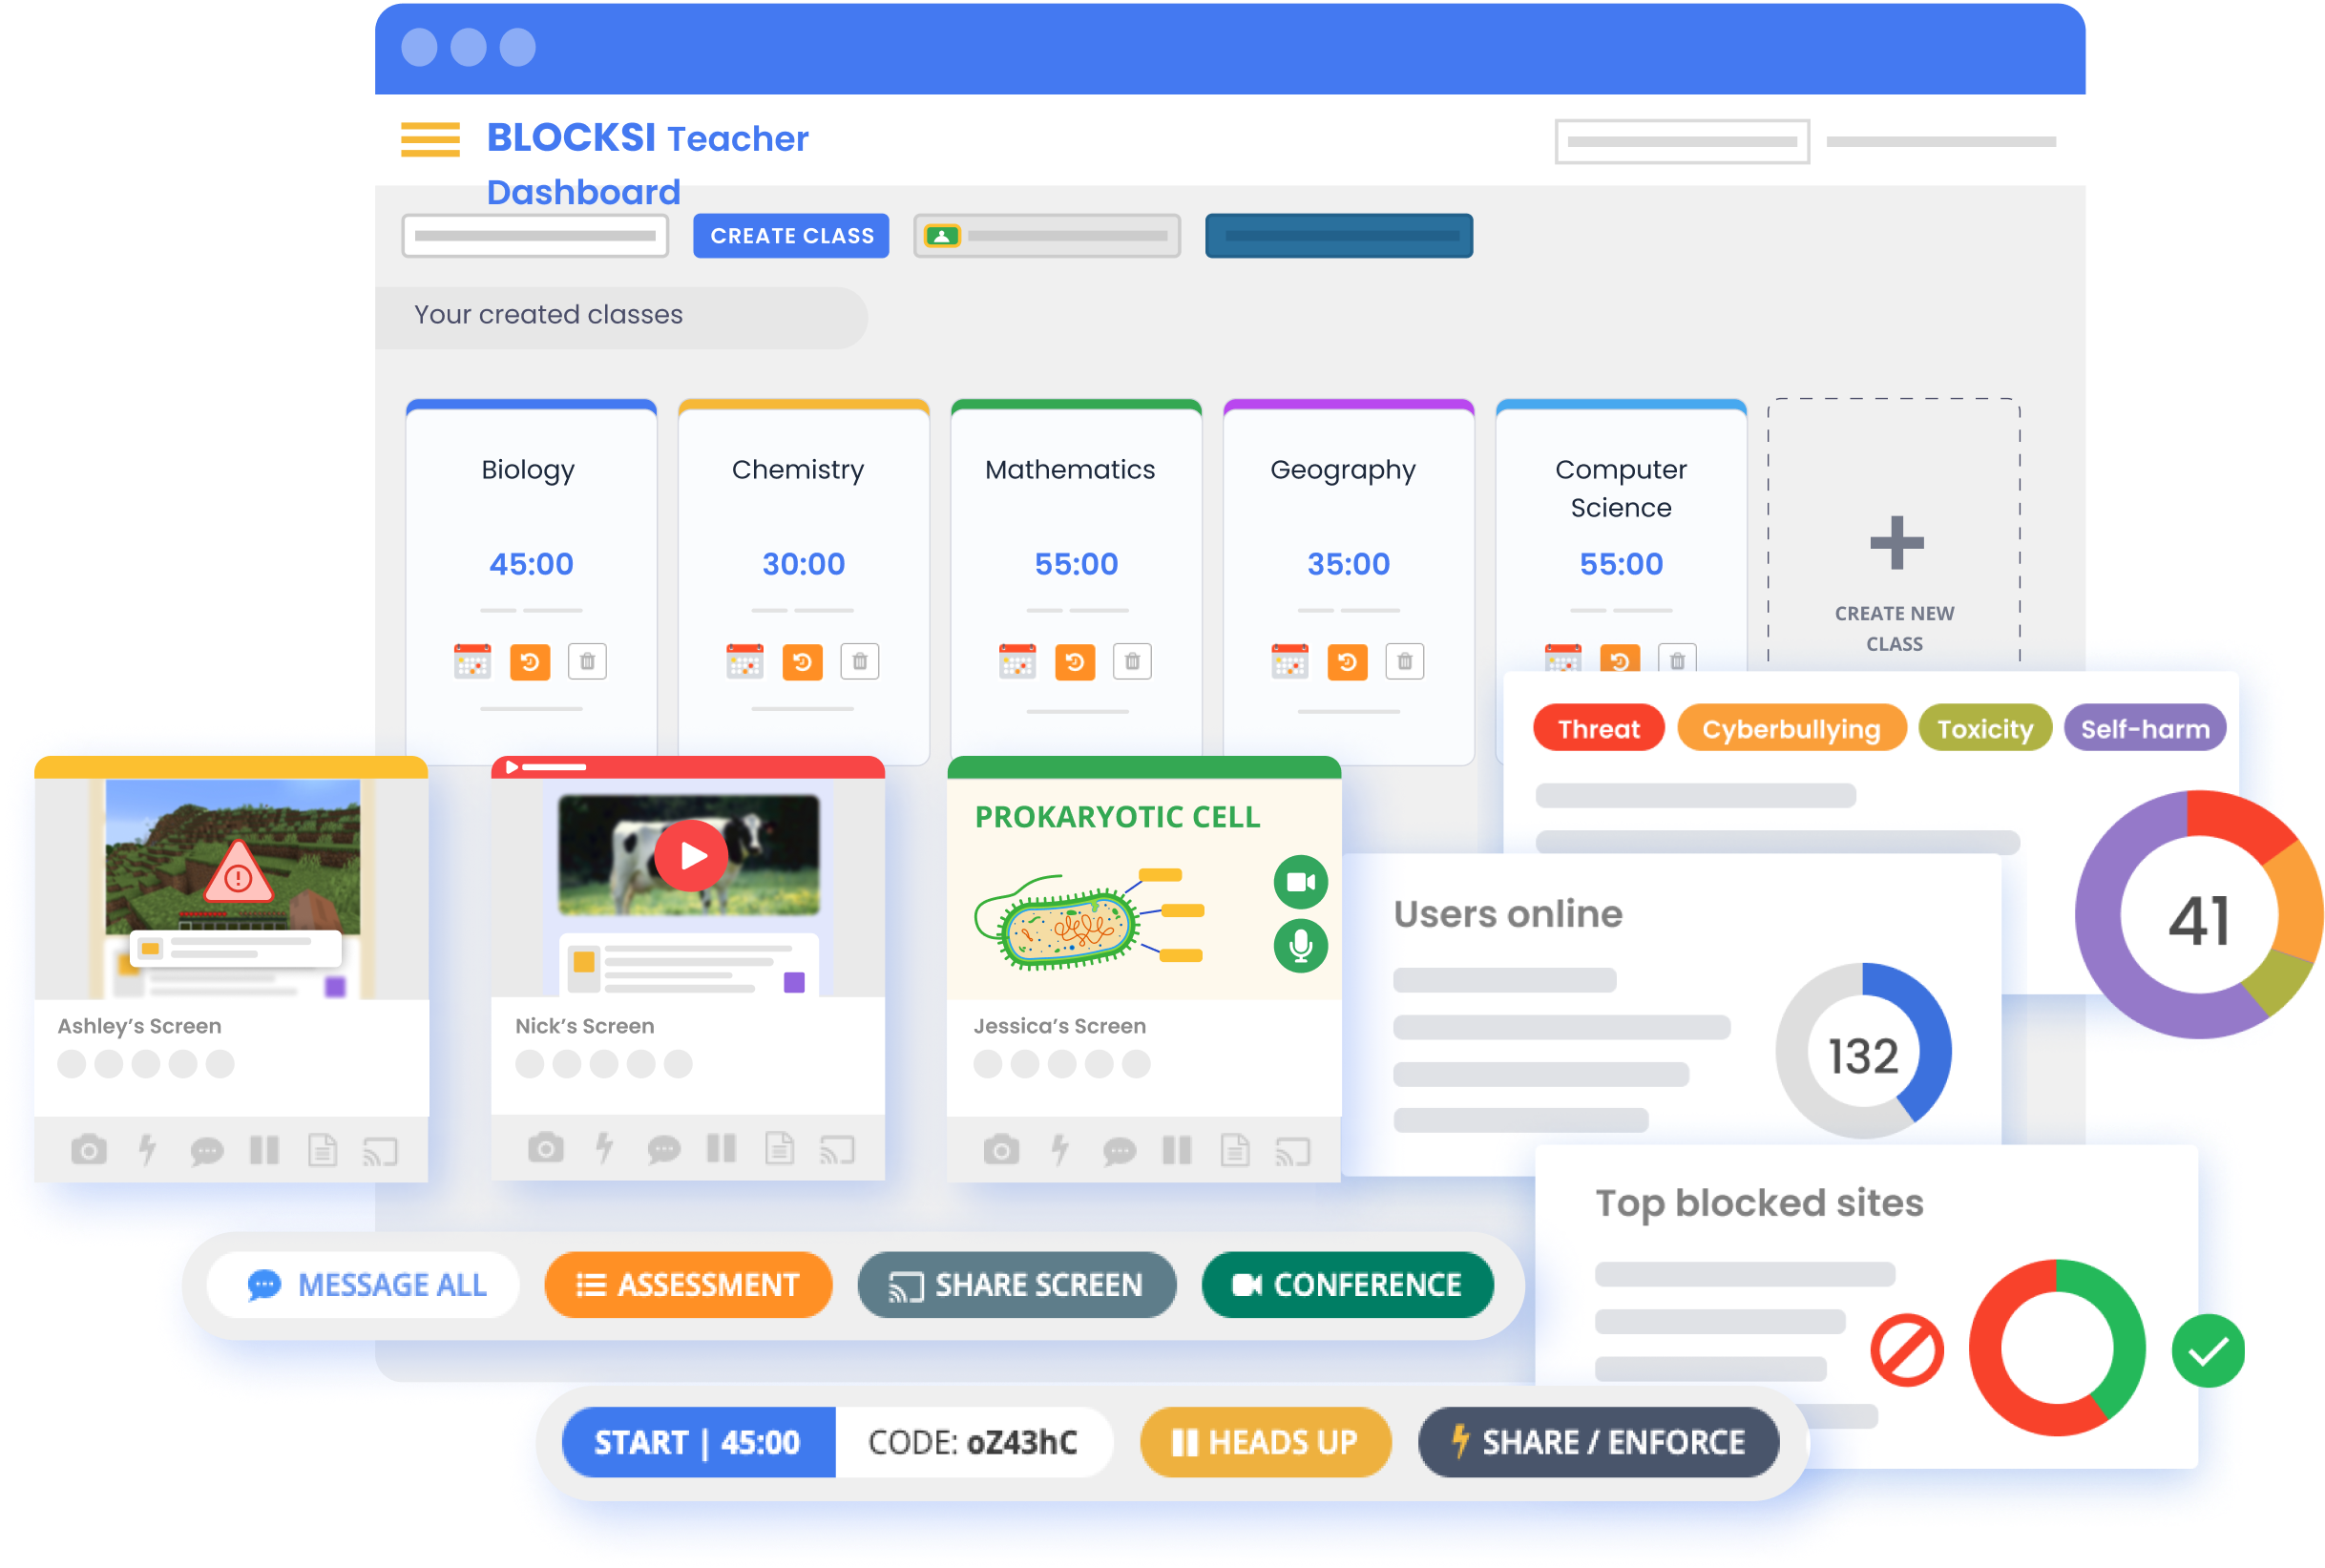
Adding students to Blocksi is not merely a technical task; it's a fundamental step in creating a safe and productive digital learning environment. Correctly configured student accounts ensure that appropriate filtering policies are applied, protecting students from harmful content and distractions.
Effective student management within Blocksi also empowers teachers to monitor student activity, manage classroom distractions, and promote responsible online behavior. This contributes to a more focused and engaging learning experience for all students.
By following the methods outlined in this article and addressing potential issues proactively, schools can maximize the benefits of Blocksi and create a safer, more effective digital learning environment for their students.