How To Record Your Screen With Internal Audio
Imagine you're watching an online tutorial. The presenter is explaining a complex software feature, but their narration alone isn't enough. You need to hear the subtle clicks and beeps that accompany each action to truly understand the process. Frustrating, right? Many have experienced this digital silence, struggling to capture both visual and auditory elements in their screen recordings.
This article explores the solution: How to record your screen along with its internal audio, whether you're creating tutorials, archiving gameplay, or simply sharing a tech issue with support. We'll break down the techniques for various operating systems and offer simple methods for achieving seamless screen recording with clear internal sound.
Why Internal Audio Matters
Capturing internal audio is more than just a technical nicety; it's about providing a complete and engaging experience. According to a study by Wyzowl, 69% of people said they'd most prefer to learn about a new product or service by watching a short video. And what makes a video effective? Clear audio.
Without it, viewers miss critical cues. Imagine a music producer demonstrating a new synth patch, or a game developer showcasing sound effects. The visual aspect alone is insufficient. Internal audio provides context, clarity, and a deeper level of engagement.
Recording on Windows
Windows users have several options. The built-in Game Bar (press Windows key + G) is surprisingly powerful. While primarily designed for gameplay, it can record any application. To ensure internal audio capture, navigate to the Settings menu (the gear icon in the Game Bar) and check that "Record game audio only" is *un*checked.
If the Game Bar doesn't cut it, consider OBS Studio. This free and open-source software is a favorite among streamers and video creators alike. Its strength lies in its flexibility and granular control over audio sources.
In OBS, you'll need to configure the audio settings. Go to Settings -> Audio, then find "Desktop Audio." Select your primary audio output device (e.g., your speakers or headphones). This will route the system sound into your recording.
Recording on macOS
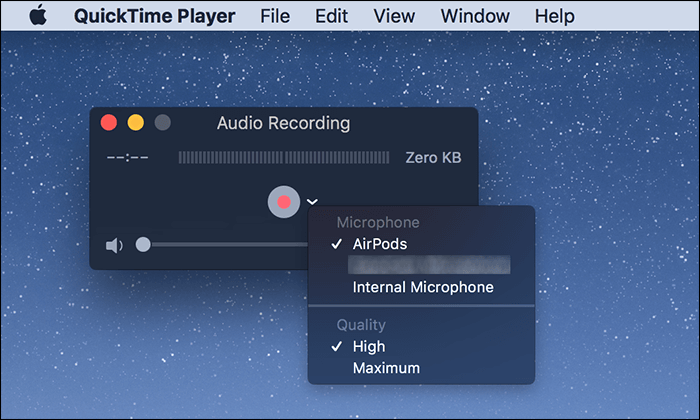
Apple's ecosystem offers a streamlined experience. QuickTime Player, pre-installed on every Mac, can record both video and audio. To start, open QuickTime Player and select File -> New Screen Recording.
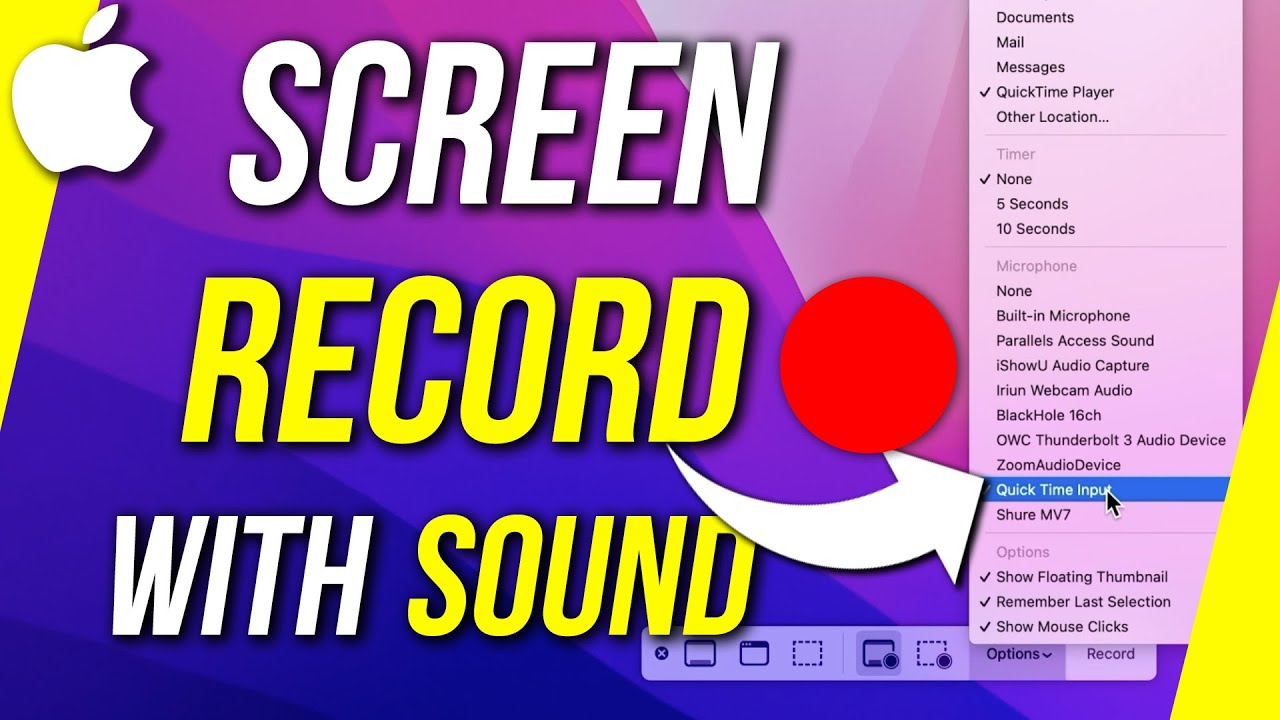
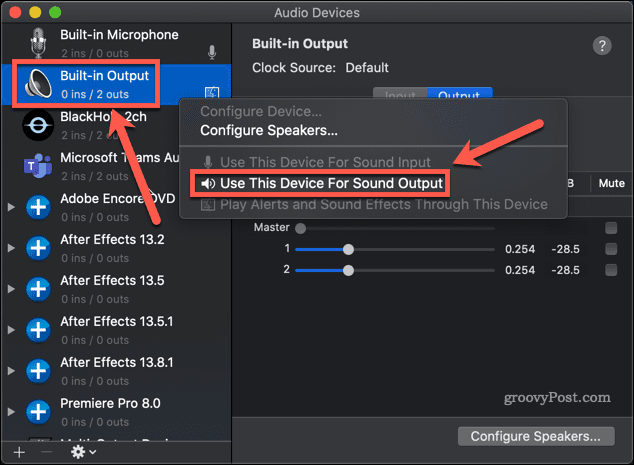
Before recording, click the arrow next to the record button. Ensure that your preferred audio input (likely "Built-in Microphone") is selected, but here’s the catch. QuickTime Player itself does not directly record internal audio. However, third-party software can help with routing internal audio to a mic input.
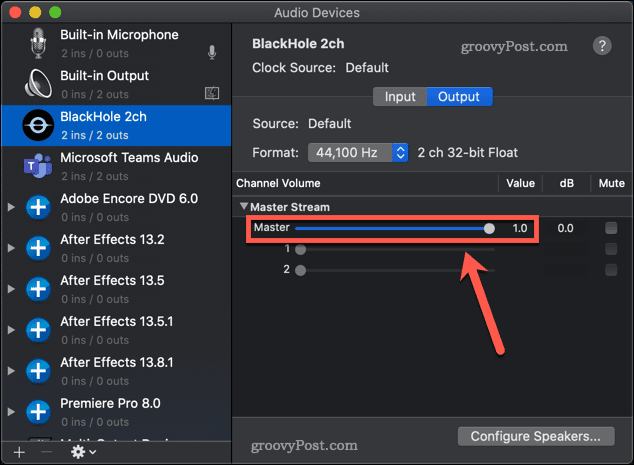
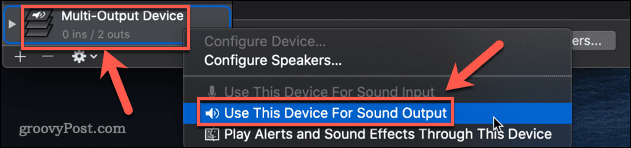
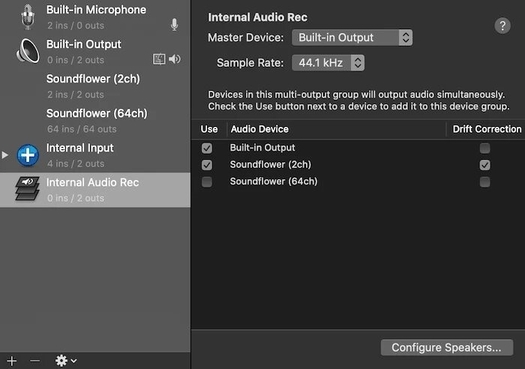
One popular tool is BlackHole, a free virtual audio driver. It allows you to route audio from your applications to a virtual microphone, which QuickTime can then record. The setup might be a little more complex compared to Windows, but the results are worth it.
Troubleshooting Audio Issues
Even with the right tools, audio recording can be tricky. One common problem is feedback or echoing. This often occurs when the microphone picks up sound from the speakers. Using headphones during recording is the easiest fix.
Another issue is audio levels that are too low or too high. Most recording software includes volume controls. Experiment with different settings to find the optimal balance, avoiding clipping (distortion due to excessive volume).
If you're still struggling, consult online forums or tutorials specific to your recording software. The online community is a valuable resource for troubleshooting and finding creative solutions.
Beyond the Basics
Once you've mastered the basics, consider exploring advanced features. Many screen recorders offer editing tools for trimming, adding annotations, or even incorporating webcam footage.
Think about the target audience for your recordings. A tutorial for beginners might benefit from slower pacing and more detailed explanations. A demo for experienced users can be more concise.
Ultimately, effective screen recording with internal audio is about communication. It's about sharing knowledge, demonstrating processes, and creating engaging experiences.
Mastering screen recording with internal audio opens doors to countless possibilities. From creating compelling educational content to sharing memorable gaming moments, the ability to capture both visuals and sounds enhances the impact of your digital creations. Embrace the tools, experiment with settings, and unleash your storytelling potential.


![How To Record Your Screen With Internal Audio How To Screen Record Mac With Internal Audio [Full Guide] - YouTube](https://i.ytimg.com/vi/ouyY_YMmcXA/maxresdefault.jpg)