How To Add A Printer On Dell Laptop
:max_bytes(150000):strip_icc()/004_how-to-connect-a-printer-to-a-laptop-4588717-5c8026acc9e77c0001fd5b15-9c7f943a1823461b9a02428ef1cced2d.jpg)
Imagine this: you've just finished crafting the perfect document on your Dell laptop, a masterpiece of words or a meticulously designed presentation. Excitement bubbles as you hit 'print,' only to be met with…silence. The printer, a trusty companion in the modern office (or home office), stubbornly refuses to cooperate.
Fear not! Adding a printer to your Dell laptop is usually a straightforward process. This article will guide you through the steps, ensuring you can effortlessly connect your printer and bring your digital creations to life on paper.
Connecting Your Printer: A Step-by-Step Guide
The beauty of modern operating systems lies in their user-friendliness. Adding a printer is generally a plug-and-play experience. However, sometimes things require a little manual intervention.
Wireless Connection (Wi-Fi)
Most printers these days boast wireless capabilities, offering flexibility and convenience. This method allows you to print from anywhere within your Wi-Fi network's range.
First, ensure your printer is powered on and connected to your Wi-Fi network. You'll typically find instructions on how to do this in your printer's manual, often involving navigating the printer's control panel or using a companion app.
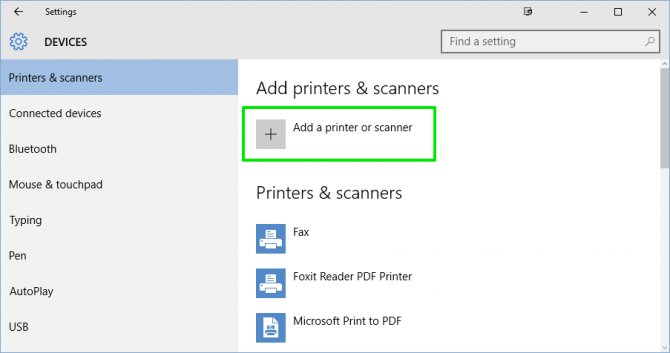
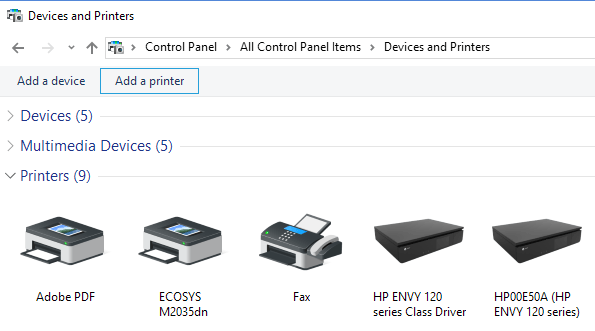
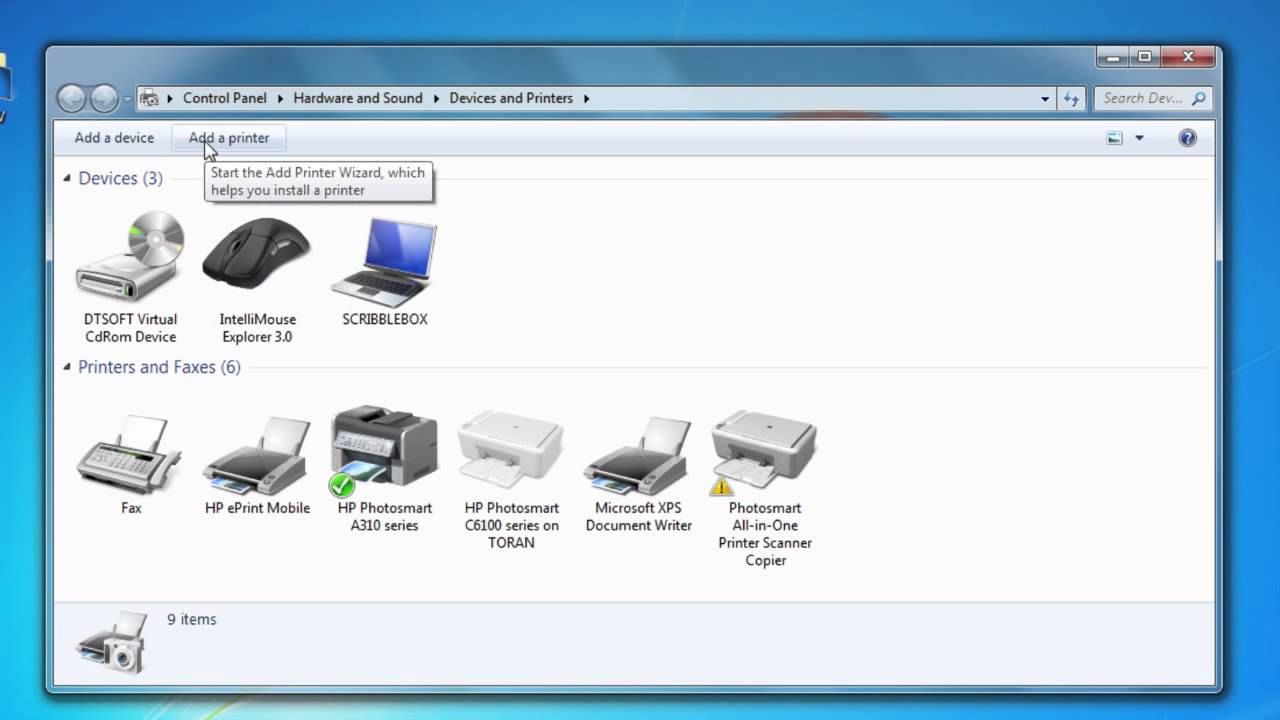
Next, on your Dell laptop, click the Windows Start button and navigate to "Settings" (the gear icon). Then, select "Devices" and then "Printers & scanners."
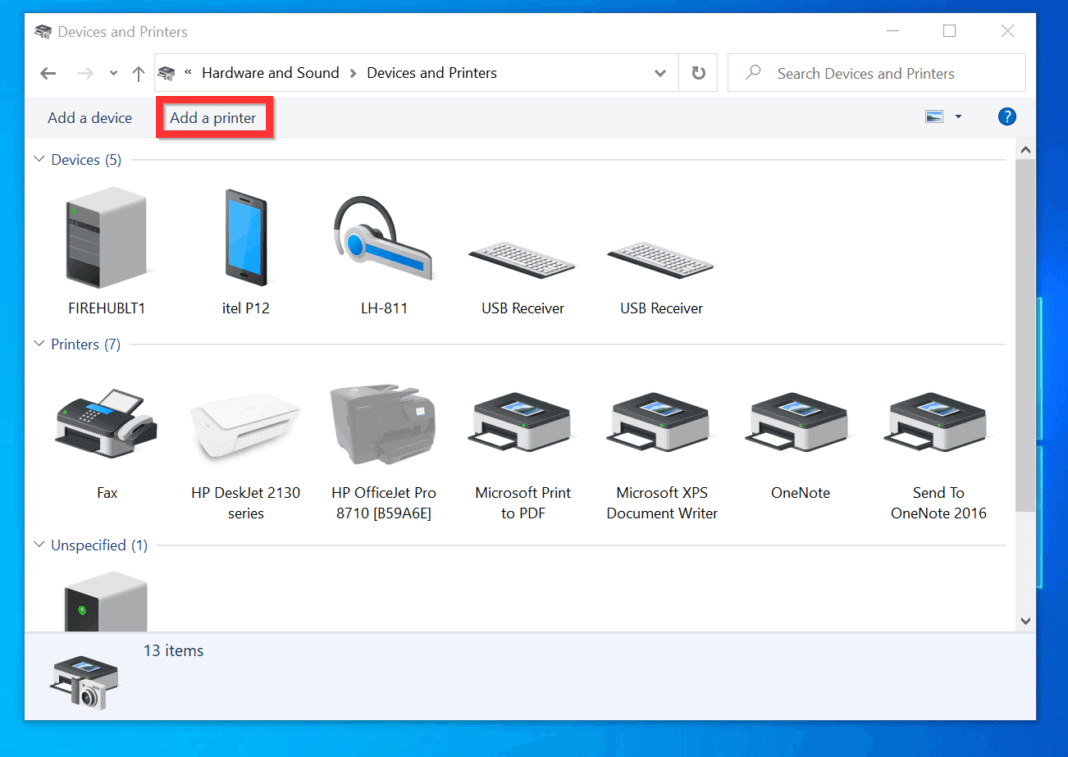
Click "Add a printer or scanner." Your laptop will begin searching for available printers on your network.
If your printer appears in the list, simply select it and follow the on-screen instructions to complete the installation. If prompted, you may need to install drivers. Windows will usually handle this automatically, but you might need the printer's installation disc or download the drivers from the manufacturer's website.
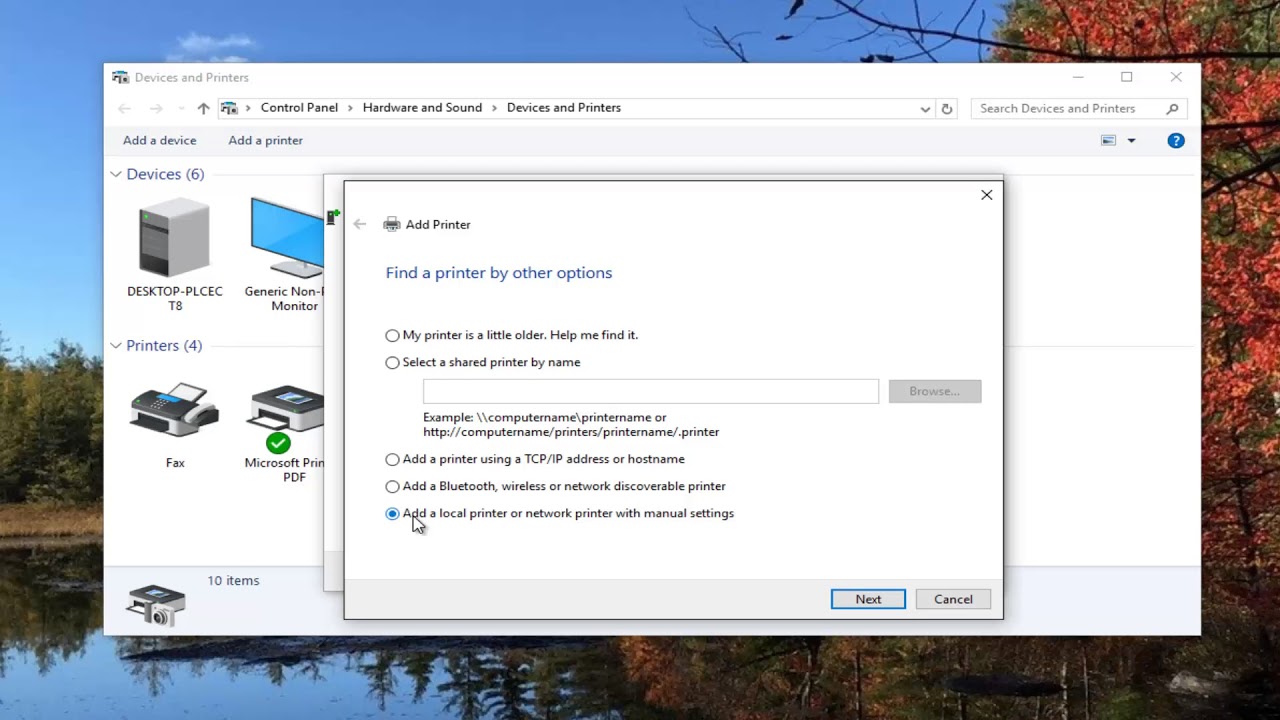
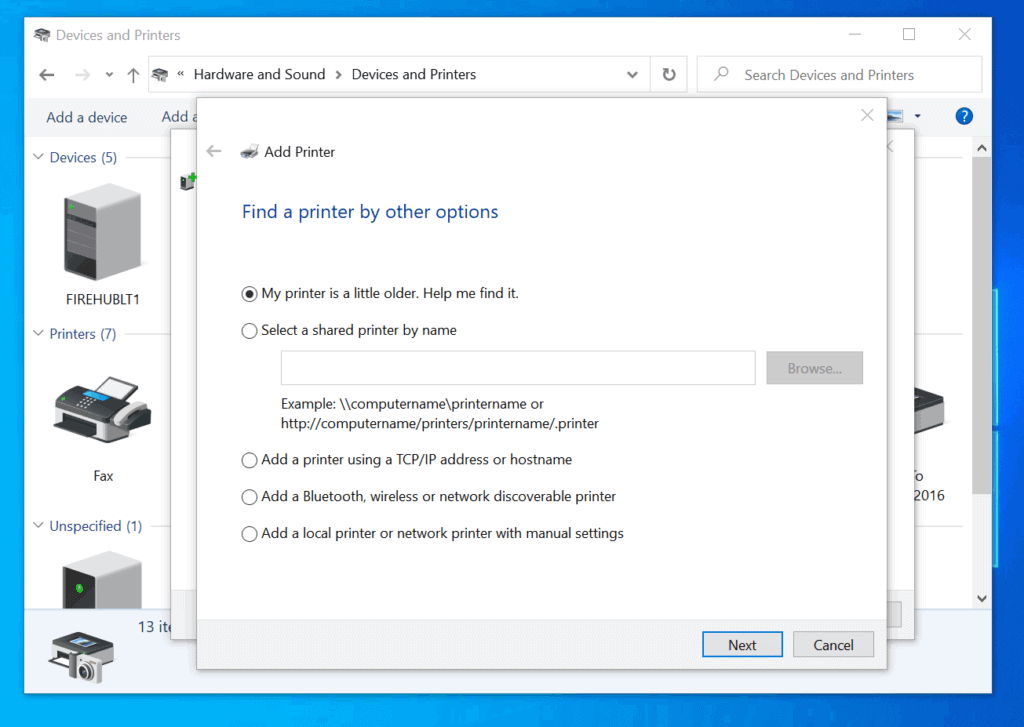
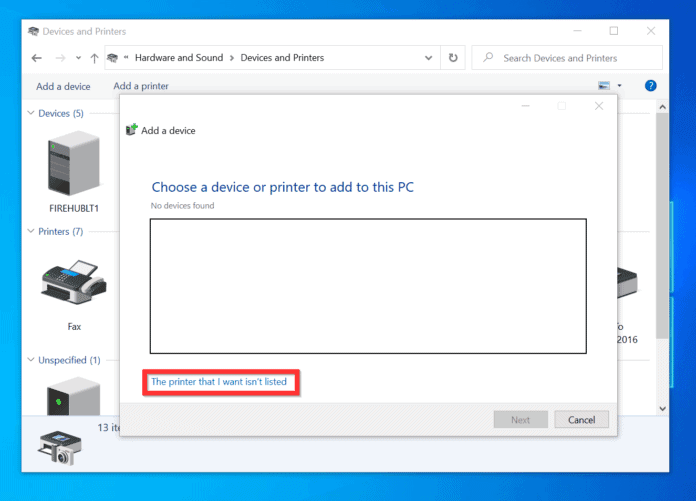
If your printer doesn't appear automatically, click "The printer that I want isn't listed." This will open a troubleshooting window with several options.
You can then choose to add a printer using its IP address or hostname, which you can usually find in your printer's network settings.
Wired Connection (USB)
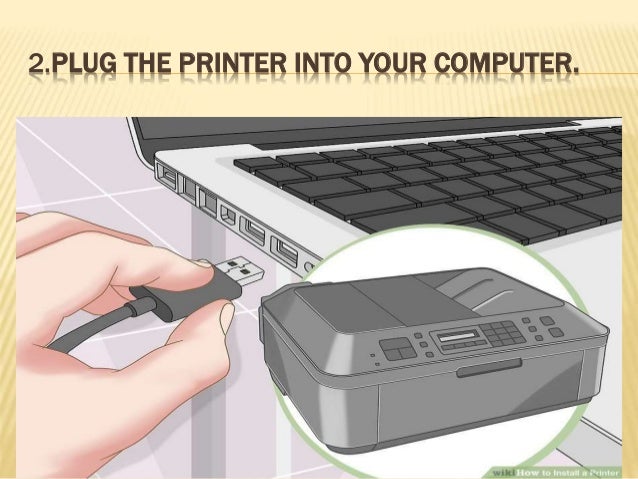
A USB connection offers a reliable and direct link between your laptop and printer. It's a simple and often foolproof method.
Simply connect your printer to your Dell laptop using a USB cable. Make sure both devices are powered on.
Windows should automatically detect the printer and begin installing the necessary drivers. This process may take a few minutes.
If Windows doesn't automatically detect the printer, follow the same steps as above: "Settings" > "Devices" > "Printers & scanners" > "Add a printer or scanner."
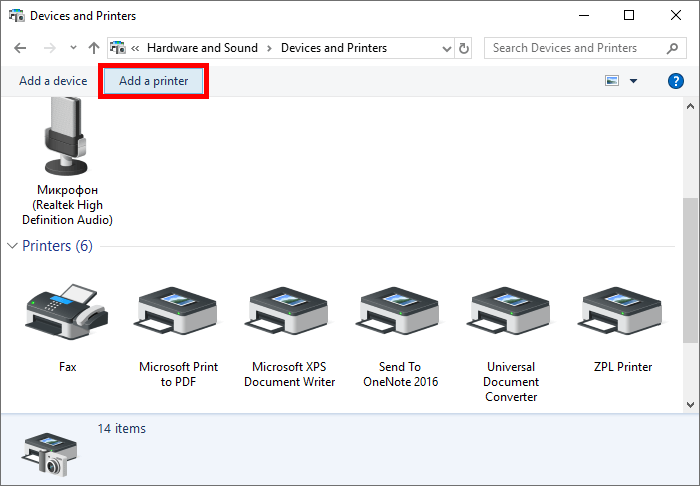
If the printer still doesn't appear, select "The printer that I want isn't listed" and choose the option to add a local printer. Follow the on-screen prompts, selecting the appropriate USB port when asked.
Troubleshooting Common Issues
Sometimes, even with the best instructions, things can go awry. Here are a few common issues and their solutions.
Driver Issues: If your printer isn't working correctly after installation, the drivers might be corrupted or outdated. Visit the printer manufacturer's website (e.g., HP, Epson, Canon) and download the latest drivers for your printer model and operating system.
Connectivity Problems: For wireless printers, ensure your printer and laptop are connected to the same Wi-Fi network. Check your router's settings and restart both the printer and your laptop.
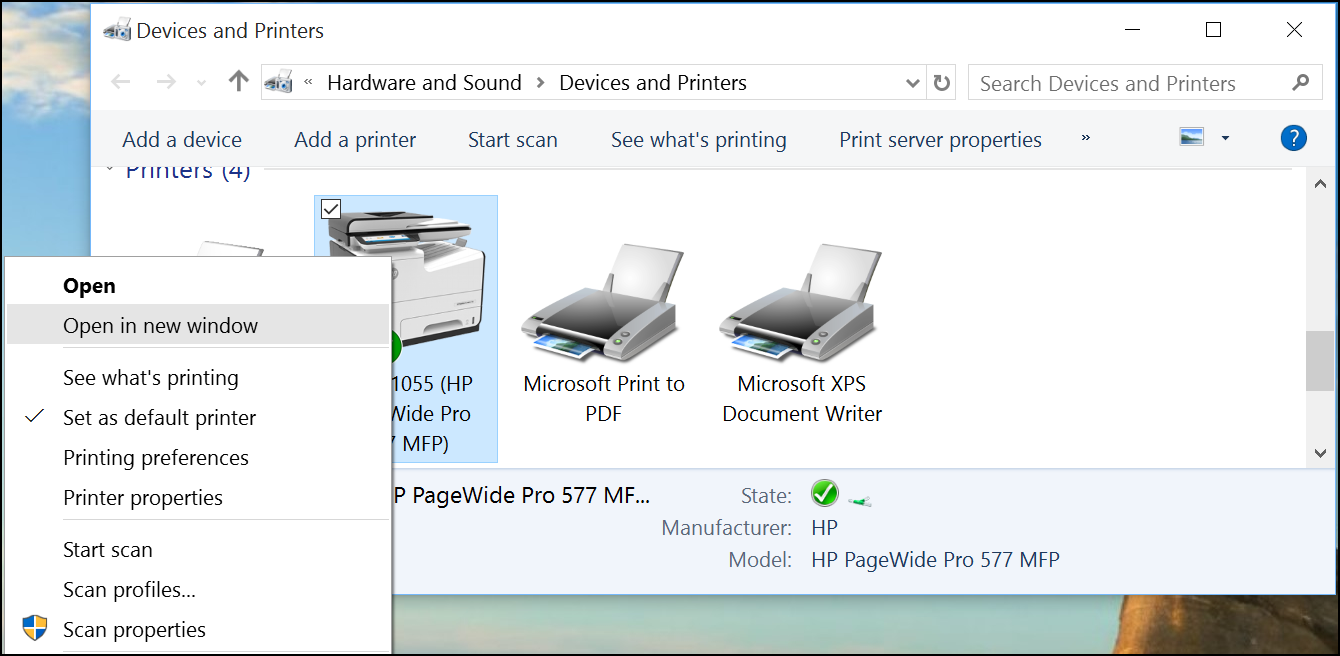
Printer Queues: Sometimes, print jobs can get stuck in the printer queue, preventing new documents from printing. Clear the printer queue by going to "Settings" > "Devices" > "Printers & scanners," selecting your printer, and clicking "Open print queue." From there, you can cancel any pending print jobs.
Beyond the Basics: Print Management
Once your printer is connected, you can customize your printing experience. In the "Printers & scanners" settings, you can set a default printer, adjust printing preferences (such as paper size and print quality), and even share your printer with other users on your network.
Mastering these settings will allow you to optimize your printing workflow.
Adding a printer to your Dell laptop empowers you to bridge the gap between the digital and physical worlds. By following these simple steps and troubleshooting common issues, you can ensure a seamless and productive printing experience.